This page serves a twofold purpose:

    *	To describe the Prius A/C blower control and a small hack for it

    *	To describe an improved in-car sleeping arrangement, thereby enabled

and contains an updated section at the end showing the final controller
circuit assembly, completed TWO YEARS later, and a method of screening
side windows to enable leaving them open as alternative and free ventilation.

The primary idea sprang from the approach of a summer's pending road trips,
some of them potentially long, and to build on the early success of some
"Wally World slumber party" overnights from the previous winter.  There is
significant value in being able to avoid high motel room costs when all you
need to do is pull over and sleep for a few hours.  However, two major
obstacles have to be solved.

One, ventilation.  Not really an issue in the winter, because the whole car
remains powered up so the engine can provide occasional bursts of heat and the
fan runs on low.  However in warmer weather, heat and humidity are the enemy
and there's no real reason to keep the whole system powered up because it just
wastes more energy than needed.  Without ventilation, a sleeping body emits
enough moisture that it basically rains off the inside of the rear window and
just gets generally gross inside.  Those cheezoid car-window fan modules one
can buy won't fit the funny angles of the Prius windows without extensive
modification, and generally won't shelter against rain, insects, or outside
noise.  A passive screen panel with a shroud could possibly be constructed,
but would need inconvenient levels of attention paid to fit, installation, and
being as intrusion-resistant as the closed window would.  So one goal is to be
able to run the car's own circulation fan by itself with the rest of the car
powered down, to bring fresh air in and through where it later exhausts out
the vents under the rear quarter panels.  And it's even screened against bugs
and filtered on the way in.

Two, privacy.  There's a definite psychological effect from being able to
mostly shut out the outside world, at least visually.  Every RVer knows this.
People being able to look in and see you sleeping is disturbing, for both
the sleeper and even the passersby because now they don't quite know what to
do about it.  As pointed out in various other "boondocking" pages, sleeping
in a vehicle is considered somewhat unusual, especially a car that isn't
specifically outfit for it like an RV or truck sleeper cab.  A towel sort of
hastily hung up along the side windows did help a bit on those preliminary
winter overnights, in fact, but the whole rest of the glass was still
unblocked letting in light and potentially prying eyes.

You can optionally skip all the techie stuff if you only want to
read about the sleeping arrangement.
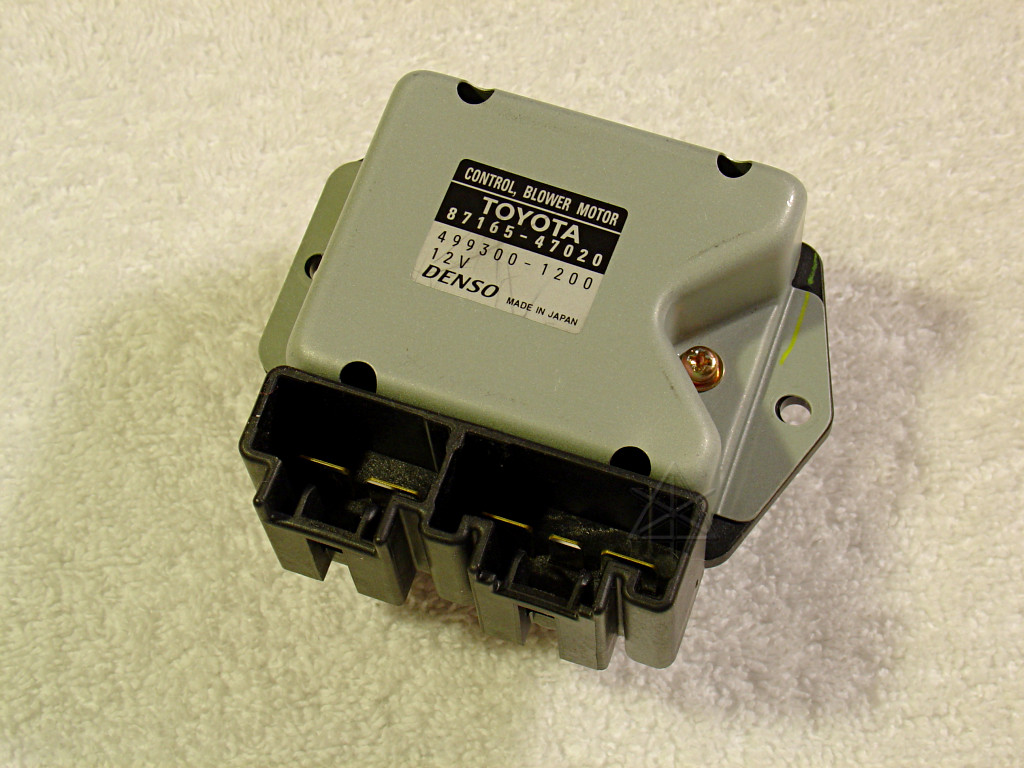
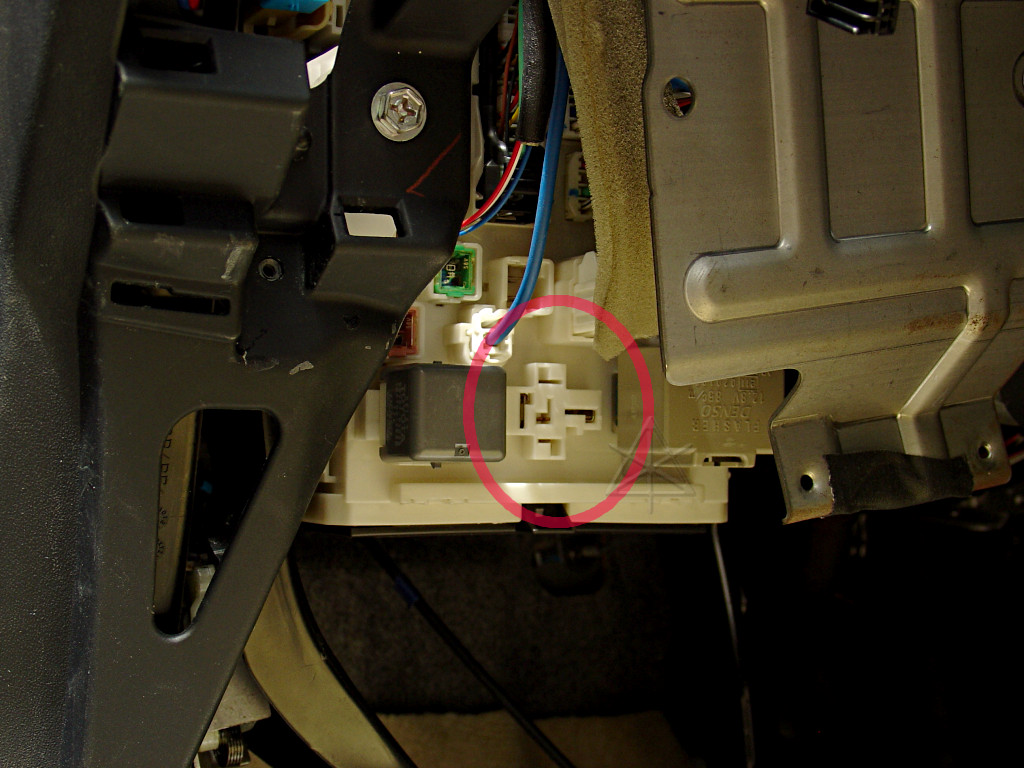
This unit is attached underneath the fan duct above the passenger footwell,
way up by the firewall.  A very short screwdriver or an angled corner-turning
drive is needed to get at the screws.  It has five connections -- power/ground
in, fan-motor out, and a control lead from the A/C ECU.
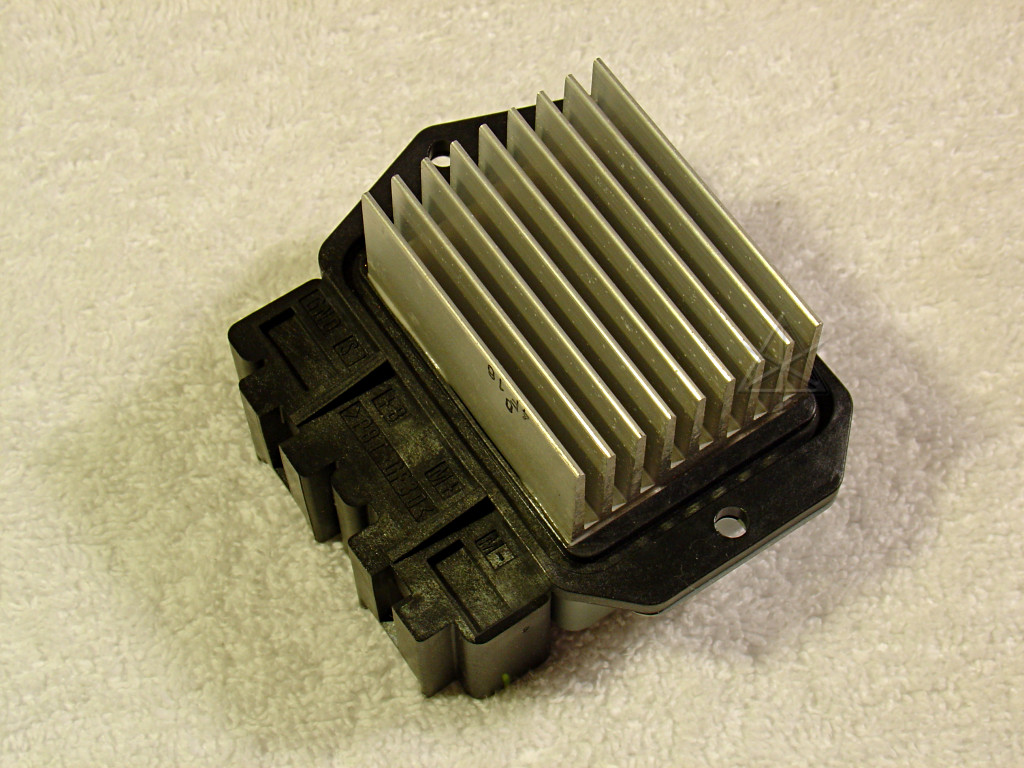
The flip side is all heatsink.  This sticks right up *into* the blower
output duct and seals the mounting hole, so it gets plenty of cooling flow.
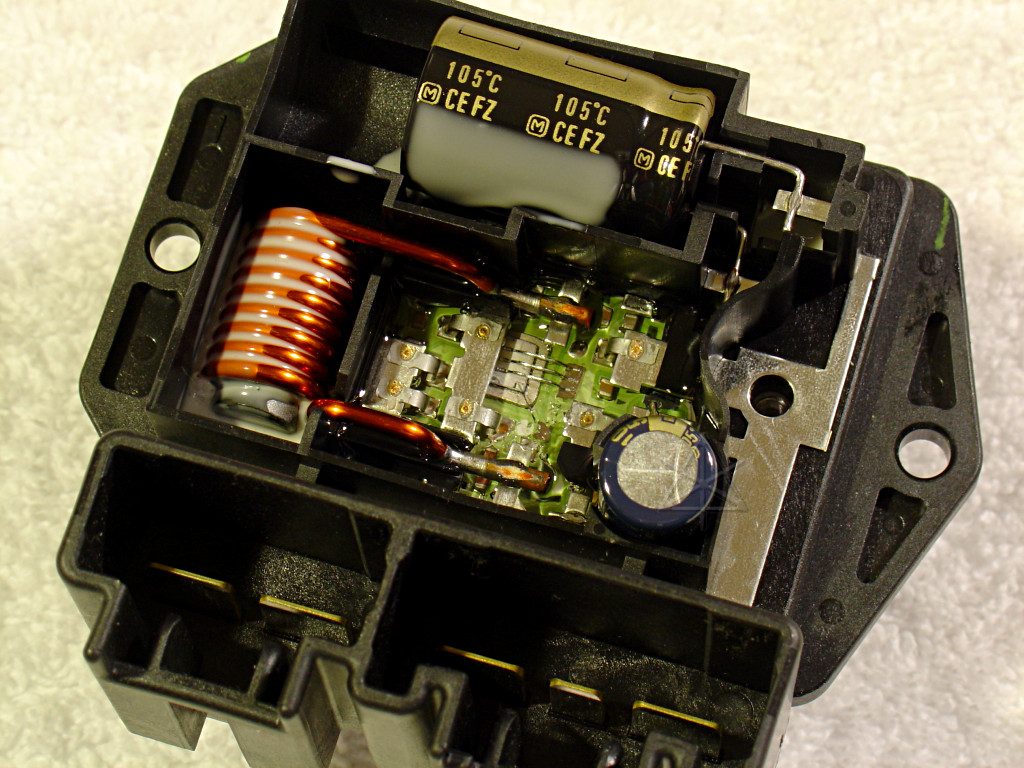
Removing the cover reveals the innards, a notable component of which is a
large power transistor with an open die mounted right down against a heat
dissipation plate.  Hmm, where have we seen this sort of thing before? ...
It's also somewhat interesting that several connections are spot-welded
rather than soldered.  Possibly easier to do in bulk...
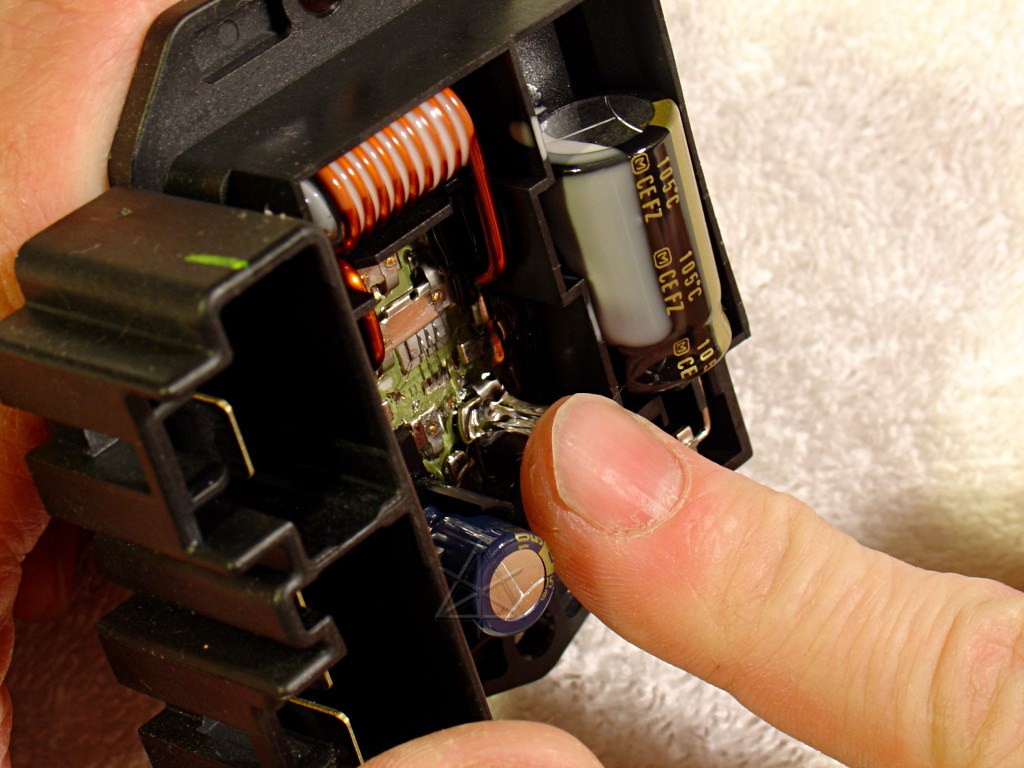
And guess what!  More of that clear silicon potting goop.  It is rather
incredible that this layer hangs upside down when the unit is mounted in
place, but doesn't peel away from the board or components.
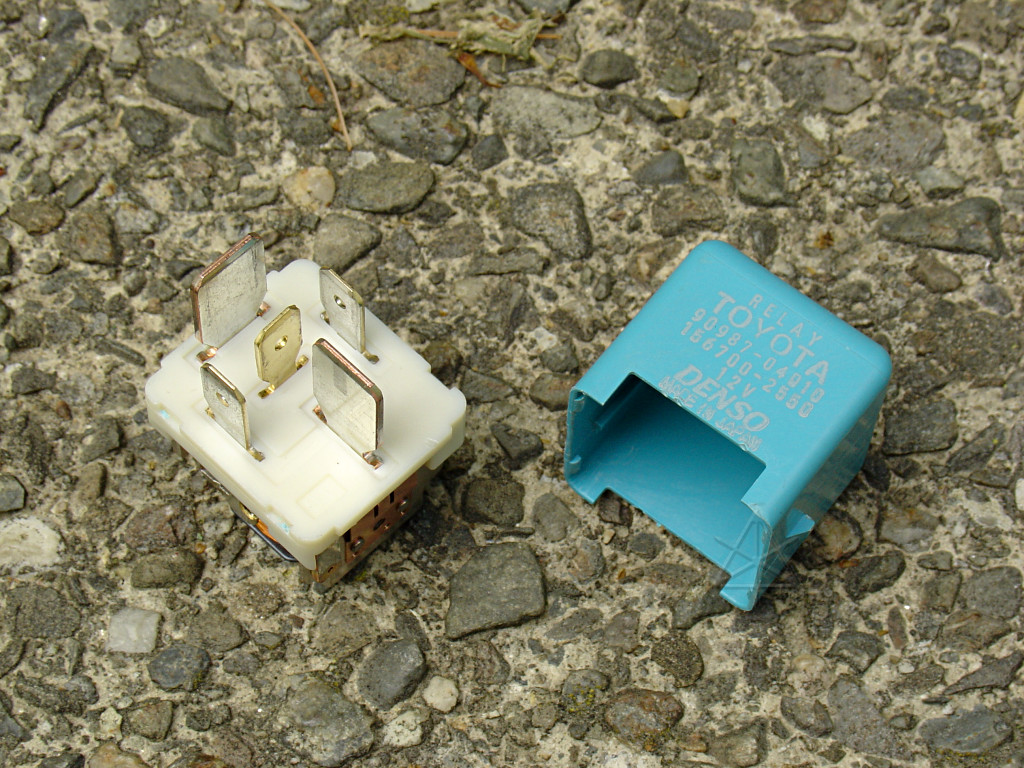
This is how the unit wires into the car.  Its (+B) input comes through a 40A
fuse and a relay, and the fan output is low-side PWM switched as one might
expect.  The relay is controlled from a combination of the IG-ON gauge
circuit and the A/C ECU, both of which we *don't* want to be powered up, so
simply trying to enable the existing relay isn't feasible.  And the blower
control input also comes from the A/C ECU.  What therefore needs to be added
is in red; a positive supply must be provided along with a suitable control
input to tell the controller to run the fan at a low speed.

The fan and controller appears to draw about 1.5 amp on low, and up to 15 on
high.  [Fused at 40A for maximum motor inrush, maybe?]  The desired run speed
is actually less than the low setting on the MFD with the car powered up --
just a very gentle drift of air out the vents.  So total draw should be down
around an amp, which is sustainable for several hours by the 12V battery
without dangerously draining it.  What this means is that the fan could run
from the front 12V power-outlet circuit, which gets enabled from my instrument
panel independent of the rest of the car's accessory stuff.
For some reason the fan module's (+) is shorted to ground by the other pole
of the relay when turned off, and experimentation shows that there's no real
need for this.  Obviously if an external positive supply is simply connected
to the blower control positive, it will immediately short to ground -- in
fact, at first I missed that and only realized it after noting the, uh,
"thermal ammeter" characteristic in a piece of wire I was holding.  So that
ground connection's got to go, per the red "X" in the diagram above.  It is
the center pin at where the relay plugs into the body-ECU block, and goes
right into the multiple ground bus inside the junction block.  Aforesaid
experimentation involved temporarily slipping a small piece of plastic into
the relay module to prevent it from falling all the way back to its normally-
closed contact, and then watching the fan module positive at turn-off -- no
spikes or anything strange happens, voltage just decays a little more slowly
if the fan motor is spinning because it's generating a little back-power.
It turns out that the most convenient way to remove the ground connection
is to simply break the goddamn pin off.  Done.  If it ever turns out to be
a problem, I'll go buy a new relay.
The control signal to the fan is an active-low duty cycle, running at about
5 KHz.  More negative time means higher fan speed.  The car sends about 40%
negative for the lowest fan speed, and pretty much pegs it to ground for
maximum, implying that there's a large range available for selecting a gentle
lower-than-low speed.  What's interesting about the controller is that its
*output* is also a duty cycle, but running at about 20 KHz instead!  The input
duty is evidently integrated and then used as the threshold to an internal
oscillator/comparator.  Playing with DC levels at the input shows its own
time-constant to be about a second and a half, so the valid range of input
duty frequency is *very* generous.

So the external control circuit is a simple Schmitt-trigger style op-amp
oscillator with a variable high-side time, driving an output switch and pullup.
The negative drive to the blower module needs to be able to sink about 20 mA,
which the op-amp can't quite safely handle so a little transistor output stage
is added on.  Output duty cycle varies from roughly 5 - 40% low, limiting the
available fan speed to a safely low range.  The timing capacitor is tied high
instead of low in an attempt to make sure the circuit brings its output high
during power-up until the oscillator gets going and settles, to avoid having
a false high-speed burst and big current inrush.  Even with the cap-coupled
level-shift to the output transistor, it seems to do the right thing.
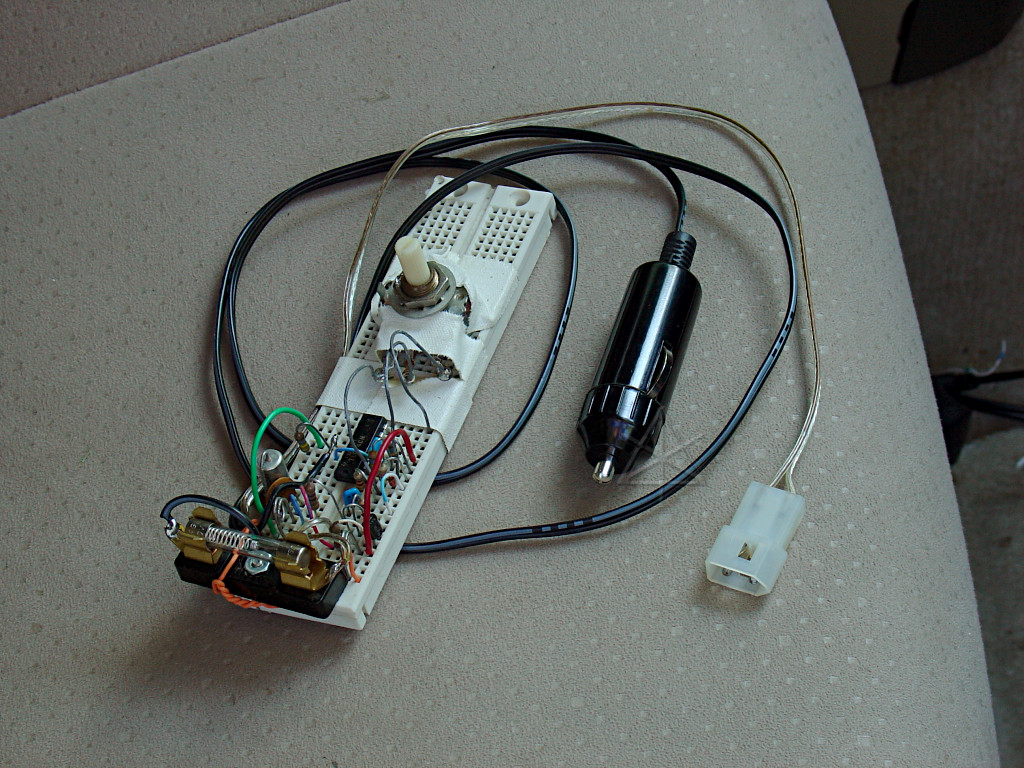
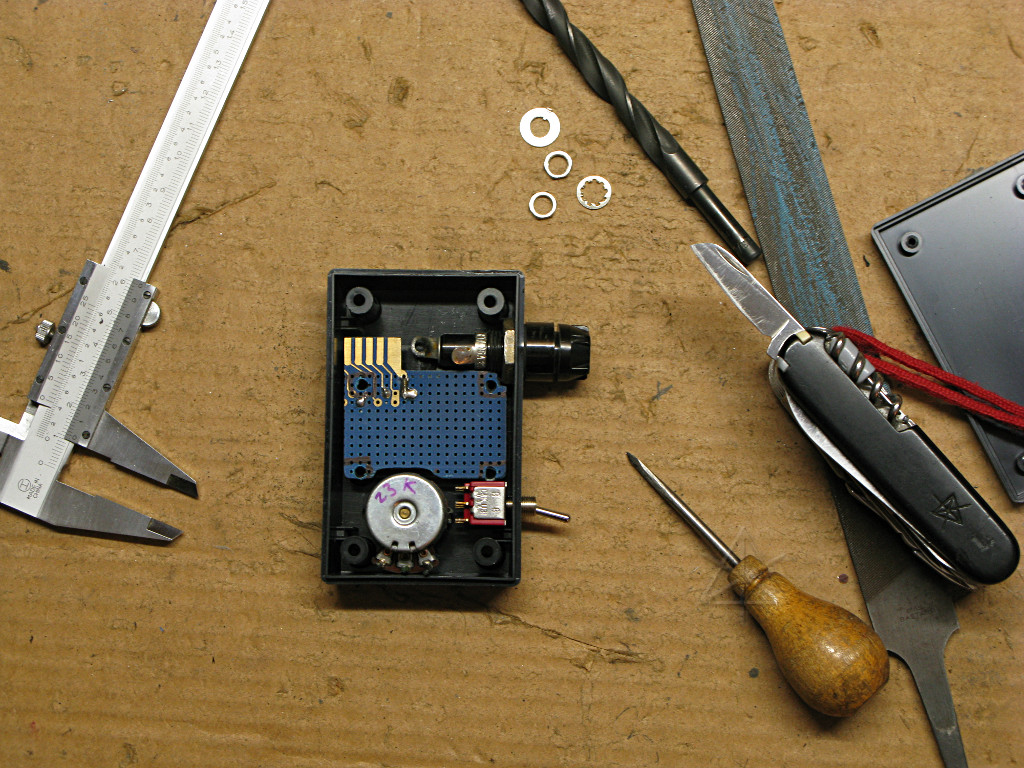
The prototype circuit is simply breadboarded, but should serve for a while.
A 2-amp fuse is sufficient to handle the desired fan speed range, settable
with the large pot.  It should pop without affecting anything else if the
control circuit screws up and sends a full-speed command.

The connections into the blower controller harness are routed over to behind
a nearby kick panel, with a fairly tidy Molex connector mounted through to
plug into.  This way when the hack controller is unplugged, nothing remains
connected to the normal fan circuitry.  [Interestingly, the fan actually won't
run on any setting but full-blast from the car control with the Molex still
plugged in, so complete disconnect is necessary.]  The proto-board tucks in
nicely in front of the center panel and just sits there.  To prepare, I set
the climate control to "face" and "fresh air" before powering down the car,
so air will come out of the dash vents and drift rearward, partly along
the ceiling.  To enable the blower, I plug into the Molex and the power-outlet
splitter, and turn on the instrumentation panel up top.  The right level of
airflow seems to draw about 0.75A, plus the small overhead for the panel and
power-outlet relay brings it to just under an amp total from the battery.
12 watts is a heck of a lot better than 300+ watts and extra hours on the
inverter pump!  Sort of like the Enterprise on minimal life support.

Now that the HVAC issue is dealt with, time to construct the rest of "motel
Prius" as coined by one of the guys who was at Hybridfest last year.  This
is also how things are set up for the freight bed -- with the passenger seat
all the way forward and the headrest off, its back can drop down to just under
the level of where the rear seat back [also sans headrest] comes down on top.
A bit or two of foam levels things out and makes a fairly continuous surface
better than seven feet long.  On this goes the Thermarest with a moving-blanket
folded around it to help cushion against the various bumps and nubs underneath
[notably, from those useless baby-seat latches which I should really just rip
out of there].  Final layer is the sleeping bag.
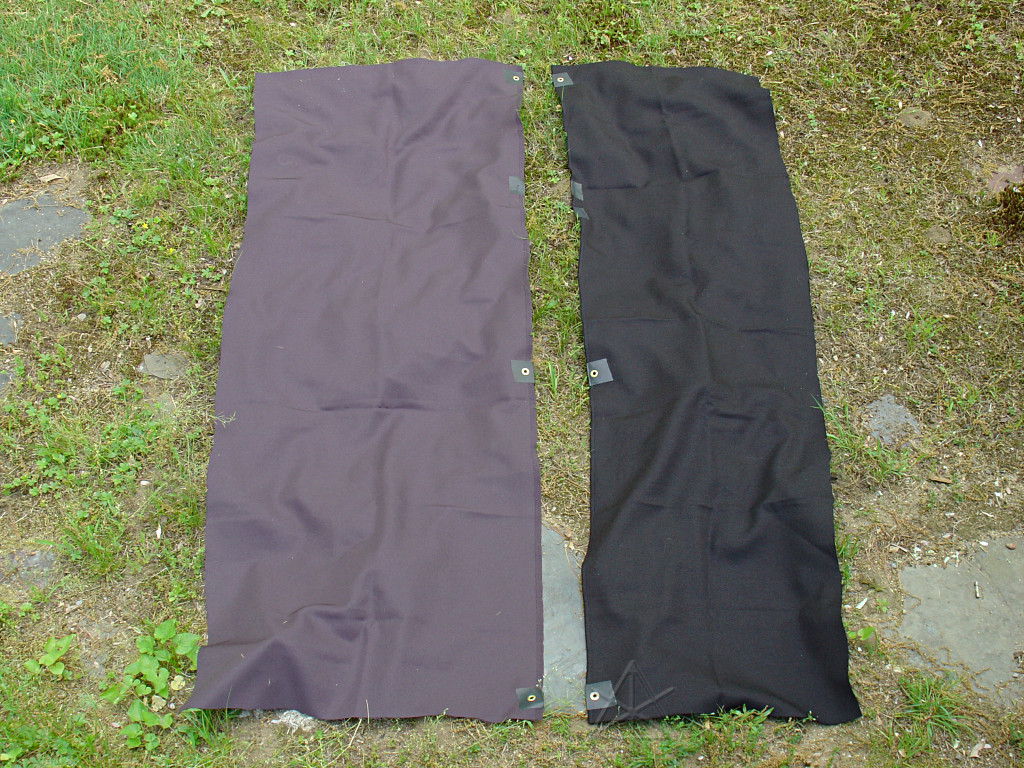
Next step: privacy curtains.  Two random pieces of dark fabric get brass
punch-in eyelets added, run through folded reinforcements made from gaff tape.
[We'll see how that holds up long-term...]  Not like they'll be taking any
serious weight load.
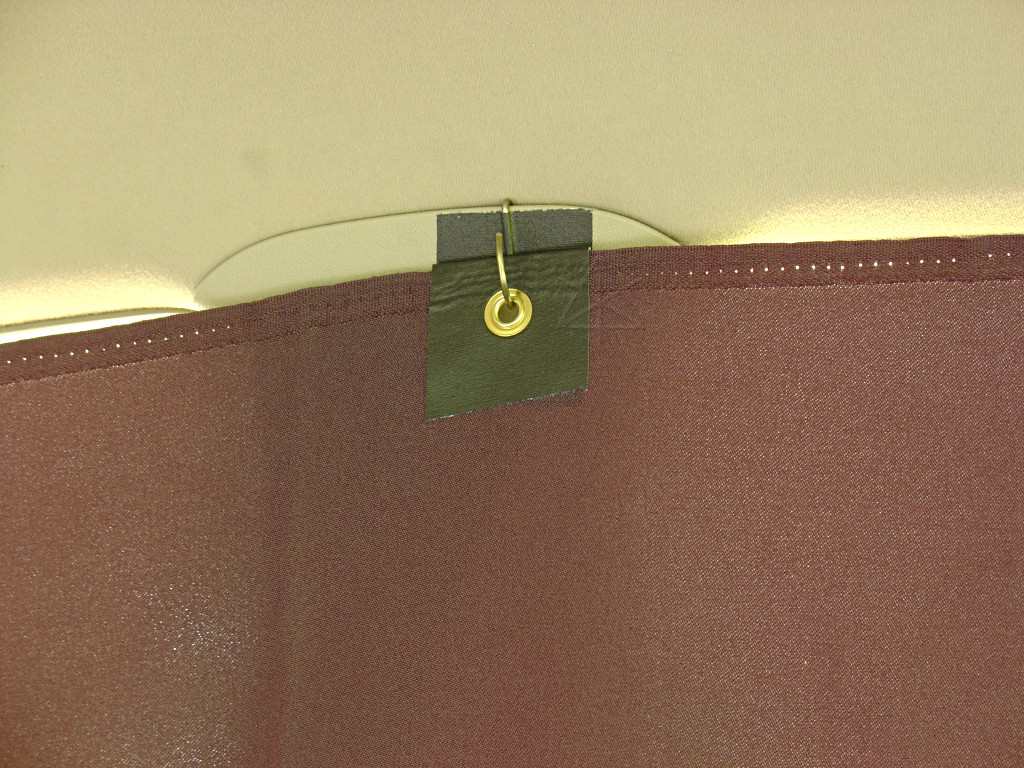
These hang from a set of small S-hooks worked in behind the trim panels,
three per side and a couple of last-minute additional holes for the existing
hooks in the jesus handles.  The taller piece goes on the "bed" side, and the
bottom can tuck in behind the door opening handle.  The windshield is taken
care of by the existing spring-hoop sun shield, and the combination pretty
much blocks everything up front.  The little triangle windows at the rear
sides already have techie diagrams pasted into them, so they're covered too.
So far nothing's done to the rear hatch window, but that's fairly hard to
see into given its angle and slight tint.  An optional step is to put the
tonneau cover in to hide the bottom of the sleeping bag, but that depends
on the amount of luggage.
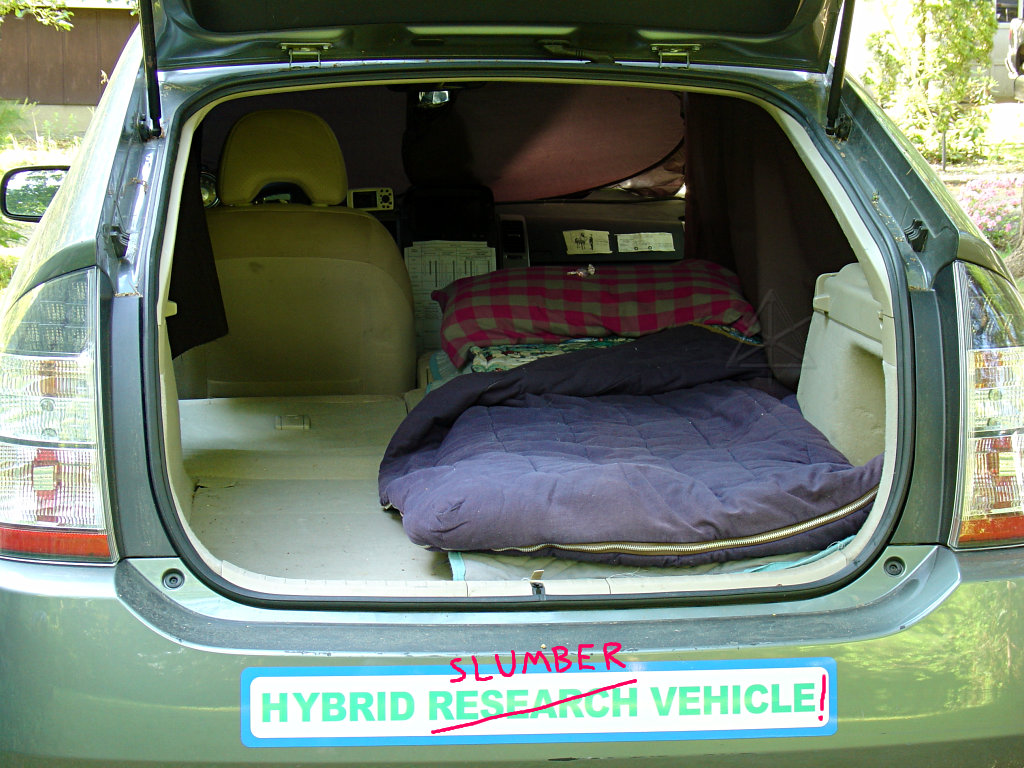
The result is a cozy little rolling home away from home, ready for the summer
travel season.  Perhaps good use of this will help offset those bloated fuel
prices, and not just into the tank.  Besides personal cost savings, consider
the energy overhead of bringing another motel room's worth of heating/cooling
online for ONE person -- totally not worth it in numerous ways, if this and
a quick truck-stop shower suffices.  Of course this also works perfectly well
in a campground, another relatively low-cost option.

And yes, that's a mint on the pillow.
The "temporary" proto-boarded fan controller remained in place for over
TWO YEARS after construction, serving well to enhance the restful quality of
several roadtrips, but it was starting to get a little flakey and frankly it
was always annoyingly in the way of pulling the lower console drawer. Time
to rebuild it into a smaller, more manageable and robust box and free up the
center hump again.
 Some new parts are selected, and others pulled from the original circuit. A nicely compact box is rummaged out of stock, which looks like it will barely fit the components around all of its funny little molded bits but is nonetheless the best form-factor for the purpose. Two minor changes are worked into the circuit for this go-round. One is a double-pole switch that a> switches power to the unit and b> connects the PWM output through the Molex plug into the car, and disconnects when off so it doesn't interfere with the car's normal fan control. This allows the Molex itself to remain connected long-term without having to reach down there and unplug it to restore normal operation. The different pot yields a slightly narrower fan speed range, too -- not a bad thing, as the old one could have been turned high enough to exceed 2 amps. 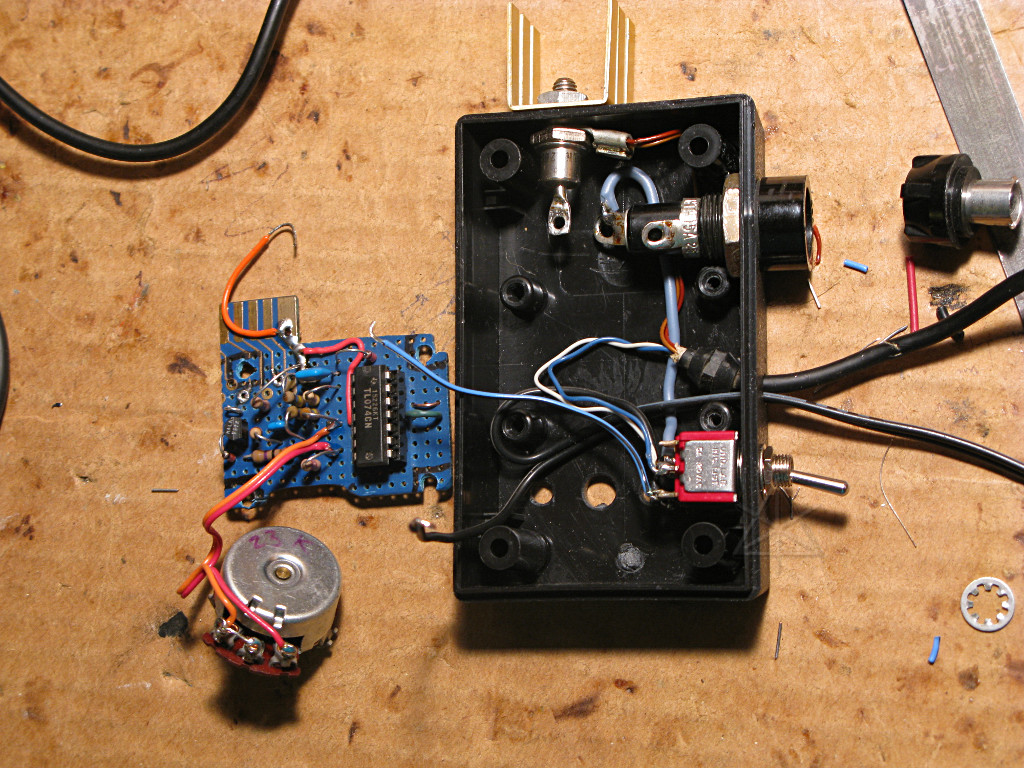 The other change is a series diode leading into the fan-power side of the output. If the box is to stay connected with the car running the climate-control in its normal fashion, it is advisable to avoid letting the 40A-fused fan circuit back-power the cig-lighter-type power outlet through the box and wiring that's maybe only good for 5 amps at most. Now, a diode like this passing forward current drops up to .8V and at an amp or more, needs to dissipate about a watt. That's actually a bit much for a typical axial 1N400x type diode and even this metal-encased unit gets a little warm at full load, so here it gets a little heatsink connected to its stud *outside* the box. The power and fan-control wire harness will also be much longer. 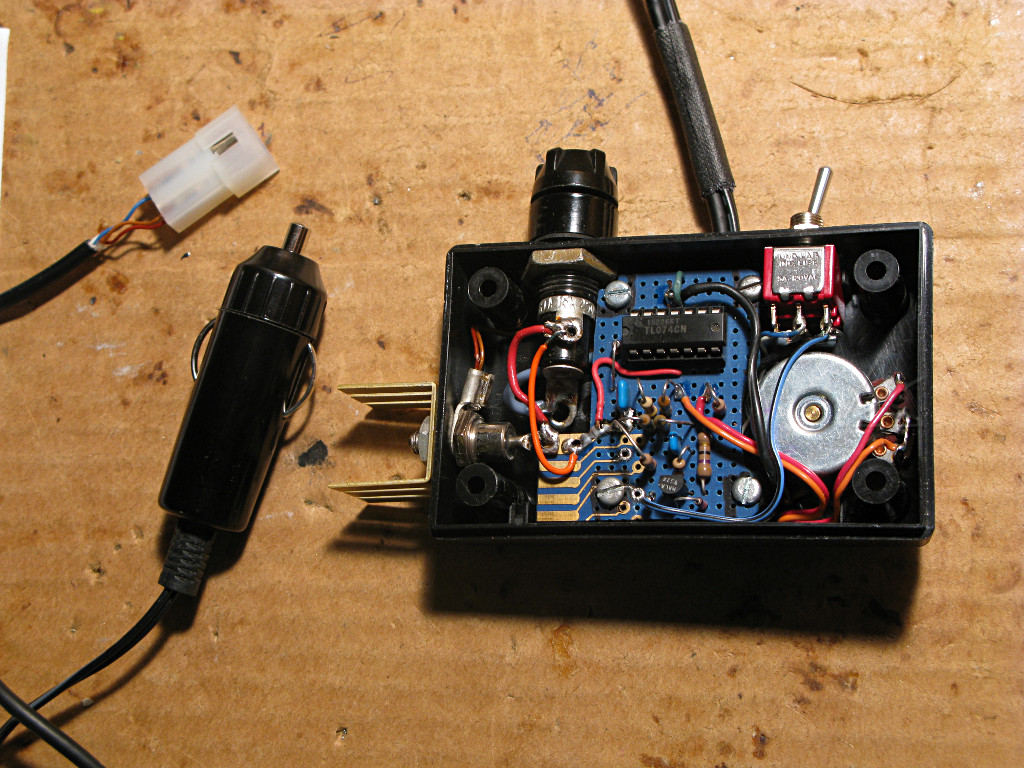 This is a serious exercise in parts-packing, including making sure none of the components on the little breadboard protrude higher than where the lid will come down over them. One face of the fuse-holder nut is solidly down against the bottom of the box, and the switch and pot tuck neatly around some of the plastic posts. The little bits of reshaping around the edges of the board are completely necessary, and there's just enough room to rebuild the circuit onto it. For lack of a smaller op-amp chip like the TL072 duals I *thought* I had laying around, I just reuse the same TL074 and waste the other three-quarters of it -- that's okay, I have plenty of those. But it all fits, with the minor exception of the heatsink on the outside but that's how it is able to be its, uh, radiant little self. 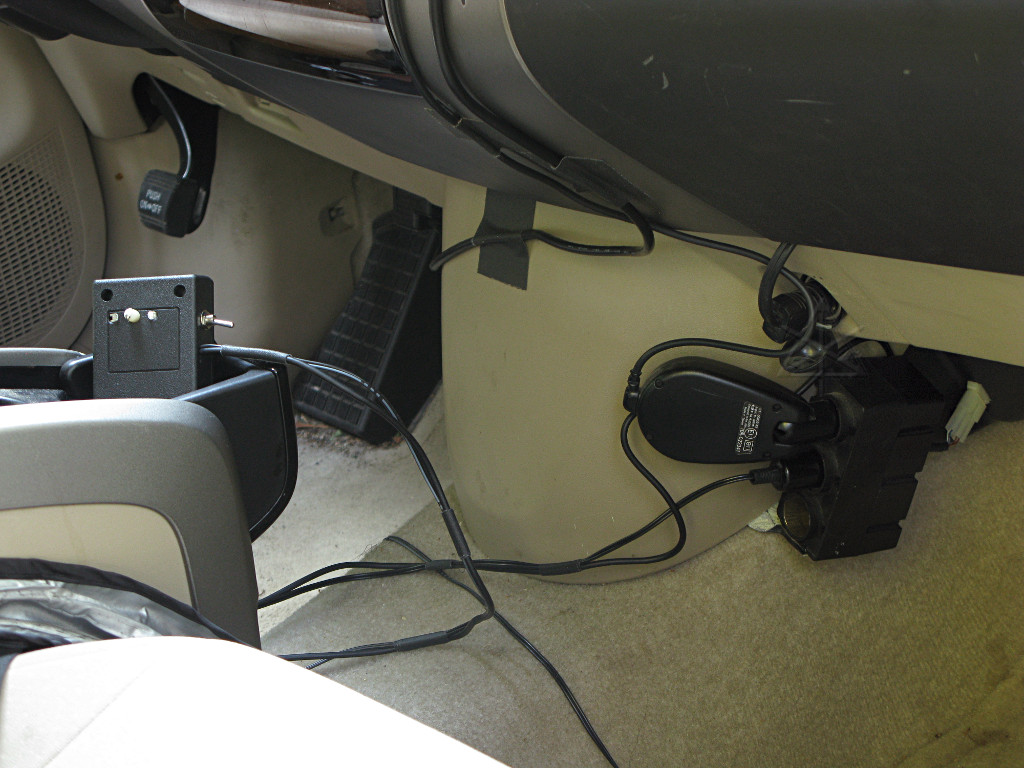 And with the new longer wire, it rests conveniently in the cupholder and can even extend far enough to be a "bedside pendant" for fan-speed adjustment without having to reach way down to the floor. My original idea for the rework was to mount the whole circuit behind the lower panel under the stereo, as there's a generous air space above the airbag ECU, and just have the switch and adjustment knob mounted through the panel. But with the mating Molex already installed and right near the power-outlet splitter, I'm glad I stayed with the original hookup method and extended the cable length instead of popping yet more holes through the car's trim pieces.
|
|
Sometimes we don't need it
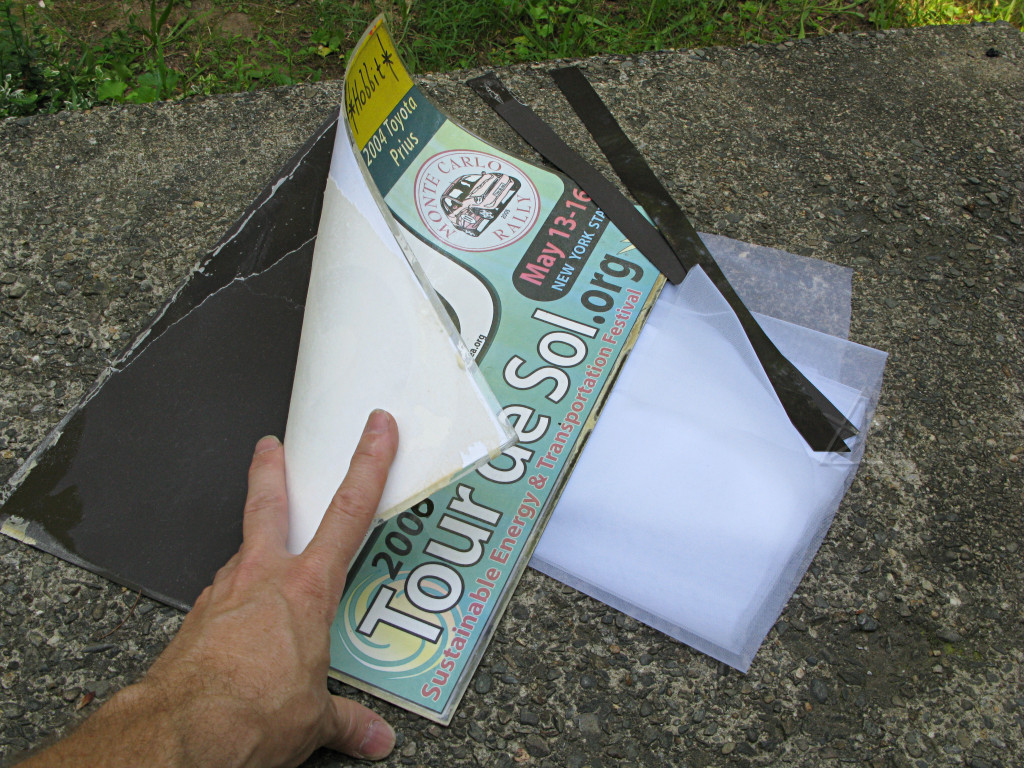
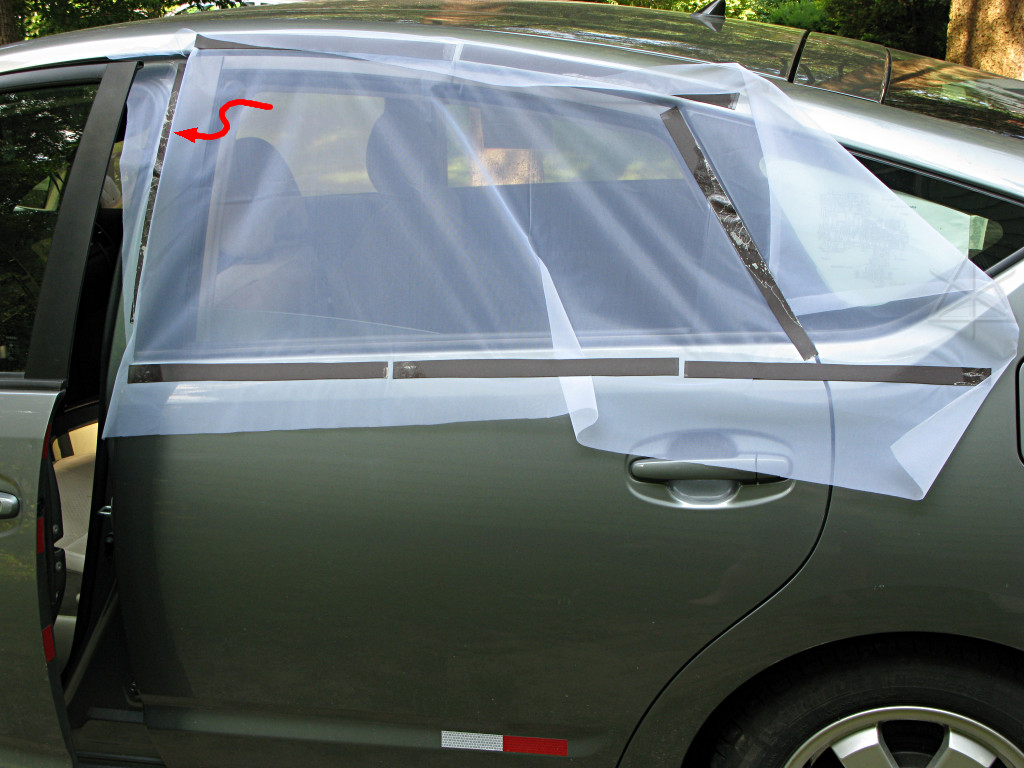
In the meantime, a slightly different camping-ventilation option has been thrown together, going somewhat back to the idea of doing something with an open car window. And it doesn't use any battery power. This was originally posted to Priuschat a year prior but is paraphrased here.
Obviously a screened door can't be opened without flinging it all off, but there are plenty of other ways in and out of the car. Applying this to two diagonally-opposite windows, as shown being used at the Lake Farm campground and elsewhere in the '08 roadtrip pages, provides very good cross-ventilation open to the night air and is a wonderful alternative as long as it doesn't rain. Check the overnight forecast first! It could even theoretically be done in wet weather by stretching a tarp over the car roof and anchoring it down some distance away. Even with the windows mostly closed underneath [especially in cases of concern about local nocturnal fauna, human or otherwise] there's usually enough circulation to avoid humidity buildup inside.
_H* 090621 |
