Road improvement project 5

May 2014

With the binder layer of pavement now in place, it was time to go back and fix up some additional details that would have to mesh with the final layer. This would include the visible parts of the drainage structures, and later on they also put the official curbing around the subdivision intersection.

[Thumbnail pictures are linked to larger ones.]


Asphalt spilled into catch-basin A fair amount of asphalt had dropped onto the steel plates over the catch-basins -- we can't blame the pavers here; they did pull in the screed while going by but this was a fairly long drop which let the natural fall slope of the new material accumulate a bit at the bottom. Now it was all hardened up and in the way.

Old-school pickaxe work So the pavement had to be cut back a little. One guy started attacking it the old-school way, with a pickaxe. But soon the other fellow arrived with the equipment truck and hooked up the jackhammer, making quick work of the rest.

Down into catch basin The catch basin was about as it had been left at the installation -- a little water in the bottom that had been there since the beginning. Now including a vague reflection of some pesky weirdo with a camera.

Hammering up small bit of pavement Pavement removed over curb box area
The answer about my curb box had come in the meantime; it was the town's problem but they would clearly need access to do what they needed to. As long as the crew guy had the hammer out he went ahead and neatly removed the inch or so of pavement I'd marked over the box to facilitate digging out the rest.

The right answer was to bring the curb box to final grade level, but it was unclear exactly how that was going to be done yet. I was dreading another extensive digging operation in this area....


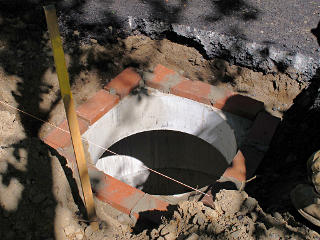
Now we get to be masons But the primary task of the day was to get the drainage structure access in at the correct heights. Here was yet another aspect of the crews's multiple skills -- today they'd be masons along with everything else, to build up a shim layer of thin bricks to raise the whole frame a little.

Brick shim mudded in Once the bricks were mudded in, they were ready to support the frame for the catch grating.

Pulling grate off truck Offshore casting
They huffed the parts off the truck; these are all made of cast iron and fairly heavy. This one seemed to be a pretty poor casting job, rather rough and unfinished. Well, that's we get from depending on offshore manufacture just to push prices lower. I can remember storm drain parts with much better fit and finish. At least the spec included molded-in warnings about dumping waste down these, and little icons of fish.

Placing grate frame The frame was placed carefully down on the bricks and aligned with the road boundary line.

Here I'm sort of combining pictures from the two catch-grate installations at either side of the road, as they were pretty much the same thing.


Drain grate frame at correct grade The important thing was that the edge landed at the right height -- about an inch and a half *above* the level of the binder, which it did nicely where I've drawn an arrow. This would accomodate a two-inch layer of final paving with a little half-inch or so drop into the grating itself.

The trick here was to mud the top of the bricks a little with concrete, which would support the weight of the grating flange without squishing all the way down. Then the flange could be tapped down just enough to make the right height and be level, but no more, and it would stay put as the grout underneath cured. This is probably a typical mason trick to align brick courses and such too, with an interesting application here.


Backfilling around drain structure A little more grout was slopped in around the top of the flange but most of the open volume was backfilled with dirt. One more layer of concrete went in on top to trim right up around the edge of the grating frame, to make a fairly impervious water seal outside of it.

    Curbing our enthusiasm

By this time the head of the water department had stopped by to look at my curb-stop situation, and said he'd send one of the guys over to come up with a proper fix. Said guy arrived only a couple of hours later and already knew what to do -- it wouldn't involve digging the entire thing out as I feared, he would simply extend the existing sleeve up to grade level and put in a new access cap *at* the final paved level like we see everywhere else. That way the shutoff would always be readily findable, say, in the middle of winter if there was a problem.


Curb box extender He had brought a widget to extend the access tube, basically a slightly smaller type, but it was a little too big to slip inside my existing sleeve and a little too tall to just sit on top. So he'd have to measure and cut it down some.

Can't see the valve The end of the new fitting still needed the thread boss for the old cap broken away, and then it would sit neatly down into the small cup formed for the old valve-box cover. As I looked way down the tube with a light I couldn't see the actual valve under dirt that had fallen down in there, and asked if something should be done about that first.

Blowing out curb box tube The answer was highly amusing, and is apparently done all the time. The water-department guy had a tool for the purpose but the road contractor had a much better one already fitted to connect to his air compressor which was right there on the power truck, so they used that. Simply a piece of pipe with sort of a nozzle formed into the end, to run down the valve tube and blow away whatever's down there. The guy warned us "watch out!" while standing way aside and cranked open the air valve, and fwoooosh! ... fine dirt came fountaining out of the hole and flew everywhere. But the water valve was now uncovered and could easily be grabbed by the long T-handle tool they use to open and close them.

Cast-iron chain cutter I finally got to see a cast-iron pipe cutter in action, as I'd missed capturing when they cut my stink-pipe down during the renovation. It really is just a constriction chain with some sharp wheels added; a couple of strokes on the long handle, and *CRACK*! it was apart.

Backfilling around curb-box piece Like the drainage structures, he'd sized the extender to sit on the old tube and protrude an inch and some above the binder-layer grade we were sitting on so the final pavement layer would come just above the cap. A tight-fitting plastic donut around the new tube went down on top of the old one and protected the junction against dirt falling in. The combined height looked perfect, so he backfilled the hole while holding the thing vertical.

One wouldn't want the box cap poking up anywhere *above* final grade, or the next snowplow to come along would make a real mess.


Curb-box extender in And in all of about 20 minutes, the whole thing was done! And painted a fetching bright blue to indicate "water supply thing" to anyone else working in the area. No more worries, in theory, about where my water shutoff was. Well, we'd see about that after another five winters...

So that was done, far more simply than I thought it was going to be. I took some time to tamp the dirt down around the fitting a little more with one of the bricks which weren't in there anymore, in an effort to prevent this new piece from wanting to subside too. It was nice to finally come full circle on the concerns I'd noted about halfway through one section of the house story, and I was glad I'd kept an eye on this whole situation.

The guy living across the street from me wasn't so fortunate in this regard; when the water crew was out marking shutoffs they had *never* found his even after throwing every piece of fancy locator gear they had at it. Hopefully he's good for the next twenty years...

The road crew had been finishing up the catch-basin inlet grilles in the meantime, finishing the backfilling and grouting and a little sweeping up afterward. The next task was installing similar frames over the two big infiltration structures, but with solid manhole covers over them instead of gratings. The whole idea is that drainage water and everything it carries goes into the side catch basins to settle out, and only *water* goes into the infiltration but there still might be some need to get into the latter for cleaning sometime so a means of access was part of the requirements.


    Gone fishin'

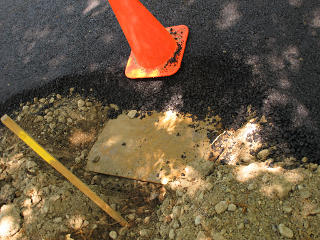
Locating steel plates Remember how steel plates were dropped on top of the infiltration chambers before dumping all that stone? The idea was that they'd be easily locatable with a ferrous metal detector. Which they had one of, similar to the wand used by the water department, but it didn't seem to be giving good indications as he waved it around where we all thought the plates should be.


The marks might be off He came up with a couple of tentative marks for where they might be, but they looked to be off somehow. A couple of test holes only found dirt and eventually just concrete. Repeated metal-detector sweeps kept being inconclusive; it was possible that the detector wasn't working quite right or there was some subtlety about its operation over large objects that nobody was aware of. He might have also been sniffing those short bits of lifting cable embedded in the concrete structure.

Rechecking pipe alignment Locate cover by sound?
The compact guy demonstrated his spelunking skills by getting right down into the catch basin and trying to see through the connecting pipe to get a better idea of where to look. Making noise through the pipe didn't work either, as the other guy up top couldn't really hear anything indicative.

At this point I went inside and brought out my laptop with all the pictures of the drainage construction, and we poked through them a little to see if any of the views would help.


Road peppered with test holes Soon the area became peppered with little test holes, and still nothing. The developer was waving the plans around, I had my pictures out, and the man with the jackhammer was starting to get pretty frustrated at this point.

I decided to go back inside and let them stew on their own for a while, as I was sure they'd eventually work it out. There was a lot more hammering, and after a while things fell quiet.


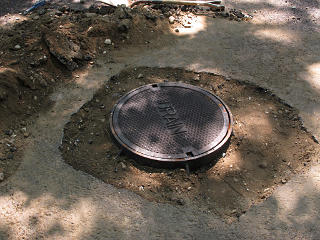
Finally found the covers They had finally located the covers, and started opening up enough pavement and fill around them to make room for the manhole flanges. Yay. There were also quite a few smaller holes nearby that had already been filled in with dirt and concrete.

Interior of infiltration structure I had never really taken note of the inside of the infiltration structure before, always seeing it from the side as they went in. This is the downstream one with the connecting pipe, and on the interior surface the exit slits are surprisingly small. But the idea is that only water goes here. As the secondary of two *very* permeable assemblies, this one would probably rarely see any water actually arrive through the pipe.

Concrete edge mudded Placing manhole frame
Despite the adjustments, the final grade had left very little margin at the lowest point in the center of the road above the primary structure. But it looked like there was just enough. This flange would have to sit directly on the structure itself, no bricks needed to shim it up. Mudding proceeded and then they fit it down, and a bit of hammering was needed to squish it low enough in the grout but they got it there. That was close; if there hadn't been enough depth they would have had to go buy a different flange or something.

It's interesting seeing the parts of a manhole that are normally hidden. It is of course nothing new to these guys.


Brick spacer ring The second structure, just ten or so feet away but starting back up the grade slope, *would* need the layer of bricks underneath. They broke a bunch of them in half and constructed a nice little ring, filling concrete into all the gaps and on top.

Backfilled manhole structure One can envision the next steps on both manholes -- same as the catch-basin grates, some grout on top to lock it down and then dirt fill, with another inch or two of concrete to finish off.

Drainage integration all done By the end of the day it was all done, the structure edges marked in bright orange, and the concrete was curing. I realized that all that top-layer grouting was to substitute for the removed binder layer of pavement -- a hard surface that the final paving still needed to sit on.

Grouted curb box They even grouted in my curb box, which would help stabilize it even more.

In thinking more about the final layer, it occurred to me that having the street surface just slightly above this would cause drainage runoff to pool up on the cap and leak down inside the valve sleeve more than just incident rainfall would. Maybe a bad idea long-term; I'd have to see how the final pavement layer went on and think about how this should really drain later. I suppose once the cap got silted up a bit over a couple of seasons, it wouldn't matter so much. At any rate, I gave the bolt threads a generous application of anti-seize so it would be less of a struggle to remove later on.


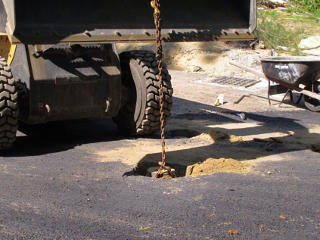
Raising valve boxes They finished out the day with a brief return to the water main junction, hammering out just enough binder to locate and raise the three valve boxes to the new grade level too. Not only was the locating procedure much more precise for these, the new sleeves could slide pretty easily and just needed a quick pull upward with a chain on the bobcat. These got cemented in as well and in theory, everything was ready for final paving. Whenever that would happen. Nobody really knew.

Go to Part 6: Rough days and smooth roads

_H*   140606

(Home)