Permeable-pavers driveway

    Day 5 (continued)

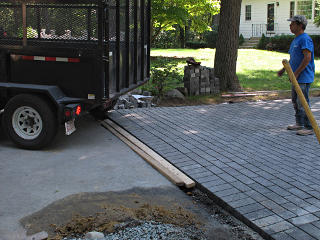
Trailerload of chip-stone They'd brought yet another load of stone, but a small one which easily fit into the short trailer. It almost looked like sand, but this was rather special stuff: "chip stone" for paver joints, the magic permeable material that would fill all the gaps between the pavers and lock the entire structure together.

[Not to be confused with "cheap stone", as it sounds when uttered with Latin ethnicity added! The stuff is not particularly cheap, as it's a somewhat specialized item. And technically, almost everything that went into the open-graded bed could also be called "chip stone" which really refers to the angular style rather than the specific size.]


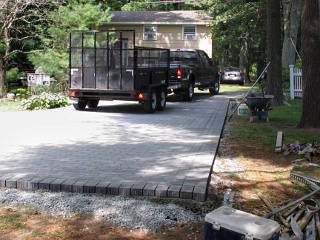
Backing in They backed this in just over the end of the driveway space and dumped it all right there. The surface wasn't really ready to take traffic, so they didn't want to try and play games with the truck and trailer as far as distribution as that would probably really screw with the paver alignment they'd just spent a while eyeballing.

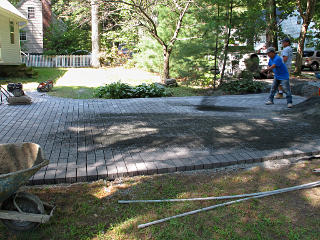
Flinging out chipstone Instead, they just started tossing shovelfuls out into the field to get the spreading process started.

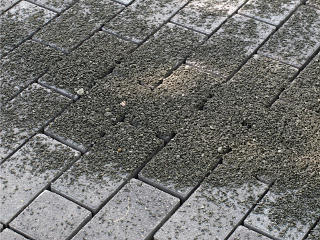
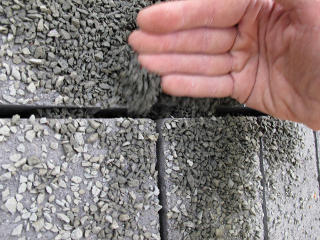
Chipstone already disappearing into gaps Chipstone falls easily into spaces
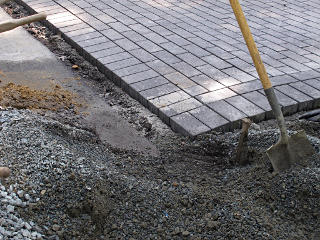
Where it landed immediately developed obvious little holes, as the chipstone was already starting to fall into the gaps. A quick test confirmed that it drops into there quite easily, which is sort of the whole point.

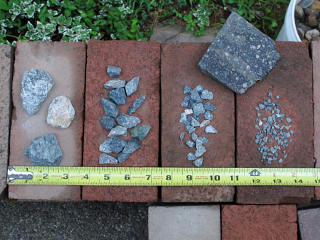
All the stone grades Now I knew all the grades of stone used in this, and could make a little layout showing the relative sizes. And a detail of what the pavers look like when cut apart. It's all angular crush instead of rounded, for the self-locking aspect described earlier.

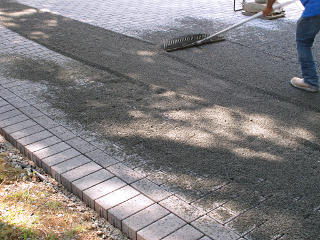
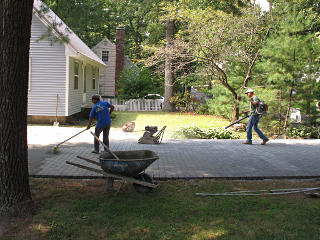
Pushing chipstone all the way down Further distribution was done by simply pushing piles of the chipstone with the back of a rake, all the way down to the other end and obviously losing some portion down into the still-empty slots.

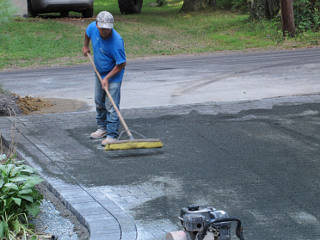
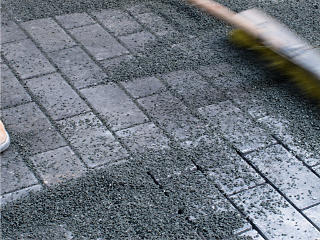
Sweeping it in Now came the "sweeping" part that's more familiar in pavers jobs, except that this *wasn't* the usual fine impermeable sand. There were clearly specific broom techniques to most effectively make the stone either drop into the slots or get pushed farther along, and it was all a fairly gentle process.

Gaps filled with chipstone Sweeping basically filled the cracks, but there would be a little more to it than that. First thing was to get all this stuff evenly deployed, which took a while.

In the meantime, the truck and trailer went back out to fetch a load of loam for the surround. I was still being kind of impressed with the just-in-time materials delivery aspect of a lot of this...


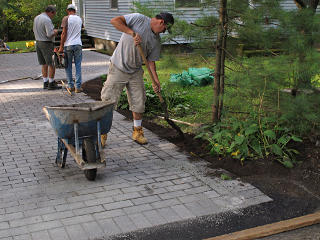
Gentle blow-off to push chipstone along Now came a very gentle application of the leaf-blower, throttled fairly far down and in very specific directions, to push the remaining chipstone down to the other end and leave the street-end area clear for its last compaction run.

  The subtlety here is that once the slots are full, sweeping in any direction tends to pull stone back *out* of them and scatter it across the surface, where blowing at a shallow angle tends to push the isolated stuff on top away and leave whatever's trapped in the slots alone. There's a definite sweet-spot of air velocity that gives the best separation here, and it gets even more interesting when stuff fallen from the trees gets mixed into the picture too.

The next stage of compaction was rather magic. It wasn't really to squash layers down anymore, as plenty of that had happened, it was to settle the chipstone down as far as it would go into the slots. The best way to express how this worked is a video clip (743K) from the process. Watch closely right next to the compactor plate and you see the chipstone simply melt away and vanish down into the slots.

I wonder how they did this back in the days before vibrational compactors? Time, I suppose, would eventually tend to settle material as we know all too well that gravity sucks, but probably far less optimally than giving it all a good shake like this. A few of the chipstone pieces were just long enough to bridge across the gaps, particularly where the locking nubs were, and this would clearly bang those loose and let them fall. I suppose you could do it by hand with a lot of rubber-mallet work, but that would be incredibly tedious and possibly leave the pavers more misaligned than they should be.


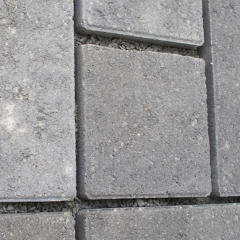
Slots not quite full yet This left the slots nicely settled down but now not quite full. I went around and thunked on a few with the rubber hammer just to test if any of it would settle even more, and it really didn't.

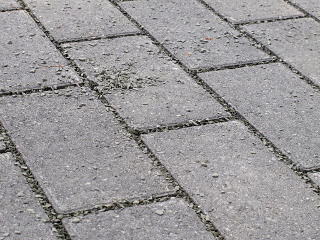
Final sweep-in A final pass of sweeping-in brought everything back up to surface level and finished the lock-in process. And just like that the driveway was ready to bear vehicles, no curing or drying or any other waiting needed.

First vehicle onto pavers So the first vehicle onto the new structure was the guys' truck, to get the trailer to the back end where they'd dump the loam supply. A lot of it would be needed right here at this corner, which despite its two-inch downward grade compensation would still need quite a bit of backfill and slope-matching.

  Besides, they needed the trailer again to go fetch the asphalt for the street connection. The head guy was originally thinking that asphalting would wait for the next day, but there was still quite a bit left of this one so he decided to do it that very afternoon.

Now, the thing about hot-top is you have to buy it by the ton, as that's the minumum amount they'll sell you. We wouldn't need nearly that much, so I was trying to think of anywhere else we could use more of it -- extra surround on either side of the driveway, or maybe even to bulk up the neighbor's little water berm for him. The project manager had been by in the morning, and we'd discussed a few different ideas.


Vulnerable corner to protect One of my major concerns was snowplows. I know how they drive around here. With the pavers laid slightly into the line of the right-of-way like they were, I could easily envision a plow coming along and snagging the corner bricks here and sending them flying. This needed some kind of protective approach to at least guide a plow blade up and over and not offer any resistance -- because at the speeds they sometimes blast through here without being able to see exactly where the road edge is, the plow would likely win.

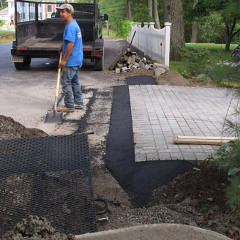
Cutting more asphalt The other connection detail I wanted to make sure was right was water management at the high-side corner. I had previously built a small dirt berm across here to kick water coming down the street outward, but that was long since trashed from all the activity ... but now we had a chance to rebuild it in nice impermeable asphalt instead! Very entertainingly, the best way I could come up with to explain what I wanted was to start building the basis myself. Rather than the lead guy wasting his time fussing about this, I sent him off for the asphalt run and told him I'd clean up this spot the way I was thinking and we'd engineer it the rest of the way when he got back.
The guys didn't even look at me funny when I grabbed a shovel and started slotting out the path that would be the new berm's foundation. Asphalt doesn't work well in thin layers -- for lateral solidity it needs to be at least a couple of inches thick, so it would basically need a shallow hole down to firmer earth under where it would go here. I had to stop and get out of the way for a bit while the other guy finished an additional cut down the slot -- widening it even more to trim back past any hint of the previous damage, and giving a little more room for a new gentle up-sweep to match where the pavers began.

This felt great. Now I was actually working *with* the guys, instead of just being that gadfly with the camera running around the jobsite. While the previous week had been wonderful dry weather it had become hot and humid again today, and we were all sweating bullets. I didn't care, I was totally in down-and-dirty design mode and knew what I wanted here. And the asphalt was due back any time now.


Asphalt cut for 'plow wedge' At the other end on the low side, the PM and I had settled on constructing sort of a wedge to extend away from the corner a couple of feet as a protective buffer. Appropriate cuts and digging were made in preparation here too.

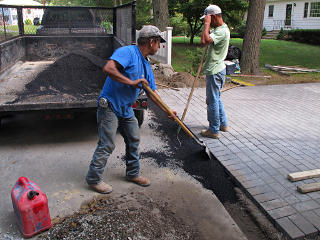
Laying asphalt The asphalt arrived back right in time and they started laying it in -- first across the main connection, and then we'd see how much we had left for my little creation at the other end.

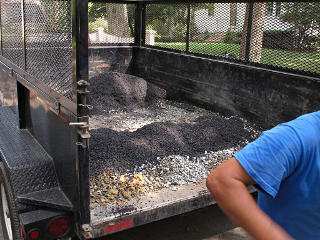
So this is what a ton of asphalt looks like. The pile in the trailer was slightly elongated toward the front but no more than maybe five feet. It's dense stuff so that actually doesn't amount to a huge volume, but it was clearly still way more than we'd need for all of this.


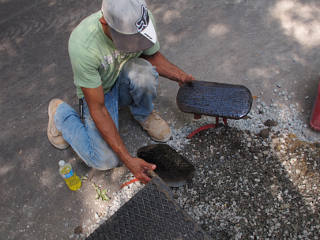
Oiling up The Shoes Time to oil up the Magic Shoes! These looked distinctly home-built, out of wood, but like the pair that was used on the street job they'd be the right tool for compacting down small runs of asphalt. The little squirt bottle of diesel was plenty to lube up all the tools they'd need here.

If you're finding yourself asking "...diesel??", my revelation about its use in asphalt work came from the roadwork page. Basically, a release agent.


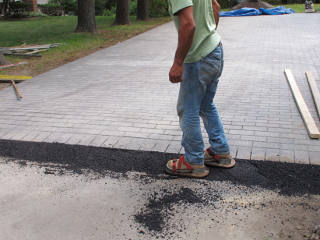
Shoes to tamp down asphalt The berm material was laid just slightly high, and then carefully "walked down" to create the match and slope we wanted.

Shaping asphalt water-berm He applied a nice humped shape to my little creation over here, which was long enough to fully reach back to the rock where my old dirt berm had started and after my somewhat enthusiastic trenching, had quite a bit of depth now. The street-side corner opposite the pavers was actually where the old berm had begun and was still intact, about where his left foot is, so that didn't get cut away but simply connected to and improved upon.

I also re-shaped the surrounding dirt to pretty things up as part of post-cleanup later, and in the process raised the inboard-side level of the area even more. Runoff *ain't* gettin' past this.


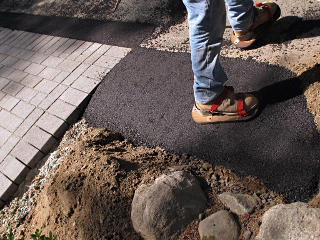
Asphalt match to the street So here was the whole resultant design: matching the road to the pavers, restoring a good water-deflector upstream, and bedding the most vulnerable corner in healthy defenses. We wound up using maybe half the asphalt all told, a respectable dent in it but still with quite a bit left over and still plenty hot.

Keeping hot asphalt off trailer bed This didn't faze the guys at all. In fact they've got a clever way to manage this, aided by the fact that they still had a big pile of other stuff to collect for disposal too -- the heap at the other corner was by now a mixed-up mess of aggregate, dirt, bedding stone, sand, and bits of concrete and it all had to go. What they did was throw in a thin layer of that behind the remaining asphalt, and then the guy got in there and started *transferring* the asphalt on top of that. As the asphalt pile worked forward they threw more of the new layer down. This would keep the asphalt from sticking to the trailer bed itself once it cooled, and they could then easily dump/shovel the entire mess onto the junk pile back at the shop.
The head guy was semi-complaining that every job invariably winds up with a similar mound of excess *stuff*, but they just collect it and every once in a while larger loads get shipped off to someplace that can beneficially recycle most of it into new products.

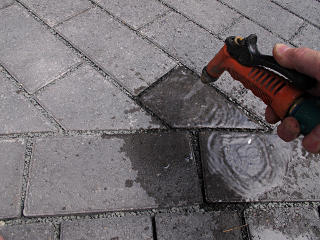
Hose test At some point I thought to do a quick "hose test", wetting down one or two of the pavers to see how water would flow. Well, even with a healthy stream water goes to the edge of the paver it's on and just *disappears* right over its edge. It's quite surreal, when intuition wants to think it would flow onto the surrounding pavers.

It'll be interesting to see how this permeability fares after a few years under the pine trees. The maintenance guides hint that in extreme cases of clogging removal and cleanup of joint material can be done, but shouldn't be necessary very often.


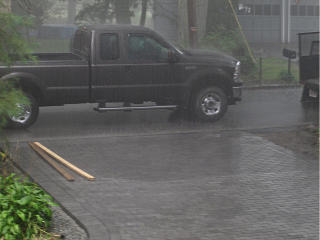
Downpour tests the water-berm The weather had started to look fairly threatening that afternoon, and checking the radar revealed some pretty serious crap coming at us from the west. We had been very fortunate that it all held off as long as it did to get all this stuff done, and an awful lot *had* been done that day. But a little later the sky built up dark and black and we got a serious downpour, giving all this stuff a nice brute-test. The guys were hunkering in the truck and I was sheltering at the side door, but I could mostly see that the new berm was already doing its job and water was staying well clear of the pavers on its way by.

  So at this point the driveway itself was pretty much done, and all that remained was for concrete to finish curing and asphalt to cool and harden. Ribbons were left up across the entrance so nobody would happen to nose in across the fresh hot-top, and I wouldn't be parking on this for another night. No problem, we all wanted it to be as perfect as possible.

    Day 6

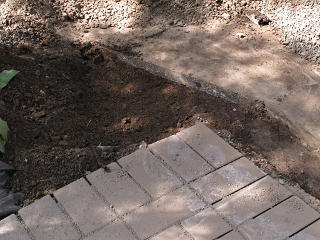
Spreading loam The next day was nice and clear, and the pile of loam had managed to get tarped over just before the rain came so it didn't turn into a soggy mess of muck. Now it was time to spread that around to finish off the edge. This was no more complex than matching a slope from the nearby ground up to the edge of the pavers -- in some areas, considerably up. They didn't pack this down at all, just left it sort of soft as it had been applied. I think the usual expectation is that it would get a few handfuls of grass seed and over time, magically restore lush lawn continuity right to the driveway.


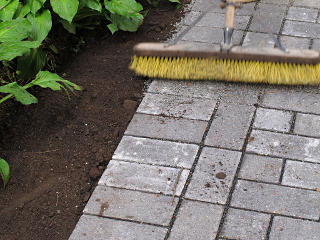
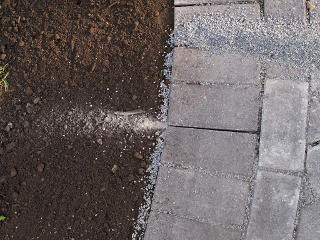
Sweeping stone in around edge With that in place, another pass around the edge to sweep in some last bits of chipstone could happen and not have it all just fall out the ends. This required a little artistic broom work to keep the grey stuff and the brown stuff separated.

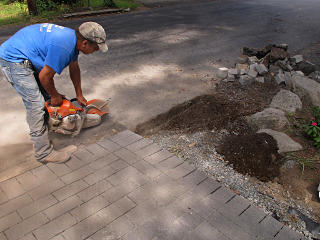
Slot widened to match others Aesthetics were still figuring largely in all this trim-up work; the narrower slot at one spot in the curve "soldiers" [seen in the closer pictures during its construction] was bugging the head guy so he fired up the saw and buzzed it a little more open to match the others and then it could actually accept filler as well.

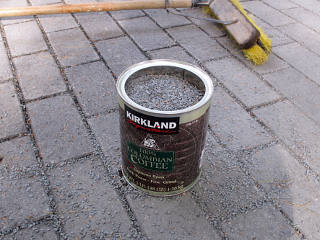
A little extra chipstone stock Whatever was still kicking around on top near the end of sweeping was persuaded toward the middle into a pile, and that's all that was left. Rather than waste one of their bigger buckets on collecting this for my spare stock I scared up a coffee can, and a generous amount to have on hand neatly filled it without too much organic detritus riding along with. In theory I wouldn't need a whole lot for ongoing maintenance. The gaps were so full right now that there would be no harm in losing a little to ongoing use and clearing and possibly a little bit of further settling over time, so this would probably last effectively forever.

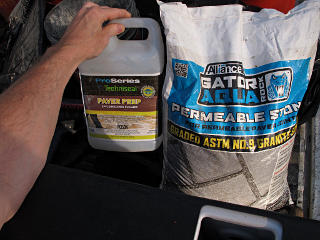
Maintenance products for pavers But if I needed any more of it later, I could easily go buy it in bags from a nearby stone and masonry supply place. The PM showed me this and his recommendation on efflorescence cleaner, in case I wanted to attack the random whitish patches on some of the pavers. [Basically, weak nitric acid.] Techniseal markets a whole line of paver care products [as does Unilock themselves], most of them geared toward the impermeable type of setups where the aim is to have a *sealed* structure so I'd have to be a little cautious about any sort of cleaning effort. The efflorescence is just a natural result of concrete curing, and after a little research it seems like the best strategy is to just let time take its course and it'll go away by itself in a year or two as long as salts are kept off the driveway. All of the pavers would eventually lighten in color anyway once out of their factory-fresh bundles, so I wasn't too worried about it.

  In fact, efflorescence or no, it all looked gorgeous. Several neighbors had passed by the ongoing project and stopped to admire, as it's such a radical and frankly upscale change to my old patch o' dirt. "It's totally Hollywood Boulevard", commented one. And as mentioned before the graceful curved bit, now clean and bordered by rich dark loam, really added a nice touch.

One caveat about the permeable system is that under normal circumstances you don't really want to sweep or rake at all, because it will easily dislodge the joint stone. I was glad I'd already researched the whole leaf-blower thing a couple of months before, as that would be an important tool in ongoing care of this. I wound up getting one of these, a nice lightweight cordless unit with variable speed. With that I'd be able to dial in that delicate sweet-spot between pushing organic stuff and pushing chipstone, and while I don't actually mind trailing a cord around for some things it would also be much nicer to take an un-tethered tool up around the roof and gutters when it came time to launch all the oak crap overboard.


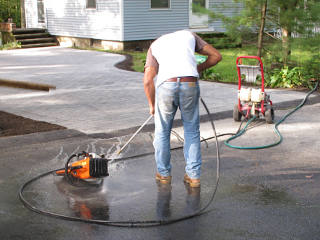
Spraying down the saw And with that, it was final cleanup time. They'd brought along a pressure washer today, with the idea that it would be the best thing to get rid of the remaining bobcat tracks and scrubbed-in dust. First thing he attacked was the concrete saw -- this couldn't have been good for the engine, I thought, but apparently he does this all the time to get the dust out of the works. Well, it's a Stihl, I guess it can take it.

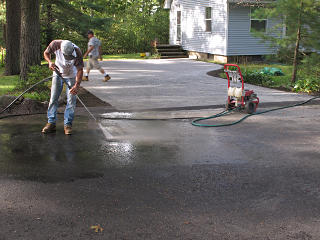
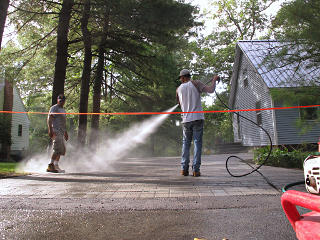
Road cleanup with power-washer Then he started on the road, and the spray did lift a lot of the ground-in stuff away nicely but it took a bit of persistence. Not like it covers a large area at a time.

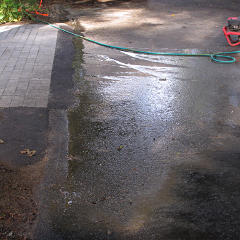
Berm diverting flow Once again, the new berm was doing its thing nicely. Even with all that new drainage capacity under the pavers, probably with enough capacity [as postulated by the PM] to suck up both gutters' worth of roof load too if the downspouts were on that end, no reason to abuse it!

    The geekdom never stops

Holding throttle stable At some point the washer ran out of gas, and they grabbed the nearest can to put a little more in -- asking each other, "this isn't diesel, is it?" beforehand ... they seemed confident that it was good gas, but the jug might have had anything in it prior to whatever its current contents were so who knows. The washer started to run on this but soon conked out and seemed rather unwilling to restart and keep running again.
The lead workman fiddled with the fuel valve and carburetor a bit without getting any more than a few more halting coughs out of the engine, and exasperatedly gave up for a moment to wander off and find different tools. But something about the *way* the engine had died and how it was now behaving -- starting with a couple of healthy surges and then dying again -- got me thinking something had coincidentally gone wrong with the throttle governor linkage, likely unrelated to the refueling. I do have some experience with these things so since no further progress seemed imminent I sat down next to the washer for a closer look. The linkage moved okay; what we were getting didn't sound like a fouled plug or anything, and if something had started restricting fuel flow then it was still trying valiantly to run on whatever made it to the bowl so it probably wasn't bad gas either.

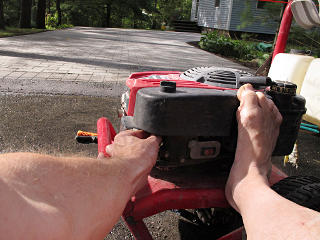
One way to debug governed systems is to un-govern them temporarily and give it a stable throttle setting, so I held the linkage steady and gave the starter an experimental tug or two. It started. And it stayed running, with me in theory holding a fixed throttle opening. I was like "...huh??" but then looked around for the guy and waved my free hand in the direction of the wand -- perhaps cleaning could continue as long as I now didn't move for the duration. I was right. I sat there on the street with a wet ass, embracing his pressure washer while the rest of the crud got flushed away. It was a moment of the *oddest* geeky triumph, and although the camera was tucked inconveniently under my busy arm I magaged to twist it around enough for the picture.


Misting down the driveway After the street was done he sort of shot the spray long and high over the driveway, to mist it down a little. Said it would look better, for when they went to take their own completed-project pictures. Wetting does indeed temporarily hide those efflorescence spots...

As he was finishing with the washer and to a noncritical point with it I was experimenting a bit, and found that when I moved the throttle linkage back and forth a little the engine output *didn't* change. What I surmise is that whatever connects the little cam I was holding to the throttle flap itself had broken in some way, and the fact that I was holding it all against rattling was probably the only thing keeping things running. Mysterious, because it's just a shaft down to the flap itself. Whatever. He figured on just getting a new carb for the thing and bolting it on, rather than trying to debug the old one.


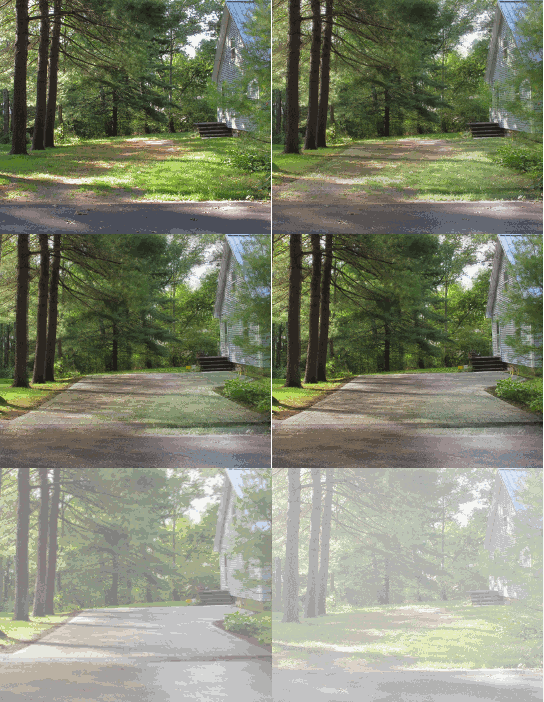
The 'after' shot 'Before' shot again Before-n-after crossfade
After Before (again) Crossfade
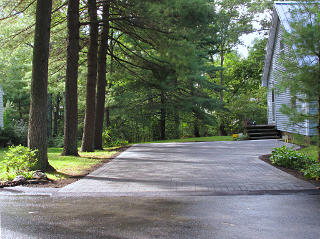
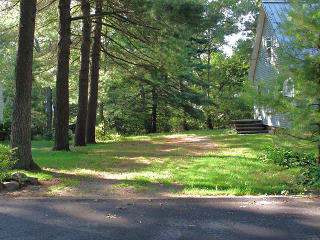
So here's my "after" shot, along with the "before" again and the obligatory animated-GIF crossfade hack between them. The light angle was almost the same -- it was still only mid-morning, and they were done and packed up and out of there before noon.

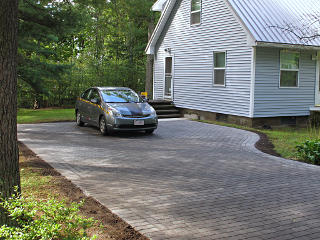
Car's elegant new home The car seemed entirely happy in its new digs.

What the car could discern that I couldn't by eye was the a gentle slope toward the rear, partially from dropping the grade at that back corner. It would just barely roll backward in neutral. So maybe I didn't get my *dead* level mid-field but it was certainly level enough for any sort of work I'd want to be out here doing. If you look carefully at the "after" shot [which itself is a little tilted anyway] you see a slant down to the right at the street end, and down to the left at the back -- the whole assembly actually goes through a slight camber twist through the length, which winds up as the best match to the surrounding terrain. So in effect, the center area is plenty level enough. And heck, if somehow the permeable joints did all silt up way in the future the part nearest the house still has a correct pitch away from it.


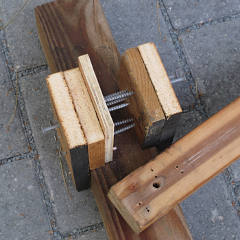
Weird crossed-up nest of screws As I mentioned the loam had gone down very soft and uncompressed, which I didn't see as quite what was needed. It wasn't helpful to step off the edge of the pavers and sink deep into that dirt, so I wanted to actually go around and compress it significantly and add more to make the whole surround a much more dense thing.

This bizarre crossed-up maze of deck screws is part of the solution.


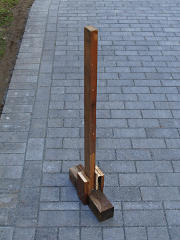
Thor's mighty dirt tamper It's not Thor's mighty redneck hammer of doom, but it is my mighty redneck wooden dirt-tamper which is simply a handle attached to a bit of 4x4 but it had to be effing strong and thus overbuilt. I could have used one of those typical iron dirt tampers [they even had one] but wanted wood to avoid chipping the pavers when I invariably tagged the edges. With this and its more suitable face shape, I could go around whacking down the loam which obligingly subsided a good inch and more around the thick part in back. Raking a bit more up from the outer edge and re-tamping built up a nice dense pack right against the edge of the pavers, which would also help contain the minor leakage of chip-stone out the ends.

I'm sure a whole creative variety of weeds would soon be growing out of it anyway. Grass seed?? Bah. That means more mowing. If anything I'm trying to encourage that nice moss from the backyard to take over.


Days 1 and 2
Days 3 and 4
Day 5   (first part)

Bonus section: extraction technique

Up   (main house pages)

_H*   140907