Permeable-pavers driveway

    Downtime

  The crew wouldn't be back for the rest of the long weekend; I had a couple of days to inspect things at leisure and think a little more about how it was all going and what I might be missing in terms of stuff to double-check. And wade through processing the first week's batch of pictures, which were already frighteningly numerous. But it seemed like each one illustrated an important point about how a job like this got done, and it certainly wasn't over yet.

Something I wound up fighting quite a bit was lighting conditions.  I hate shooting in bright sun, because the light/shadow difference gets so harsh and cameras still don't have the dynamic range to not lose information at the extremes.  While I shoot in manual and pick my battle on the fly as to which end of bright vs. dark is more important for the shot, I wind up having to do a lot of selective "fake HDR" correction in post to make what's on the screen looks more like our eyes/brains would have seen it.  Sometimes if I knew there were multiple opportunities for capturing a given aspect I'd look up at the sky and figure out about how long I had before the next cloud would reach the sun, and wait to get the more diffuse light of the overcast.  Didn't always have that luxury, of course.  And yeah, the relative white-balance is a little squishy here and there.

Just some of the more subtle technical points about what *I* was doing while the guys were doing their thing. And as long as we're talking about picky little fine points ...


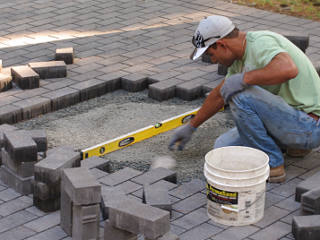
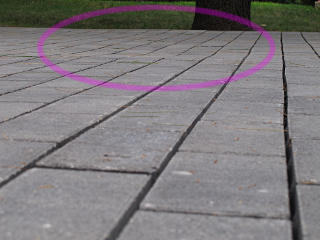
Slightly low area in paver field One thing I noticed was a slight dip in the overall paver surface in one spot, which I earmarked to show the guys when they came back. Easy to fix, by extracting some small number of pavers and spreading a little more bedding stone underneath.

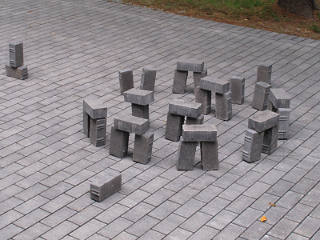
Paver-henge And one more little hack simply cried out to be done. I figured it would amuse the guys when they rolled back in next Tuesday.

    Day 5   (first half)

  I actually had two questions for them when they arrived; one was about the low spot, and the other concerned snowplows and the general robustness of the connection at the street. But I'll get to that a little later.

In many of the pictures that follow, I've wound up frequently decapitating workmen at the top of the frame. Not intentionally, I was just trying to capture what they were working on so hard.


Setting the PVC pipe curve guide The other long side would get trimmed up and bordered today; the first thing to do was set up how the curved bump-out would actually run. To make smooth bends, they simply flex some thin PVC pipe over the intended path and trace the cut line along it. Simple and great results.

Pulling low-area pavers Then the lead guy tore right into my low-spot problem and started pulling up pavers around it. I'd discovered a small flaw in his work; he seemed to want to make it right immediately.

I don't think he really got the Stonehenge reference, though.


Print of the crud that fell in He extracted a fairly large area, and here we could see a clear print of the little bits of crud that had fallen into the gaps over only two days. Those pine trees overhead keep themselves busy making organic detritus...

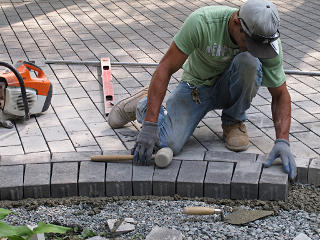
Leveling the low area He added a little more stone and leveled and screeded everything off, and after he dropped the pavers back in and thumped them down slightly with the mallet it was perfect.

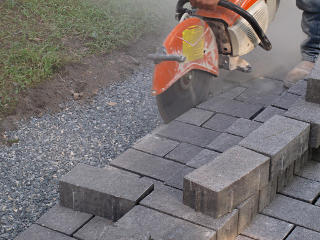
Starting another long cut The long cut to remove the every-other half bricks started. More dust flying into the air. If I'd thought to research the dust collectors at the time, instead of much later while writing the story, I would have definitely shown them the ICS product pages.

Slotting the curve line End of curve line back into straight run
Cutting could proceed normally up until the curve, and then he switched to carefully making a shallow guide slot along the curve penciled down from the PVC pipe. The actual through-cuts would require a little bit of odd fiddling.

[If you've spotted a certain visual continuity problem here, it's explainable by the fact that he didn't do this run all at once and a few extra pavers had been delivered and carried over in the meantime.]


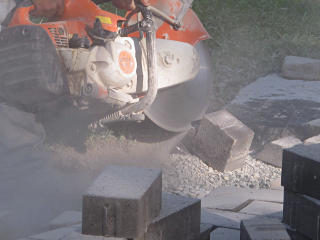
Cutting individual blocks for curve surface Because the sawblade doesn't bend, the curve would actually be a bunch of straight line segments, and to begin creating that on the "inside" part of the curve it was easiest to lift out each block needing a cut and deal with it individually.

Last little bits of curve-sliceoff On the "outside" curve, the excess bits could be cut off normally as the back side of the blade would just kick them away.

Finishing long cut The result was a very clean curved line, ready to finish off with the border. A close big-picture look shows that the larger notches farther away do have the appropriate tiny little triangular bits ready to fill them in, once something more was in place to hold them up.

Noodling cuts around the stoop slab The stoop would be a little tricky, because the slab certainly wasn't dead square. He laid out blocks to template the runner-and-soldier width and figured out what needed to be cut away to fit all that.

Cutting blocks around slab The cutting process here wound up blasting the whole house wall with dust. Conceivably the saw could have been aimed the other way but that would have meant trying to start a cut mid-field instead of from one end which would have been harder.

Yes, I'd pulled the storm-door glass up to not let all that fly into the kitchen through the screen.


Shaping an inside corner piece One block got specially shaped as a combination inside corner, rather than trying to piece it together out of multiple sections. Yup, diamond concrete saw as a fine sculpting tool.

Little slivers to match angle Fiddly bits near slab
That piece wound up in the corner at the left here, and several other small fiddly bits were cut to match the slightly diagonal line needed. Note that the angular corrections were set up to be *inside* the border, which could then run pretty much unmodified around the stoop slab itself.

Runners around curve Finishing run of runners
Before that could really be laid in, though, the runner row itself had to be set around the curve -- like a little choo-choo train rounding a bend -- and finished down toward the slab itself. The half-blocks were not flipped around on this run, but it didn't seem to matter.

A little trimming needed to fit next to slab The border pieces pretty much fit with a little whacking down, but a couple of them needed a little more persuasion in the form of their locking tabs getting buzzed off. Because the edge of the slab was actually slanted out a little, not vertical.

Around the slab, the border blocks would not get cemented in. The slab would be plenty to retain them -- jammed in against firm earth and the stoop and the foundation wall, that thing wasn't goin' *anywhere*.


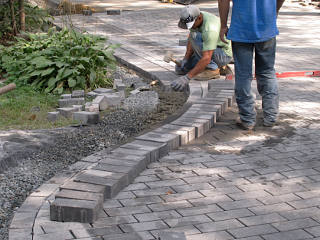
Laying soldier row around curve Meanwhile, the main soldier row had started from the street end and had reached the point where it needed to start following the curve.

Curve adaptations The bend wasn't quite gentle enough so that small placement angles between the pavers could conform to it well enough, so some of them needed minor modifications to make the turn more gracefully.

Shaving off thin wedges This was done by shaving off thin wedges of material on maybe every third block or so, although it wasn't done on any strict regular count as the matching to the runner row was somewhat variable. The guy just did what made the most sense right at any spot he was at. This was where his craftsmanship really came into play, taking a more artistic and aesthetic approach and adapting to the variability of the medium to match all this up instead of trying to force-fit some rigid framework.

Heavy load of concrete He was doing all this pretty fast, with the other guy mixing the concrete having to hustle a bit to keep the process fed. Here he'd poured out a wheelbarrowload so heavy it was almost flattening the tire as he rolled it over.

A graceful curved edge The result was an elegant and graceful touch to the project which, as one of the neighbors put it, really "made it" as far as how it all looked in the end. Just this curved bit, which possibly looks even better when the view is foreshortened a bit from this angle -- but that's what everybody sees from the street. So my earliest thought about putting a curved edge to make it easy to track with the car seemed to totally be the right thing, and I think we totally nailed the size and placement relative to the foundation corner.

I suppose if we were still in that eighties "Star Wars" aesthetic, it would have been two angles and a 45-degree line. And don't forget the laser turrets.


The last paver is laid! Soldier-marshaling rocketed onward toward the stoop, and soon the very last paver was buttered up and laid in. Wow.

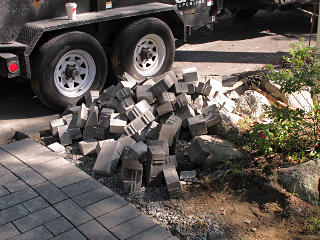
Scrap pile They'd generated an impressive pile of scrap from all the cutoffs and a few bricks that got rejected for upper-corner chips and such, and piled it all ready to load up and take away for disposal.

Recovered scrap and extra stock But I saw a lot of that as potentially useful, and spent a while picking through the pile pulling out any blemished but usable full blocks, a bunch of the "halfies" from the side cuts, and minor bits and pieces. There were also a few 100% good bricks left over which were supposed to become my extra stock anyway. While the guys were finishing up on the borders I spent a while building up a nice stockpile, and cut the load they'd have to take away by over half. I wasn't sure what I was going to do with it all yet but would undoubtedly find some creative use in good time. Even the half-blocks would probably be great for some fun little construct around the place one day. And I had a new bunch of large round rocks I'd grabbed out of the excavation that could go out front on the little wall or something.

Leftover concrete, couldn't use it They'd made a bit too much concrete and now couldn't use it, and a whole load of fresh stuff sat around in the wheelbarrow for the rest of the day slowly congealing into a huge heavy lump.

Somehow it makes me think of a monstrous bowl of oatmeal.


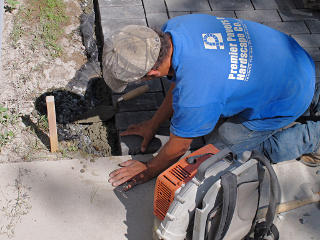
A big dusty blow-off Now came a cleanup and final tweaks phase. First was to get all the remaining concrete dust off everything; vigorous application of the leaf blower raised one more giant cloud but the point was to get all the pavers nice and clean.

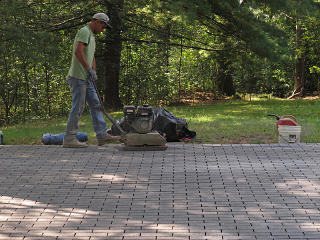
Compacting the remaining area All the new area got its compaction run, and more passes were taken over any other parts that might still be a little uneven. This was the last chance to get everything perfect.

Checking overall alignment of things They rechecked some alignments, especially around the border rows, and nudged any blocks that seemed noticeably out of place. Because the next step was going to commit to the present positions of everything and lock it all in.

Days 1 and 2
Days 3 and 4
Next   (Day 5(rest) and 6)

Up   (main house pages)

_H*   140907