Foundation wall exterior insulation

    Part 2: gettin' down to it

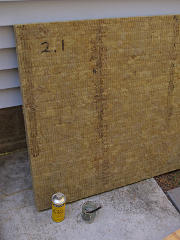
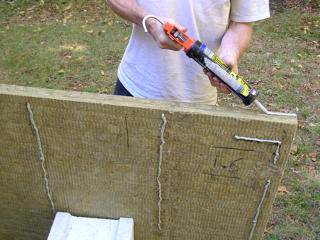
Applying wood-hardener My initial thought had been to mark exactly where the adhesion lines would go on each piece of Roxul, but it was relatively obvious where the wood-hardener got applied anyway.  A full piece would get about four vertical lines down the top two feet or so, and exact placement was hardly critical.  When I did draw some marker lines, the hardener solvent dispersed the ink to be almost invisible anyway!  Powerful stuff, and very sticky while drying. 

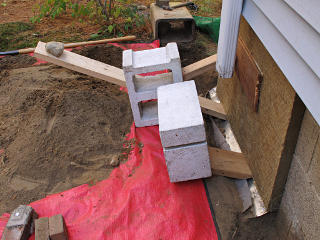
I didn't do the pre-treatment here on the stoop, though, I confined that out back over an expendable sheet of plastic [in fact, the first removed Roxul wrapper] leaning pieces up against an old cinderblock where a little splatter wouldn't get on stuff I cared about.  And yes, per the OCD geekiness of the "grand plan", every piece had an assigned number in the format of wall . position.  Which may or may not have been written on the back, depending on how much in-process indication I actually needed for each one. 


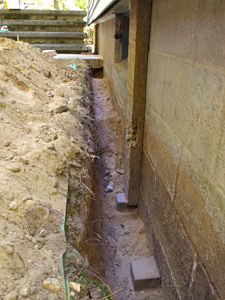
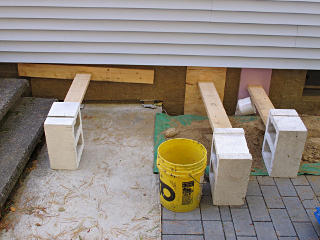
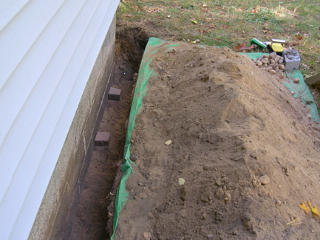
Height gauge and support bricks A couple of the pieces in the delivery had gotten a bit mangled and wouldn't be appropriate for full-size installation, so I cut a reasonably intact 3-foot piece off one end as a height gauge.  This allowed setting a couple of bricks to support the bottom of a piece going in, because the adhesive alone wasn't going to hold it firmly up against the metal while curing.  The installation method would be to apply adhesive to the pre-treated hardener runs along the piece, drop it down outboard of the bricks just far enough to duck under the siding and metal edge, and then back up and onto the bricks as it got attached to the wall.  A little fiddly, but given the geometry of the flashing and siding this is how I had to go at it.

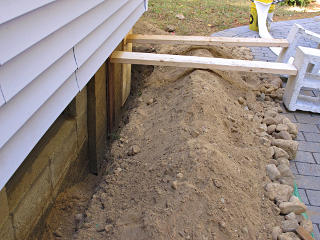
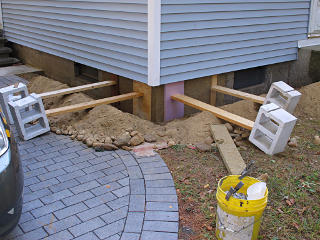
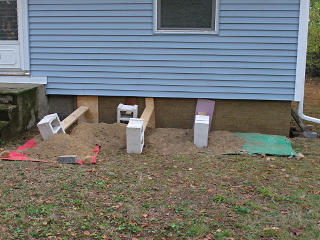
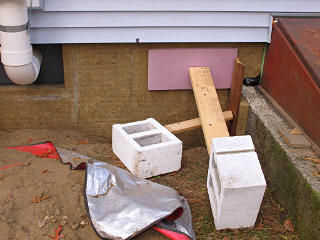
First piece on and braced With a little struggling I got my first piece on, and braced it with inward pressure to cure the adhesive.  In most cases, holding pressure was obtained by simply tilting one of my brilliant white cinderblocks up slightly with its back corner retained by friction, and sending that force compressively through some member of an appropriate length to reach the wall where pressure was then spread out across the adhesion points on the insulation piece.  In other words, any temporary crock-up of weight and pieces of wood that would work to push the panel against the wall -- and slightly upward if possible.  I also reached down and squidged a little more dirt in under the bricks to increase their upward force before leaving everything alone to set.

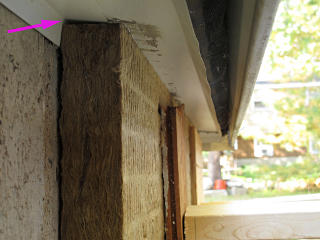
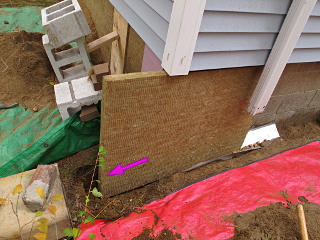
Snug to top, slight adhesion miss It was important to have full adhered contact with the flashing metal above each piece, as that would add bond strength and provide physical closure to keep insects out of any gaps and maybe even help the metal stay just a little warmer in cold weather.  Thus the upward component.  The metal as it comes off the wall slants downward in most places, so my bead of adhesive usually got placed on the outer edge of the Roxul where it actually contacts the metal.  The small empty space from the angle mismatch [arrow] would then not matter.

Here I had missed just a bit, contacting the metal a little before the top of the piece swung fully in to the corner, but didn't lose any significant amount of the adhesive so there was still plenty where it was actually stuck.  I got better at avoiding the "smear" as further installation proceeded.


Northeast corner keepers I turned the corner and put on the first piece for the north wall, to make sure the pieces meeting at the overlap would be tight together.  An extra line of adhesive went vertically between them to make sure of that.

I kind of like the general composition of this shot; something about the lines and angles and perspective.  And while touching on aesthetics, I already knew that the unfinished Roxul was not going to substantially change the general color or texture of the foundation.


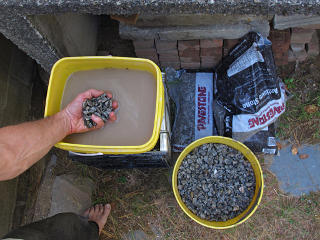
Re-washing drainage stone Next thing would be to add the drainage feature.  Bags of stone are pretty inexpensive [leaving out the apparent irony of *buying rocks* in New England], but they always have extra fine dust mixed in so I needed to proactively re-wash it all.

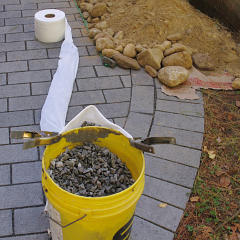
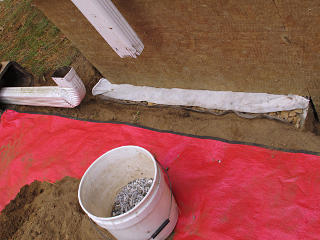
How not to fill the sock The "drain sock" is indeed a long thin tube of synthetic mesh, and *not* a giant roll of TP even if it looks like one.  I got it on a recommendation by the local hardware store as an alternative to decent filter-fabric that I was having a little trouble finding; this is designed to slip around four-inch drainage pipe or the like to keep out silt.  It thus needed to be filled from the end, and I wasn't quite sure of the best way to do that at first.  Trying to pre-load a given length didn't really work as the stone would all collect into a big bolus in the middle once the sock got lifted.  The right answer was to place it down where it would go and then fill it, incrementally lifting the end just far enough to distribute the added handfuls of stone more or less uniformly along the length.  Then I could easily tease the stone along inside the sock to even it out.

Drainage sock in place I could do a roughly 8-foot length at a time, filling from each end, to cover two panels' worth and in this case, around the corner.  The alignment/setting bricks got pulled out and some backfill dirt pushed firmly underneath the Roxul along the wall to help support the inner half of the panel, and then part of the rock-sock got lightly tamped with a hammer into place under the outer half with the rest laid out into the trench.  This helped ensure that any drainage the Roxul might need would head away from the wall, pretty much matching my concept diagram.  More fill was then carefully dropped in next to this to avoid shifting things until everything was adequately covered, and then I could go to town on backfilling.

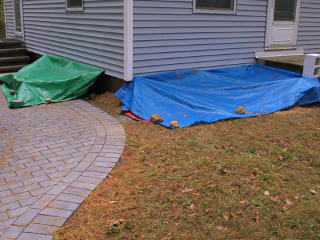
Tarped over against rain With a forecast of rain for the day ahead, I tarped over everything rather than let the stored piles of fill turn into mud or the trenches get water in them.  It was easy to clip onto the lower edge of the siding and have everything pitched downhill away from the house.  Fortunately, there weren't too many wet days over the project duration so I didn't have to do a lot of this.

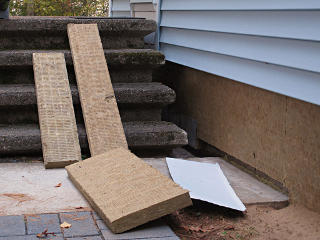
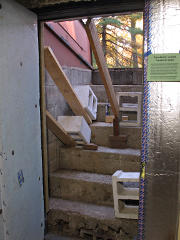
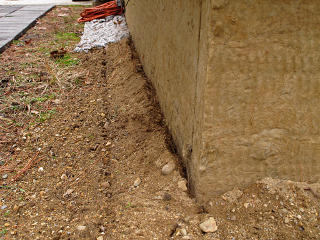
Working over the side stoop Work reached the side stoop, where trenching had to end for the moment, and I noodled ideas for how to deal with the big thermal bridge of the lower slab sitting against the wall.  It would be another flange configuration of some sort, but would have to lay flat and I wasn't yet sure how to protect it from foot traffic and snow shovels.

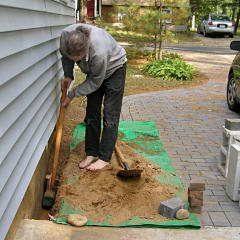
Tamping backfill The Mighty Homebuilt Dirt-Tamper of Doom emerged once again, and was the perfect width to get down into these trenches to compact the backfill.  I did this in incremental layers, to ensure best uniform density all the way up, and managed to not ding up the face of the Roxul too much with mis-aimed hits.  This might have been the only part that would have annoyed the neighbors, as the soil hereabouts is fairly resonant when impacted.  Thump, thump, thump, thump thump ... thump, thump.  Thump, thump, thump thump thump thump thump thump ... thump, thump ...

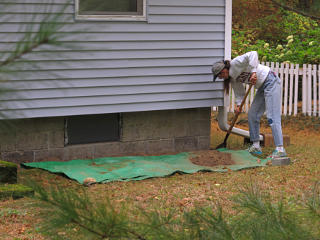
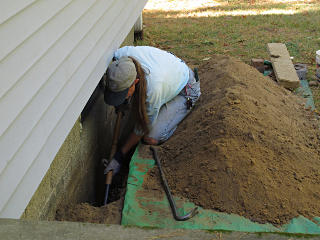
Helper starting That previous shot was actually taken by someone else -- over one of the weekends this was being worked on, I had a helper!  I set her to trenching out the other side of the front, and busied myself with preparing the pieces for it and finishing up various details around the corner.

Helper progress A short time later she'd made significant progress and kept things very tidy, producing a perfect-width trench.  It's nice to have clueful friends who like pitching in on physical work!

Setting bricks positioned Pieces could start going on immediately, so the appropriate bricks were positioned.  Loose dirt is a medium which can be adjusted to a surprisingly fine degree; a fist thump or two on a brick sitting on a small mound can shift it by very small and accurate increments.  Leaving a very slight downward cant to the brick surfaces allowed them to supply a little bit of upward wedging action as the piece was pushed in toward the wall.

For this run I'd work from the corner inward, to make sure I left the correct two-inch overhang past the block to match the layer that would go down the west wall.


Applying adhesive She was able to capture a few more procedural details, such as gooping up a piece with adhesive.  On this one I had skipped a small "fluffy" area and made up for it a little bit by turning a corner near the top -- one of a hundred little on-the-fly subtleties in working the project, but here probably wasn't going to make a huge difference in overall bond strength.  The adhesion method seemed to be working beautifully in general, and I hadn't seen any signs of failure.

Foot trick to lift piece I was getting better at the lower-tilt-lift technique, and with a trench slightly wider than what I'd had on the driveway side I could stick one leg down next to the piece for a "foot trick" to help lift the bottom edge onto the bricks.  Anywhere there might be spacing issues, I would dry-fit the piece in question to make sure it would go in and clear the siding before committing to the runs of adhesive.

Front section set and braced By the end of that day we had most of that wall set and braced and some of the backfill started, I had the rest of its pieces ready, and I'd made more progress around the side stoop as well.

This span went over one of the window-blockoff areas, which had nothing passed through it at the time.  For the piece that went over it, I made partial cuts for the blockoff outline but didn't finish them, leaving the piece of Roxul mostly intact to go completely over the window opening.  If I ever needed to access that panel to pass something through it, the cuts could easily be located and completed to remove the insert piece in place, but I didn't anticipate needing to do that any time soon so in effect it was just solidly covered over.


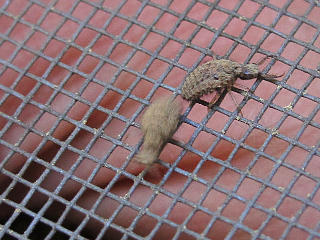
Ant lion larvae My helper, a biologist/naturalist by trade and avocation, had noticed several small conical pits in the very dry soil next to the wall and thought they might have been made by ant lions.  We both found this odd, thinking that ant lions are more a southern thing, but we dug up a little dirt around some pits and managed to isolate the critters onto a piece of window screen and sure enough, that's what they were.  These are actually ant lion larvae, also called doodlebugs.  The adults have wings and look more like small damsel-flies living above ground, but the typical notion we have from guidebook pictures of ant lions is of these terrifying monsters with huge pincers that pop up out of the ground to grab their prey like the sandworms from Dune or Jedi.  In fact they're quite small, and move mostly backwards with an odd humpy jerking motion that helps them dig and form the trap pits. 
They were hard to photograph because they kept doing this rapid jerking in an effort to dig through the window-screen and get away from us -- one's in mid-motion here, and I managed to catch the other while still.  They'd just collided butt-to-butt like little bumper cars.  She spent a few minutes finding some small ants to drop into the undisturbed pits and feed the ant lions, amused by how fast the victims would get sucked in and captured.  Mmmmm, crunchy goodness!  There are quite a few videos of this searchable on youtube.

The fact that numerous ant lions now reside in the soil next to the house is excellent testimony to just how *dry* that soil became since the renovation.  It's really like dirt from the desert -- fairly loose, doesn't pack down very well since there's very little moisture content to help bind it.  A clear result from having larger eaves and better drainage, plus the somewhat "mushroom" aspect of how far the above-ground walls and flashing metal overhang the foundation and nearby grade.  With the addition of the Roxul it would become a couple of inches less mushroom-like, but I was still counting on those features for good long-term protection against rain.


Parts for the side-stoop workaround footer She also lent a hand in getting one of the more difficult pieces installed, the one directly behind the side stoop in that narrow little space that's hard to wiggle into.  We managed to horse it into position from both ends and lift it into place without losing all the applied adhesive, and with bricks quickly wedged in underneath and random bits of springy foam squeezed in against the stoop it stayed in place well enough to set up overnight.

Because I couldn't duck the lower edge of a full-height piece over the side-stoop slab and footer, I decided to engineer in my own "footing" similar to what had happened with the polyiso on the inside, and thus could leave myself two inches of working room at the bottom of the vertical pieces.  That was just enough to let them pass under the siding and come up, and then more pieces laid flat would slide in to fill those gaps and in the manner of the "flange theory", cover some of the horizontal concrete to gain just a little more overall R-value.

The parts for finishing this included a piece of coil stock with a bent-up flange of its own, which was inserted into a reglet cut up into the edge of the piece over the bottom slab about midway back to the wall.  That would give it a solid water-flashed connection without being a thermal bridge, and then matching Roxul got slid in underneath to lock the metal up in place and form a nicely protected footing.  After that all went in, two flat heavy chunks of concrete -- some of the scrap from when they cut the slot through the front stoop, in fact -- were then laid on top of the metal as a first go at protecting it all from foot traffic.  The flange pieces farther in behind the stair unit would simply lay on the old concrete footer with some filter-cloth on top, and get covered by a layer of dirt.

Dulled knife blade A few notes on cutting this stuff:
The industry seems to generally recommend using a serrated blade, like a bread knife, to cut Roxul panels.  I disagree with this, because a straight blade makes a much cleaner cut without shredding the edge and making a kerf, and also ensures that pieces accurately cut out can be re-inserted into the same spots and they'll fit in and hold very nicely by simple friction.  I was going to rely on that to have some removable sections around the wall, notably over the block-offs that replaced basement windows and which now carry well-sealed infrastructure penetrations.
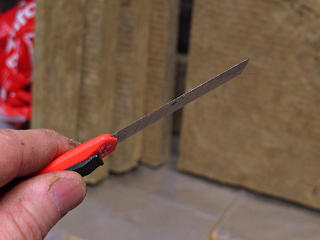
What's interesting about this is that about two passes through the material dulls the edge right off a sharp blade very quickly, but without actually reducing its capability to cut fiberglass!  It rapidly becomes pretty much useless for cutting anything *else*, but it will still slice through Roxul panels just fine.  So several of my utility knives became dedicated to Roxul-cutting for the duration of the project, and wound up looking about like this the entire time.  If this blade was truly sharp we should *not* see any glint of light off the edge.

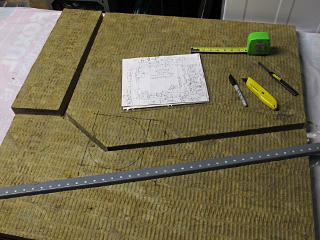
Most cutting was against a straightedge using a sequence of utility knives, the same approach I use for cutting foam -- first with a short but fairly stiff one to solidly establish the cut angle, and then successive passes with the thinner but longer cheapo blade [like this one] to finish.  I found that it was best to complete a cut all the way through before trying to separate the pieces, unlike with foam where the rest of a cut can usually be snapped open.  If any fiberglass was left across the cut it would shred in a rather messy fashion when pulled apart.  Another interesting characteristic about Roxul board is that if the binder that makes the rigidity gets crushed down at all, it stays soft and doesn't recover, and incidentally makes it harder to cut accurately.  So pieces have to be handled carefully and not banged around, especially at the corners. 

Curved cuts seemed easiest to do by marking them out and then doing a line of carefully vertical straight-down penetrations with the thin blade, all the way through, and then going around gently cutting at full depth to connect them all up.  Again, aiming for complete separation before trying to knock the piece out.


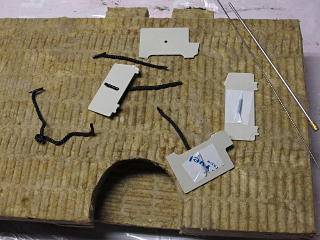
Anchors for pull strings Because any removeable sections would fit back in rather tightly, I needed a reliable way to be *able* to remove them again, however infrequently, without mangling the insert pieces all to crap with external tools.  A couple of screws through from the back of the small test-patch piece with washers on the backside had sufficed for that instance, but I didn't really want rigid screw points sticking out of the wall here and there being physical hazards not to mention unnecessary thermal bridges.  Instead, small lengths of nylon string were turned into pull handles connected to load-spreading anchors on the back.  The strings were separated halves of the otherwise mostly useless poi-leash bridles that had come with the glow balls I had ordered, and already had convenient little tee-shaped anchors attached, which could then go through little flat bits of plastic and get taped in.  Close-fitting holes were then punched through the Roxul piece to tease the strings through and the whole assembly tacked down with adhesive from the back, and there were my pull handles.

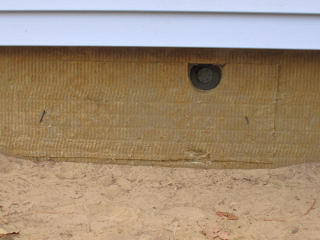
Insert piece around pipe hole Once set in place, the section inserts were not only almost invisible but the means to extract them again nicely subtle and nonobvious.  This one was the "utility" pass-through out front for either electrics or water hose, so I still wanted access to the PVC nipple on the outside.  Because of the spacing between the Roxul plane and the block-off surface, an additional almost-two inches of padding layer had to go in between, generally using more Roxul and stuffing any remaining open passages with fluffy fiberglass to further insulate and keep insects out.  If anything else needed to go through this panel in the future, the filler piece could be easily removed and re-cut to accomodate it.

Later I took the D-shaped piece cut out of this insert and just popped it loosely back in, making an even cleaner installation that totally hides the utility pipe but leaves easy access to it when needed.


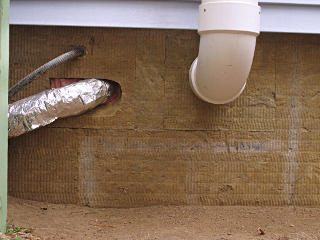
Fancy cuts around duct The one place where a significant wall penetration goes through something other than an official ex-window panel is the HRV exhaust duct, and I thought I'd get fancy on how to cut the piece to go around it and up against the side of the basement bulkhead.  Because of topological weirdness this actually wound up becoming *four* pieces as it went on the wall and I'm not particularly proud of how it turned out once all the obstacles were worked around, but it went on tight enough and got done.

  The section with the exhaust duct brought me around that back corner from the stoop up to the bulkhead, completing two sides of the house but for some remaining footing details and backfill behind the stoop itself.  After that I moved to the opposite corner that my helper and I had reached before, and continuing down the west wall was pretty much plug-n-chug with "fullies" and a couple of simple window-port cutouts.  And the grade kept getting a little lower along that whole run, making the digging easier as I went along.  I still went slowly and carefully and let the applied pieces set their adhesive for generous amounts of time, and spent a while extracting many of the rocks out of the backfill to store separately for later.

I had to break off for a weekend to do my usual infrastructure duties at the local haunt event, but was right back to it as soon as that was over.


    The home stretch

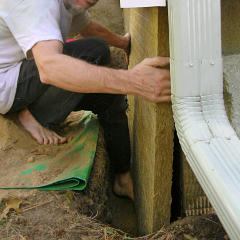
Relief trench for piece insertion Finally I turned the other rear corner onto the back wall, which was going to have quite a few more subtleties and topological problems to solve.  The first piece had to get behind the downspout, because while I could easily remove its extender I wasn't going to mess with detaching the vertical part in the way.  For this it was easier to dig a short temporary "relief trench" out away from the corner to lower the piece into once gooped up, carefully clear the siding, and translate back in along the gentle diagonal slope of the bottom to the actual attachment position.


Over the underground cutter The slope of that edge was odd because here I was over the re-exposed underground gutter, and couldn't conveniently brick up underneath the Roxul.  Instead, a couple of kludgey lever arrangements with counterweights held the bottom edge upward, along with the usual inward push.  The piece came down just over the foil-tape lip of the flashing piece, which was not at the full 3-foot depth level, so had to be cut to conform.

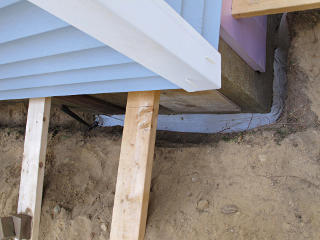
Underground gutter rework The gutter, aka "downspout failure protection", got reworked a bit to match the change.  I added a bit more stone to the drainage channel to raise the level and widen its throat at the top, and then installed the "sock" for the Roxul in more or less the usual way on top of that to connect it all into one free-flowing slot.

It turned out that the grey cloth-like stuff I'd used on the underground gutter project is *not* really drainage-grade filter fabric, but more like weed-control membrane.  It is water-permeable but not anything like fast, especially when it starts out dry, so it made much more sense to open that up a little and consider it as a less permeable surface to wrap around the outside of the sock and form the overall drain path.  All of this got re-covered with a thin layer of dirt back to grade, as in the event of water intrusion from above the idea was *not* that the gutter-slot would take all the possible flow from that, but only serve as a backup to direct water that made it that far down away from the block wall.

 
  The updated intent was that the grade surface itself should drain off most incident water that landed here.  To that end as things went back together I wound up nesting in a largish flagstone right under the downspout elbow, sloped away, and moving the support under the extender a little farther out.  That way any random leakage from the elbow would flow away on the surface, and only in total downspout failure and heavy rain would I expect enough washout of the soil cover that the gutter would become really relevant.

This Roxul piece represented the first of several compromises on installation depth, not going down the full three feet from the sill.  But it was all along the south wall, which actually gets some solar energy in the winter so this was of less concern than the other sides.  The next piece on after this reached up to the old test patch, or what remained of it after I cut off part of the XPS foam that had managed to detach from the wall anyway.  I left most of the patch in place and simply skipped over it, and that certainly doesn't go down to full depth either.  It was okay, I didn't see this as losing a whole lot of relative effectiveness given that the really cold parts of the wall were all covered anyway.  And I'd still have my little openable observation port with the pull-screws.


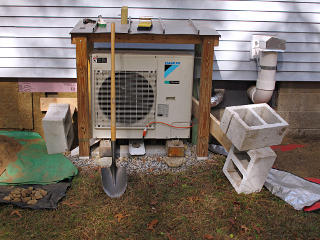
Behind the compressor unit, very tight The next headache was getting in behind the compressor unit and hutch-roof supports.  Digging needed to be very careful here, and stay as far away as practical from the places where the back two support posts had been concreted into their holes -- I didn't want to loosen up any part of that dirt.  There were a couple of largish rocks in the way of the "duck-under" path, so I wound up simply whacking about four inches off the bottom of this piece just to make things easier.  Another depth compromise.  It also needed a bit of relief-trench in front of the test patch to facilitate endwise insertion. 

To install the piece I wormed my way completely in behind the compressor unit -- that's my arm sticking down holding the Roxul, in this "timed selfie" which I was actually hoping would show a little more of how I had to contort myself into that small space and still be able to work and not have my butt cave in more of the trench.


Keepers around the compressor Getting the "keepers" onto that piece was interesting too, using available spaces through the hutch and some funny cantilever arrangements.  The leftward horizontal component actually helped push the piece over against the test patch, although in the end that joint wasn't perfect and I had to do a little creative filling on it anyway.

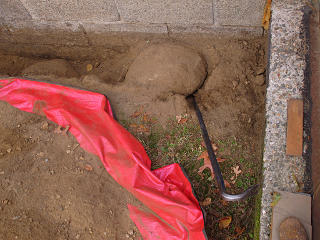
Huge rocks After that I thought I would be more or less home free on the rest of that back-wall home stretch, but then ran into some of the biggest rocks to date.  One got extracted but the other one seemed rather unwilling to move at all without disturbing far more of the topsoil, so I decided I'd just leave it in there.

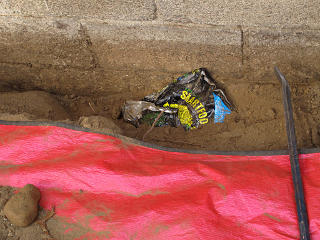
Very old litter Shortly thereafter, this came to light.  It must have been from the septic job in 1991, as I don't think "smartfood" existed back in the seventies the last time any significant digging might have happened around the house.  Still, a quarter-century old and perfectly preserved, testimony to how durable non-biodegradable plastics are.

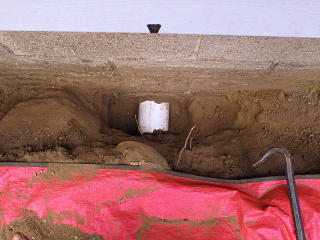
Soil pipe exposed Since I was so near it, I decided to go carefully down the few more inches and see how accurately I'd marked the location of the septic pipe by measuring from the doorframe inside.  I had marked this position to make sure I didn't go slamming deep into the ground with the crowbar right there, to avoid busting a hole in the pipe.  Pretty close, and the PVC was still as gleaming white as the day it had gone in.  I also wanted to check how well sealed it was on the outer wall surface, to make sure it wasn't leaking air or anything.  It seemed quite well-mortared around the exit point, so I filled the area in with relatively soft and rock-free dirt, lightly tamped, back up to my working level.

I suppose insulating outside the wall would help keep that warmer, too.


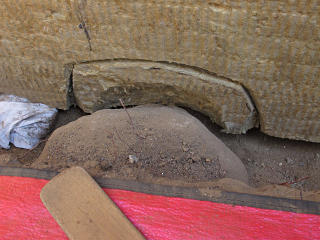
Working over a big rock For installation I had to accomodate the big rock that stayed in place almost touching the wall, but could put most of the cut-out piece right back in once it was set.

The last two pieces onto the outside! And the *last two* exterior pieces finally went on!  I was almost done, and with this the really grubby parts of the job were close to over with.

The truck-tire prints on the larger board were come by honestly.


  For something of a hack, this had been a *huge* amount of work from the planning and acquisition phases on down, and there were still a few more details to chase.  While I *was* using latex gloves for some of the fiberglass handling, there had been lots of manual digging and rock-moving and surface-grading and my hands were totally beat to crap and covered with flecks of adhesive and wood-hardener.  But that which does not kill me, etc etc.  I enjoyed the bit of exercise not to mention the sense of accomplishment at actually being able to pull off the job before cold weather really arrived, and generally in a fairly elegant and workmanlike fashion.

I really don't think I could have gotten any contractor to apply quite the same attention to detail or building-science principles to something like this, especially laboring under the possibility that the experiment might not work out entirely as hoped and they'd be called back to try and fix it somehow, so a project like this may not be for everyone.  My neighbor to the west seemed pretty amused all the activity, and asked the pointed question "do you think it's worth it?"  From his viewpoint, that being purely financial, that's rather squishy.  Let's super-optimistically say that if the project could cut the already modest $200-per-winter heating bill by a third, my materials costs alone would put the added "payback period" at around ten years and that's not including any of my labor.  And with this new twist in the ongoing energy-improvements I was still looking at another couple of years collecting updated energy stats to see how much difference it would make.  But really, the pride of designing and solving the challenges and getting it done [mostly] myself and the raw geek-factor involved are significant parts of the value here.  And my cold walls were now a little better frost-protected, which certainly couldn't hurt.


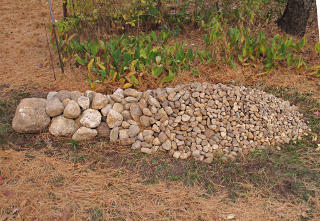
Size-graded pile of extracted rocks Yes, I spent some amount of time sorting my rocks in a truly OCD fashion, into a nice size-graded pile headed up by the really big rock from the back and trailing off to pebbles at the other end.  Now don't laugh too hard -- this is New England, so consider what those colonial farmers did with all the rocks they pulled out of their fields.  With this now stored aside, I was *totally* ready for whatever the next big drainage structure improvement would need!  Perhaps I would enlarge the downspout pits someday, but for now it could all just sit in this oddly decorative stockpile near the driveway, somewhat grimly reminiscent of those grave-barrows they used to build over fallen cowboys in the western desert lands.
Now, add some more geek-factor: how did this volume of rocks *removed* from the backfill compare to the volume of soil displaced by the below-grade part of the Roxul?  Well, lessee: This pile is about 6 feet long over its main bulk, and on average a little more than 2 feet wide by 1 high, triangular section, with maybe an 80% volume fill factor.  I'd eyeball that around 5 or 6 cubic feet.  The foundation perimeter minus the various stoops and bulkheads and shallower-depth bits was probably about 80 linear feet of trenching, with perhaps an average of 15 inches of Roxul into the ground.  At a two-inch thickness, that's around 28,000 cubic inches or 16 + cubic feet added below grade.  So in theory I gained about ten cubic feet of available backfill, reflected quite realistically in the slightly higher grade slope I could build back up against the new wall surface.  The nice dry stuff packed in right under there might even deliver a smidge more usable R-value heading into the basement, who knows.

The ant lions were going to totally love it.


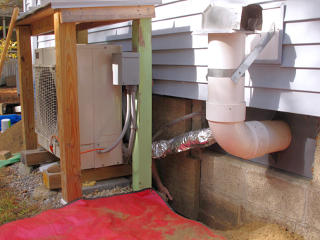
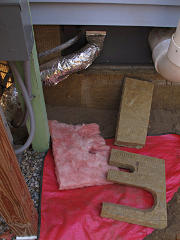
Parts for HVAC connection fill-in There were some final exterior details to finish up, such as a fairly complex bit of cutting to work around the HVAC refrigeration pipes and power feed.  In this case it was easier to fill the intervening space with some flexible pink fluffy stuff instead of sweating over the topology of how to interweave Roxul layers.

HVAC filler panel in place The rest of that panel fell together rather neatly, including a couple of cute insertion-path tricks for a nice tight fit around the ventilation intake.  I didn't expect to have to mess with this again for a very long time, maybe not until the HVAC unit or lineset needed replacement or something, and didn't bother with any pull handles.

Here's where I had one minor screwup.  After wrestling the piece in behind the compressor I was perhaps a little brain-fried, and wound up wood-hardening the wrong side of the next piece.  Oh well ... given that I was going through wood-hardener like it was going out of style anyway, it was a small loss.  I hardened the *correct* side and plunged onward, but where the treated surface gets brushed against it turns white.  All this is in the back next to other "ugly" infrastructure stuff, so who really cares what it looks like.


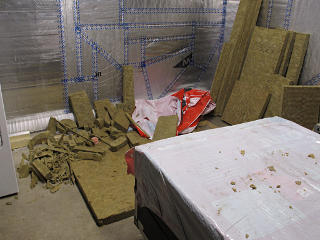
Pile of cuttings At this point I had an impressive pile of cuttings, plain and fancy.  Adapting to the various features usually involved measuring outside and then cutting inside here, and I was glad that all worked out without any major foul-ups to cause material waste.  The roadcases for my 918s had gotten commandeered and lashed together against a lally column as my cutting table, covered with one of the Roxul wrappers.  This entire corner was a festival of fiberglass shards by now, and cleanup after everything was done took a while.

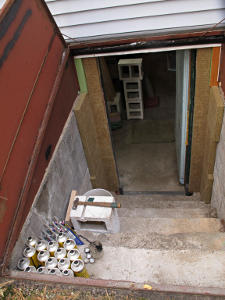
Keepers for inner-bulkhead pieces What then remained to deal with was the *inside* of the bulkhead, to cover the small strips of foundation next to the door and flange out along the bulkhead walls to match the terminating flanges on the outside.  The keeper rig looked a little scary from inside.

Inner bulkhead stairwell done Bulkhead interior done.  I managed to avoid cutting open the very last of my ten packs of Roxul by cobbling various leftover pieces together for the flange areas, which gave enough coverage and made storage of my spare material quite a bit easier.  I'd gone through nine of the bags and only had a couple of ratty pieces left in addition to the tenth, which I figured for a total sweet-spot as far as my usage ratio.

I had also used up *seventeen cans* of wood hardener, the detritus from which looked like a serious drinking problem, and it was definitely time to retire that brush I was using with it.  Admittedly that's a lot of ketone solvents into the atmosphere, but it was better than the alternative of my Roxul pieces falling off the wall.  The 8X adhesive had racked up a respectable number of dead soldiers too.  And I had neatly used up all the stone and drainage-sock stuff by the end.


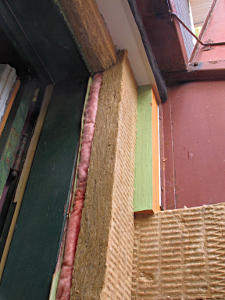
Bulkhead top piece The main-wall pieces were cut to overhang far enough in to hold in a neat run of fluffy stuff, thus completely entombing any visible cinderblock like on the inside and protecting the doorframe a little as well.  Even the top of the doorframe got its little fuzzy overcoat to couple to the metal and complete the surround.

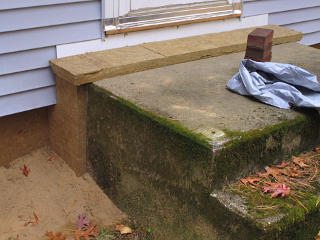
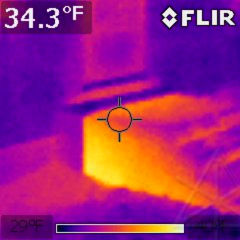
Flange lid over front stoop Thermal of front stoop
Here's a nice illustration of the "flange" principle at work.  The run along the north wall turned out along the sides of the front stoop for a little way, and for winter I planned to cap off the top with a matching piece and eventually batten it down with the plastic and bricks to keep water and snow off.  With the top piece in place the infrared still shows the exposed stoop as fairly hot relative to the Roxul, but eyeballing the gradient from what's probably still close to earth-temp at the lower inside out to the steps, I'm getting some benefit by pushing the major thermal transition another foot-plus away from the main wall and its convective highway.

In other words, instead of a blazing main rocket-engine of heat loss under the whole house, maybe it's reduced to the equivalent of a few small side thrusters.  I'm sure I can live with that, but the proof would come from long-term study over the coming winter with the house now wearing its fuzzy leg-warmers.  It would also be interesting to see if the moisture profile of the wall changed at all, which I could check just about any time by opening a basement window inside and dropping in a hygrometer between that and its total-coverage external insert.  In cold-weather mode, the foundation wall would basically be a completely featureless expanse of Roxul with few visible holes -- moving closer to becoming that windowless igloo to hunker down in for the winter.

The infrared was shot on a clear evening, and the effect of night-sky radiation on the upper surface of Roxul and the stoop is quite obvious.  I'm still sort of amazed that it has such a profound effect.  At this late-Fall point the basement and surrounding earth mass were still fairly warm, yet to receive the long-term deep chill.


Weird frost heaving against Roxul A couple of months later, the first winter for this experiment was fairly mild in general but did bring a week of single and subzero digits -- nothing like the ice dam festival from the previous year, but still a good solid run of frigid.  The soft dirt around the walls did a rather weird frost-heaving pattern, fluffing up about an inch above its packed-down level and working open a gap away from the Roxul surface.  The soil right next to the house had always done that to a small extent, but now with the exterior of the wall so much colder there was nothing to warm that dirt up any more so any moisture trapped in it received the full influence of ice crystal expansion, trying to build its own little pingo.
The Roxul never felt soggy, though, other than in a couple of the horizontal "flange" pieces like near the side stoop and only in rain or snow melt when everything was wet.  The spaces between the operable basement windows and the Roxul filler pieces over them never got unreasonably damp, either -- basically just tracked the outdoor humidity as always, so the Roxul's drying profile clearly remained wide open and it didn't appear to be accumulating any water.

    So, any profound results??

  The block wall, as observed behind the removable outdoor test-patch, remained safely above freezing the whole time, maybe high thirties to 40 in the coldest dips. The lowest I measured at the inside surface of the cinderblock was 44F.  So the wall itself still showed a slight gradient, but was now unlikely to ever see real freezing temps on the outside again.  Loss reduction aside, that's generally better for concrete.

As described in part 27, my data generally gets reduced to terms of whole-house BTU/hr per degree F of base-65 delta, said delta taken from averaging HDD figures from the two nearest airport weather stations listed at Wunderground [KLWM and KBED].  The conversion is still a bit complex, taking plug-loads and body heat and ventilation loss into account as well and after some testing, a variable heat-pump COP factor based on ambient temperature. Data collection is made even more complex on occasion by running on the strip heat instead of the heat pump to try and nail down the actual running COP under similar conditions.  The script to reduce all this from midnight meter reads continues to get uglier and uglier, but is reasonably accurate in its calculations after several tweaks over the years.

The basement with its uninsulated slab still represents the major nonlinearity when comparing energy use vs. heating degree-days, but on average the Roxul job coupled with some improvements around all the windows did visibly lower the average consumption over time.  Mid-level basement winter temperatures ran about 4 degrees higher on average, from 56 in previous years to right around 60F this winter.  That's still against a setpoint of 68F for the rest of the house, so that 8 or 9 degree delta through a maybe R-2 first floor with partial carpeting is still a significant part of the loss path and it never changes!.  [One possible way to really *fix* the basement would be a fully insulated sub-floor, which may happen someday but is way into diminishing-returns territory and not on any near-term agenda at this point.]

All told, observed average whole-house loss went from about 185 - 190 BTU/hr/F just post-reno to more like 155 - 160 BTU/hr/F due to various improvements over time.  Not a huge step change after just the Roxul alone, perhaps, but overall trends which must be observed over a season-to-season basis simply because it's helping to slow heat loss from all the foundation mass and the dirt under the house.  All that mass still wants to stay at 52 degrees or so during the winter, which means that heating the rest of the house normally is always "pulling" against that sink to some extent.  Thus the colder it gets, the *lower* my HDD-based loss figures appear to run, and that's in spite of the cold-temps "polyiso U-factor hockey stick".  There's also a phase-lag effect from multi-day trends in outdoor temp which again dictates longer-term averaging.  [The basement factor is also most likely why I no longer need to do any real *cooling*, just some intake-air dehumidification in the summer.]  That's where the nonlinearity comes from, so viewing long-term averages over an entire season's worth of temperature swings is really necessary because my effective "delta" is NOT represented solely by HDDs.  Still, be it 160 or 190 or whatever, it's still a fraction of the losses in a typical code-built house which are up around 600 to a thousand btu/h/F or more.

Further years' observations will tell more.  As this little part is being written four winters after the renovation, my assertion that I'd still be collecting data on the improvements for years afterward was completely true.  Maybe not taken religiously night to night going forward, but certainly season to season with periodic baseline sanity-checks to make sure there aren't any compromises in the thermal envelope's integrity.


_H*   151031, 160420