House energy retrofit project 20

    Roofing, day 4

[Click any image for a larger version.]
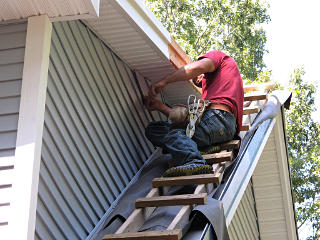
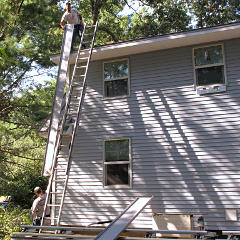
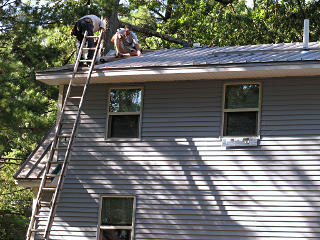
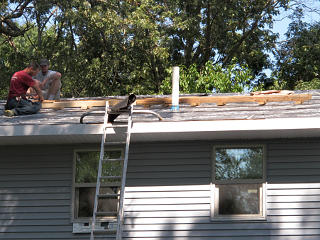
Assembling the chicken ladder The next day the roofer arrived with parts to put together a specialized "chicken ladder", which he hauled onto the shed-dormer and assembled up top. Unclear why they're so named, as they don't really have anything to do with chickens; perhaps they're more footing assurance for someone who doesn't want to just dangle from a fall-arrest rope fastened up top. They're available commercially and similar to the hook-ladder rig the roofer already had, but a little more optimized for steep-pitch work. He opted to construct his own out of wood, in part to make sure its rungs would clear the standing seams, and wound up with something a little similar to this -- with the exception that it wouldn't simply hook over the top but rather get temporarily screwed in.


Lowering chicken-ladder into place Testing chicken-ladder
They spread out some rubber roofing membrane underneath to protect the panels before lowering this rig into place, fastened it in at the top, and the roofer gingerly got onto it to test solidity. Once he was sure about it, he issued the go-ahead to start siding up the cheekwall.

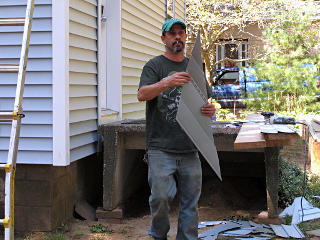
Siding cuts easily with an angle grinder They didn't have a fancy cutting station for siding, but it turns out that carbide cut-off wheels make perfectly acceptable slices through vinyl and yield beautifully clean edges. The guys on the ground laid out all their measurements and cut everything right there on that same side stoop that so many other people [incl. yours truly] have used as a worktable. And here they had to make some pretty funky angles to match the converging rooflines.

Cheekwall almost sided The cheekwall siding didn't take the roofer very long at all; most of his delays were in explaining to the other guys how to measure the angles and transfer cut-lines between pieces and generate the sequence of pieces he needed.

Funny shot during siding cutting The last few pieces at the top were the most odd in terms of cutting; no right angles anywhere.

This was one of the funnier shots from the job...


Getting near the squeeze The workspace was getting tighter and tighter as well.

Last hole to fill Last siding bits in
The last couple of bits went in, with one tiny triangle at the top capping it off. I shot these from above, lying on the shed dormer and leaning way out with the camera aimed back at the work area.

Here we also see a good cross-section of how the soffit hooks together, very similar in model to siding. Right after this, the final piece of rake trim metal had to go on over that and the wood before finishing up the split.


Sloppy caulking job in the cavity The last bit of siding and the Z-bars to block the soffit void basically got caulked in a fairly sloppy fashion, and I wasn't at all convinced those spaces were truly sealed off. Both of these would probably need to be screened over in some way before the next summer's influx of insects.

Unpatched chicken-ladder screw holes With one cheekwall and its rooflet done, the chicken-ladder got pulled and moved to the other side -- leaving several screw holes behind including right through the panels. After all that talk about avoiding top-side penetrations, this is how the roofer had chosen to attach his ladder. Some of these were far enough down that they would *not* necessarily get covered by the ridge cap. He swore that he'd patch those -- for the holes through the Grace he simply ran screws back into them all the way but that would have been wrong to do on the aluminum. I really questioned this ladder attachment methodology instead of using a hook over the ridge -- this area of the ridge was a nice 90-degree angle which would have given a pretty secure attachment, maybe one or two screws to just tag it down. Instead he had put about ten of them into areas where they maybe shouldn't have gone.

The west-end cheekwall got set up and sided in a similar fashion, so I didn't bother with any shots of that as it was pretty much the same. There was still a little bit of the day left afterward so the roofer started some figuring for the shed-dormer, particularly how to locate panels to land the stink-pipe in the middle of one. Flashing around a seam is far less reliable, so any roof penetration really wants to have the seams running on either side of it.

We agreed to just give up on the ATAS end-details entirely for the shed dormer, and he'd just fab up a starter panel with an integrated drip-edge to go over the side and get trim-nailed into the fascia. This seemed so much simpler. A suitable piece was cut, and this time not just buzzed apart with the angle-grinder. This needed a clean edge.

That was accomplished by marking up the piece and clamping it into the dual-brake setup at the cut line, and then scoring right along the brake nose a few times with a utility knife. A gentle bend was then applied and un-done and re-done a few times until the piece broke precisely along that score line. I had seen this technique used a couple of times on things like door trim, which is thinner metal, and was intrigued to find that it could also be used reliably on the stiffer .032 roof metal.

The additional bends were then the right angle to go down over the fascia, and a little half-inch kicker flaring outward to form the drip-edge.


Trimming the starter panel The panel needed a little trimming before being applied, and he wanted to double-check that he'd calculated its width right to to accomodate the stink-pipe placement. The upper end of this had to be tapered off to match where the lower roof came up.

How the shed-dormer roof splits He wanted to get this first panel trimmed up and attached before calling it quits for the day. This is how the split got put together.

This is one reason I cannot understand today's evident desire for complex residential rooflines -- it just makes it that much harder to match all these pitch-split and transition details. Some of this might have been simpler if I'd decided to bulk out the shed-dormer to the ends after all. Too late now.


Panel-to-panel is 11-1/6 I got curious about the exact inter-panel distance, understanding that it could vary a little from seam slop. Turned out to not land on nice measurement boundaries -- it turned out to be just about 11 and one-sixth inches. If it was exactly 11 per panel cycle I'd be at 132 inches over 12 panels here, not at 134. I eyeballed the roofer's first shed-dormer panel and the distance to the stink-pipe and figured he had it pretty close. We'd find out the next day.

    Roofing, day 5

Bad triflex placement While up noodling panel measurements I also spotted this. What's wrong with this picture? Where would water running under a panel go?

With one panel already down on top of this, it got fixed by lapping another short piece of Triflex under the end of the first piece and above the drip-edge.


We had already gone through a conversation about underlayments and drip-edges, where the sensible thing might seem to have the main Grace layer lapping over the drip-edge piece, but almost everyone attaches drip-edge *over* any underlayment present. The roofer defended the latter, saying that it must be that way to prevent the ice dams that the ice & water products are supposed to handle in the first place -- i.e. water that backs up over the drip-edge piece won't be able to sneak underneath to decking. In a superinsulated scenario the ice-dam problem should be far less of a factor and I was thinking more of where inevitable under-panel condensation was going to go, and realizing that proper installation of the tri-flex was my last chance to have *that* handled appropriately.

I floated this quandary over at Green Building Advisor and got some helpful input, including a link to a detail from Grace (PDF, 155K) showing two layers of I & W lapped on either side of the drip-edge. They don't specify the width of the lower layer but one assumes it would be one 3-foot-wide course rolled out -- enough to protect against ice dams on most roofs, one would hope. So my substitute for that upper layer was now the tri-flex, which isn't even specified as a water-resistive barrier but at this point late in the game it's all I had. Therefore, its edge detail needed to be perfect or I'd be getting more water into the plywood. Especially since my lower Grace layer ended shy of the deck edge and *didn't* drop over the fascia as shown in the diagram.

That same Grace detail document also contains another vindicating note:

	Repair all holes left from removal of toe boards, roof jacks, etc.
Well, there you have it in black and white.

Panels prepped and lined up Much of the morning was spent prepping panels: cutting to length and doing the lower-end bend, and lining up stacks of them ready to go up. Today he only had two guys on site so once they got ready to install these I handed most of them up from the ground.

Seating pans on the shed Clamping down pans on the shed
Work proceeded fairly fast along the shed, seating and clipping panels one after the other. The move to slide the panels up and seat them was a bit risky -- crouching near the edge of the roof and *pulling* against the end of the panel. Mostly he tapped them up into place with a rubber mallet, extending the reach with that and keeping him a little farther from tipping over the edge. The guy apparently kind of grooves on the sketchy positions, though. It hasn't killed him yet.

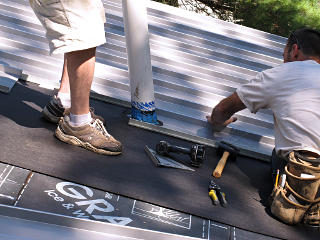
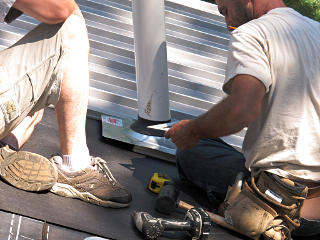
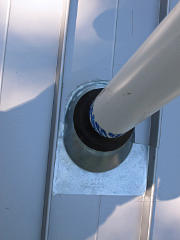
Half-panel to meet stink pipe They reached the stink pipe, which got a special panel made a little longer and cut in two, with its ends carved out to lap around the pipe base.

Trimming stink-pipe flashing The flashing fitting only needed about a half-inch trimmed off one side to fit within the panel ribs.

Stink pipe flashed in Stink-pipe done, or as done as he was going to get it.

Gaps in pipe caulking He had left a few gaps in the caulking around this, which I fixed later. Here I was also checking that the rubber ring really had a solid seal to the flashing piece, as water coming down here fast could conceivably coast up the slope of the galvanized and try to dive under the lip.

Feet just barely stick to panels At this point I had started walking around on the panels. This was one of my concerns about the standing-seam -- would I be able to get onto my own roof and move around without sliding off? I found that I was able to just barely stick to them, at least well enough to walk around and my extra margin of safety could be had by simply reaching down and grabbing a seam. In this weather my feet were a little moister than they'd be in cold, which I discovered much later made things a bit more slick.
For the record, shoes are *more* slippery -- at least the composition of the rubber on the sneakers I had on hand. Shoe soles to stick to metal roofing have to be just the right type of rubber formula, and that can probably only be determined by experimentation. For example, the roofer's shoes happened to be sticking pretty well, and his helper was sliding all over the place. As a data point, Vibram is not bad for this purpose.

The last thing one wants to do, however, is sit down -- any kind of cloth doesn't stick well at all, and immediately starts sliding down. Soft rubber and/or flesh contact is about the only successful friction mechanism here.


Switched to roofing paper Somewhere around the stink pipe they had run out of tri-flex, and instead of waiting until they could get more of it the roofer just switched to plain old roofing felt. Because it's what his daddy used for 40 years, or something. I didn't bitch about it although maybe I should have; this seemed like a casual compromise in materials that maybe wasn't right for this job in the first place. At least *something* was still going over the ice & water to keep the panels off it.
The other downside of this was that where he had been trying to minimize stapling into the tri-flex, with the paper he went absolutely batshit crazy with the tacker. He said he wanted to be sure that the stuff wouldn't tear off under them walking on it.

In retrospect, this was just fucking lame. More holes in the Grace underneath, and more *steel* to scrape against the underside of the panels. He should have brought more Tri-flex that morning or run out for additional supply that afternoon. Well, you read it here first. We'll see how this all works out twenty years down the road.


Handing up panels The last of the panels were handed up, by the helper kid instead of me this time. The length was really convenient -- try doing this with shingles!

Roofing themselves into a corner By day's end, the guys had nicely roofed themselves into a corner.

And at that point, they *ran out of panels*. With three or four left to go. Apparently the roofer hadn't quite planned right for accomodating the wing-walls and using partial panels in various places, and hadn't ordered enough from ATAS. The remaining ones would have to be backordered, meaning a substantial delay until the roof could actually be *finished*.

However, they still had some other parts to work on so they'd be back the next day to finish up what they could.

Meanwhile, our discussion about the shed-dormer end pieces and the fact that the cut-offs from its panels were substantially long inspired me to get going on the air-conditioner hutch project. Here was my chance to make its little roof match the big roof, which would just be hilarious. I made sure he left me a few of the cutoffs, where he would have otherwise added them to the aluminum he recycles. The shed-dormer overhang didn't quite cover the condenser and plenty of drip had been landing on the outer edge of the box every time it rained. The enclosure is designed to be fairly weatherproof but having that much water hitting it that hard couldn't be good for it long-term, so I wanted to work toward getting it under better cover soon.


Trying to un-warp boards I already knew the dimensions I wanted for the cover -- 2 x 4 feet, and just a simple single surface would do. While the guys were paneling the shed-dormer, I brought various materials out into the backyard and started noodling how to put this thing together. It would be built almost entirely from the project's scrap wood I saved.

As the top would have a tilt, I wanted to pre-plan for that in the supporting framework. One of the 2x4s was a little warped and I figured that one end would already match the desired angle and the other would get forcibly untwisted a bit with a framing clamp as the top got screwed together. It worked out okay, and with that pre-stress on it the wood would likely straighten right back out over time.


Condenser hutch concept This was the vague concept, although supported on posts a little higher over the condenser box. Enough to keep rain off, but not mess with airflow. And obviously it would need a waterproof upper skin.

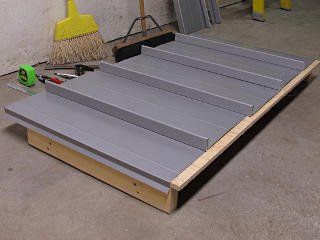
Score-n-break cutting method That evening I started putting the rest of the hutch top together, first making the roof panels for it. I used the score-and-break cutting method, bending the panel over a sharp edge after slitting the rib parts, and it worked quite well. The only other tool needed was a short steel straightedge to sit down inside the panel to run the blade against.

Developing a roof-let for ODU Development of the rooflet went pretty quickly. I bent the drip-edges at either end on the brake in the backyard, and before it all went down onto the hutch for real, I ran a layer of his vaunted tar-paper underneath it as underlayment.

The panels really do click together in a really satisfying way. This short video demonstrates that.


Panel junction and custom clips In running out of panels, the roofer had also just about exhausted the supply of hold-down clips -- there were about eight left from that big box, and I didn't want to swipe them for this in case he needed them up top. But it was easy enough to bend up a few functional clips out of more of the roofing metal and whitney-punch some holes for screws. Here's an end section of how it would go together, using my own cutoffs from the drip-edge pieces as a demo of the seam interlock. Again, constructed entirely from scrap, even down to the screws themselves which were probably some dropped ones that I had picked up off the ground with the magnet.

    Roofing, day 6

I showed the roofer my little creation the next morning, and he definitely approved. I felt sort of like the small child with the plastic toy workbench and the tinkertoy wrench and screwdriver, going "look, I can do like daddy does!" But just watching the real roof go together had already taught me a lot about working with these materials, and I think I was doing a pretty precise and well-built job on it even if the methodical attention to detail would take me far longer.


Forming custom gable cap The roofer had bigger things to attend to, one of which was fabbing up our custom gable-end caps for the lower rakes. Here's the promised section picture of one -- pretty simple, really. The stock end-cap piece was ripped a little narrower and the upper part given a 90 downward to come inboard a measured amount and clamp down over the endmost roof rib.

Fitting gable-end parts They ran these in where needed, and the fiddly bit was shaping a closure at the lower end. Here it's in process, with a bit of excess hanging off in various directions that got trimmed off and bent more neatly.

Cutting 80-some Z-bars Despite the roof not being complete, they wanted to get as much of the ridge cap closed off as they could. To prepare, the roofer had to cut about seventy small sections of z-bar to sit down into each pan on both sides along the ridge.

Prepped Z-bars These were further prepped with pieces of the double-sticky butyl tape, to help them seal down against the panels.

Another look at the felt paper here with lots of staples in it, not all of which were even fully seated.


Guys on the roof Fastening in z-bars
The two of them started working along the ridge installing the z-bars. We were all wondering why ATAS forces their materials customers to cut all the z-bars for this application on-site, rather than supplying pre-cut ones already accurately matched to the panel widths. I could see site cutting introducing the possibility for a lot more error if not done carefully.

From the street, something about the scene made me immediately focus on the fact that there were guys working on top of the roof. Maybe it's all the parallel lines converging in perspective, that immediately draw the eye upward. In fact I noticed this effect several other times where a glance at the front roof seemed to always bring features of the ridge line into prominence.


Starting ridge cap The roofer cut a separate little section of ridge-cap to go over the wing-wall part, figuring to integrate that into the main center one. Meanwhile, the helper installed the foam backer pads behind the z-bars.

Fitting ridge cap Then they started install the main ridge cap. It's a simple bent piece with two little open hems that are supposed to hook over the protruding ends of the z-closures and shelter a fairly generous volume of everything under the cap. It gets final-fastened in the middle of each z-bar with a pop-rivet for extra holding security.

Ridge cap is too wide Except that the cap piece wasn't fitting right -- it appeared to be too wide to actually clip in. Either it was intended for a 90-degree ridge which this at the shed dormer isn't, or the cap had gotten slightly squashed in the shipping box, or the z-bars had been mounted too high. In theory, there was some spec measurement for distance from peak for the z-bars that they had followed. Maybe it was a combination of things.

Forcing ridge cap to mesh With one side already riveted down, the roofer grabbed the lip and hung his ass way overboard to try and pull the cap up against the z-bars while the kid got a rivet or two in. With this initial realignment done, they could then continue down the line.

This felt a little ghetto to me; the ridge cap should have fit better from the beginning without being forced.


Ghetto ridge-cap end Even more ghetto was the junction between the small end ridge-cap section and the main one. This is where those slightly elevated ends of the ridge became a problem. The roofer tried to pretty up the metal with some slitting and bending, but if you look at this carefully it's a total reverse flash with the end piece sluicing water right in under the main part of the ridge cap. The end piece isn't even over its own z-bar. The whole area looked like total ass from the front, with the main ridge cap sort of bent oddly all the way along.
The roofer gave me the impression that a lot of this was semi-temporary and would get fixed up better later after the final panel delivery happened, but other than some finalized fastening at the ends I didn't see what else could really be done.

I was having decidedly mixed feelings about the roof in general. On one hand standing-seam metal would be a great long-term solution and totally beat the pants off any asphalt shingles, and the new assembly contained several waterproofing layers backstopping each other so that I *should* never see water in the attic again. And overall the roofer had been doing a pretty nice and robust installation job, even accomodating my what-if questions. On the other hand, across the various trade segments involved there was a whole lot about the roof that could have been done better -- without any particular extra work on anybody's part, just by paying more attention to stuff they already knew how to do.

Fortunately a lot of what's been bitched about has to do with areas out at the edge of overhangs, where problems are less likely to affect the house itself. But I'll need to keep an eye on the soffits and siding for any evidence that water might be going astray.


    Roof pre-testing

New drip pattern, finally About three-quarters of the ridge cap got put on before the roofer ran out of things really needing to get done before the extra panels came in. He stuck some tarpaper over the remaining open panel ends at the top and that and the Grace could keep the unfinished parts sufficiently water-resistant for the intervening time. We actually got really lucky on weather over the week most of the roofing happened -- basically no rain the whole time. It rained a couple of days later, and you can bet I was right out there with an umbrella and the camera checking drip patterns. *Finally* the water path behind the trim metal had been mostly closed off, and the drip was all coming off the end of the overhang like it should. Yay.

Check the big pic for odd inconsistencies in how the gable closures were terminated at the lower corners. The guy that showed up for one day did one of them, and the main roofer did the other.


Bursty drip pattern The drip pattern off standing-seam was interesting, especially on the lesser-pitched part. Water would sort of pile up along the length of the panel, and then as some part of it started rolling down it would trigger a little cascade that gathered speed on the way down, the result being each separate panel end peeing substantially outward in amusingly random little bursts.

Eventually there would be a gutter under this whole thing and then it wouldn't matter how it drained. But for now it was still all landing on the heat-pump. I really needed to get that hutch finished.


Next section   (21)
Index

_H*   121213