Prius 100,000 mile maintenance

==>   Part 1: Overview;   tires/brakes
  Part 2: Underhood
  Part 3: Headlights: the Big Schnoz
  Part 4: Inverter pump
  Part 5: Coolant testing
  Part 5b: Engine coolant
  Part 6: Transaxle / driveline, references


Overview

It is a notable occasion when a car turns 100,000 miles; I managed to catch the particular moment in my Prius a couple of different ways. [Click the picture to see where it happened!] Six digits is usually not an immediate signal for the doors to drop off or a trail of transmission parts to appear on the road behind the car, well, unless maybe you've bought GM, but it does represent a point in a car's lifetime when various maintenance items should be considered in a reasonably timely fashion and various longevity topics can be discussed with long-timeline perspective.

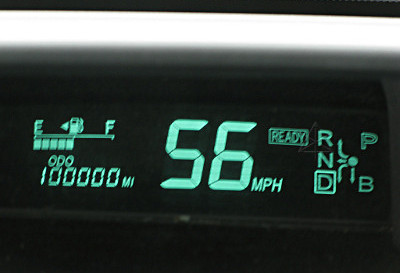
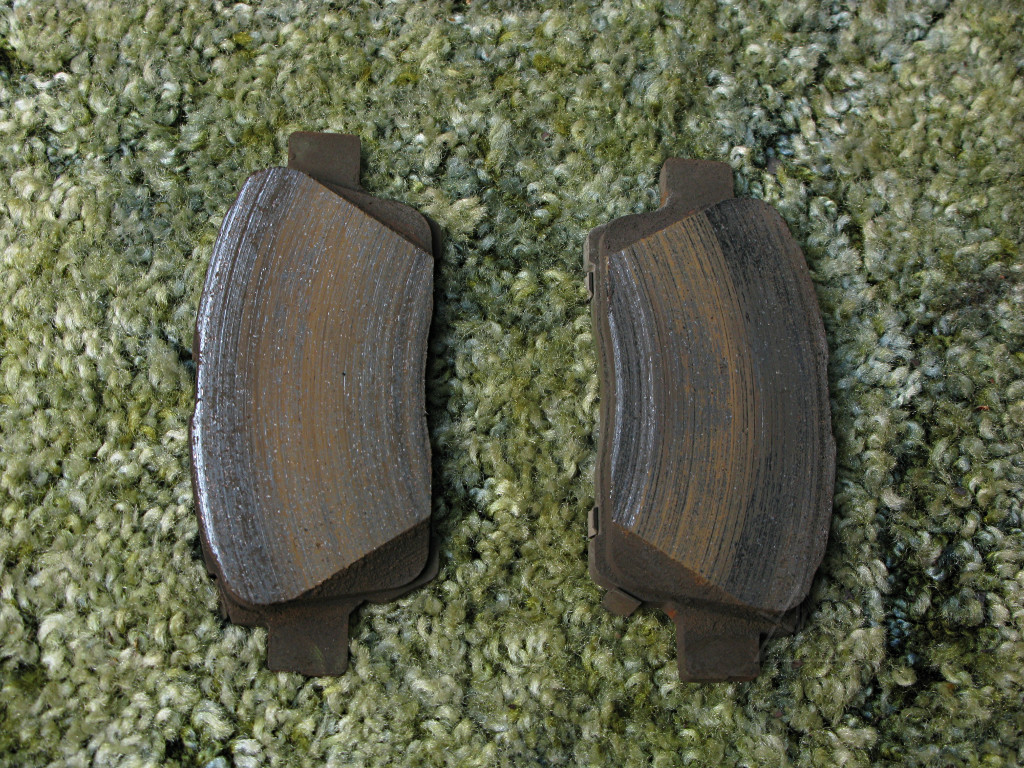
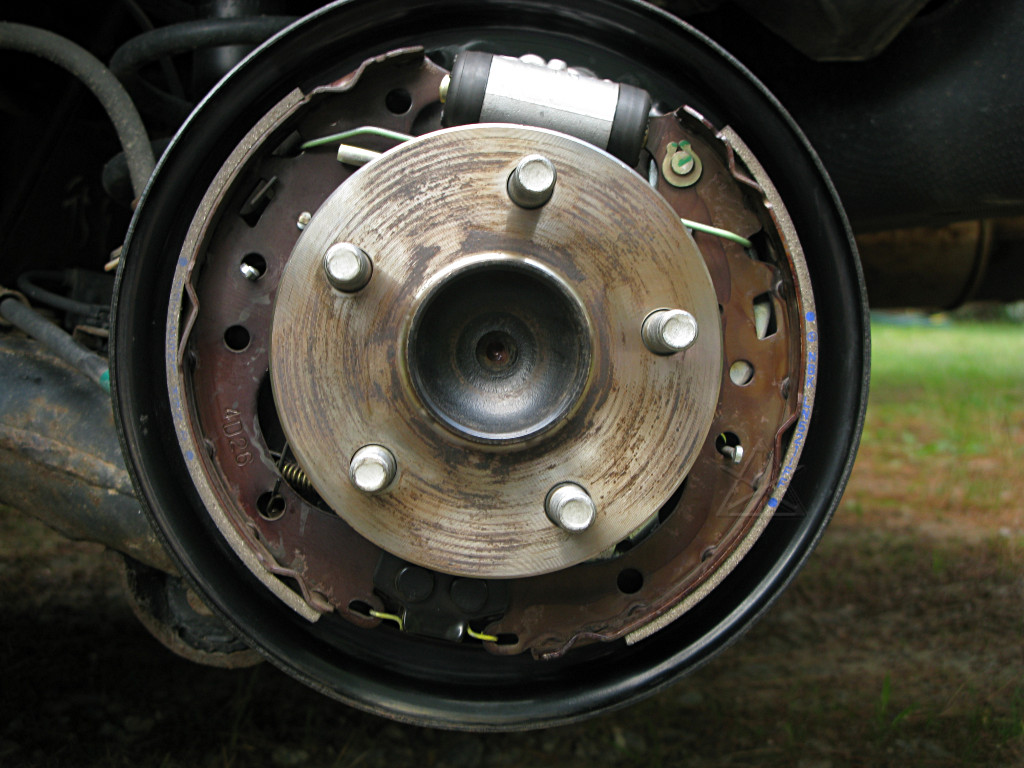
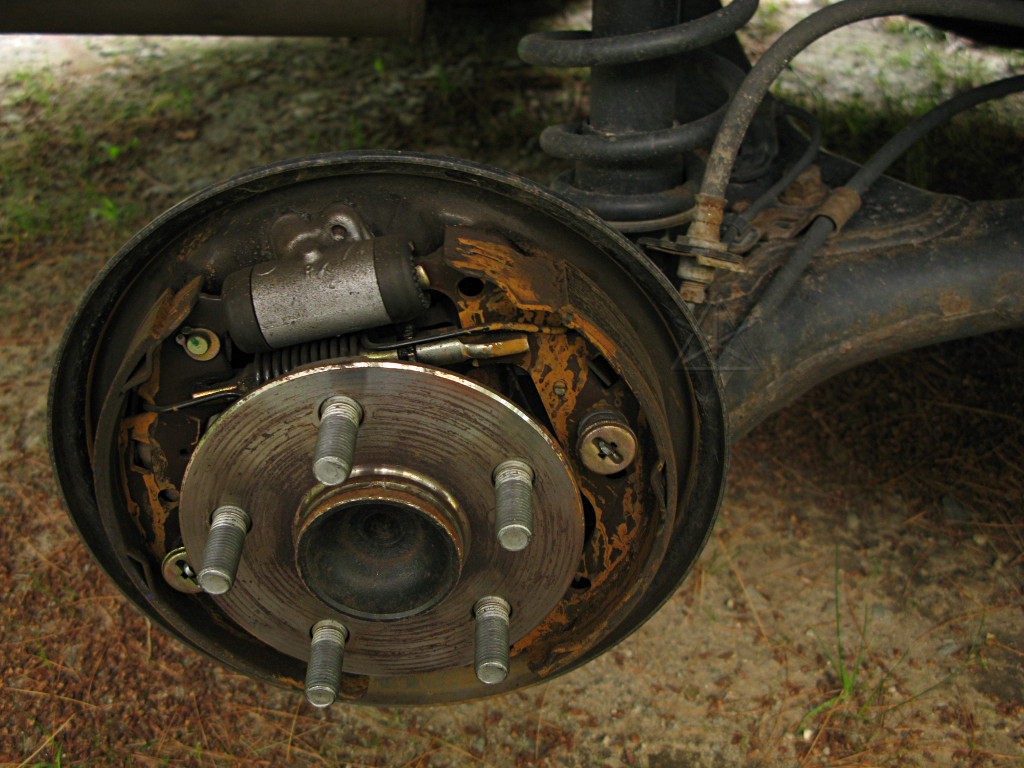
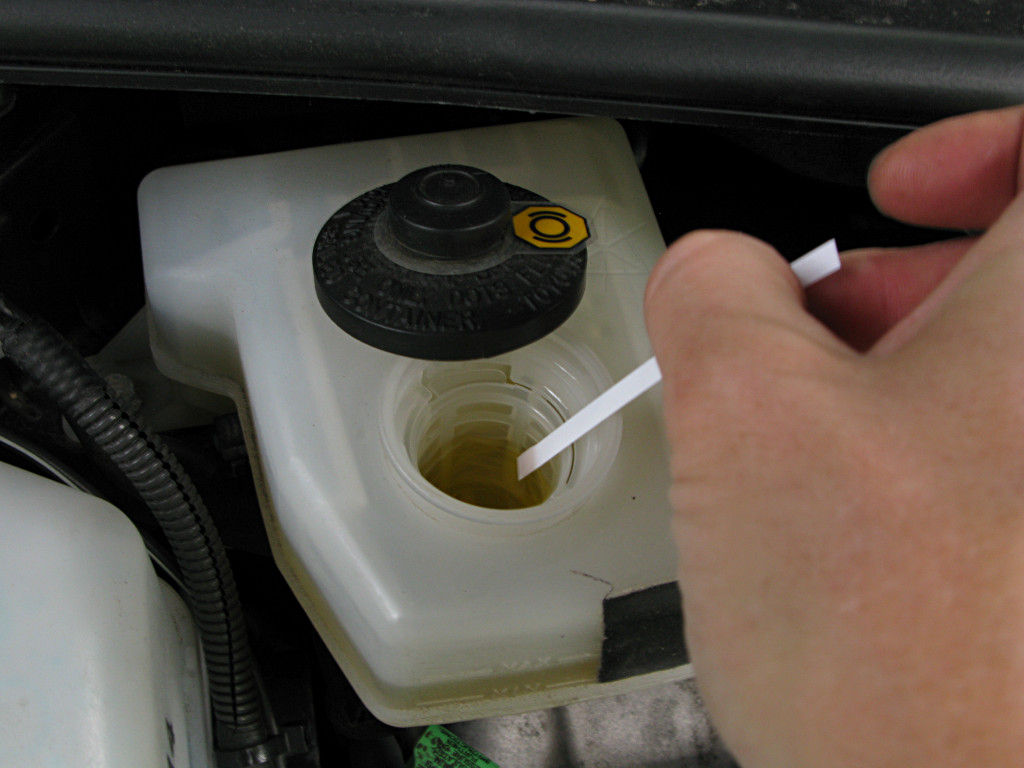
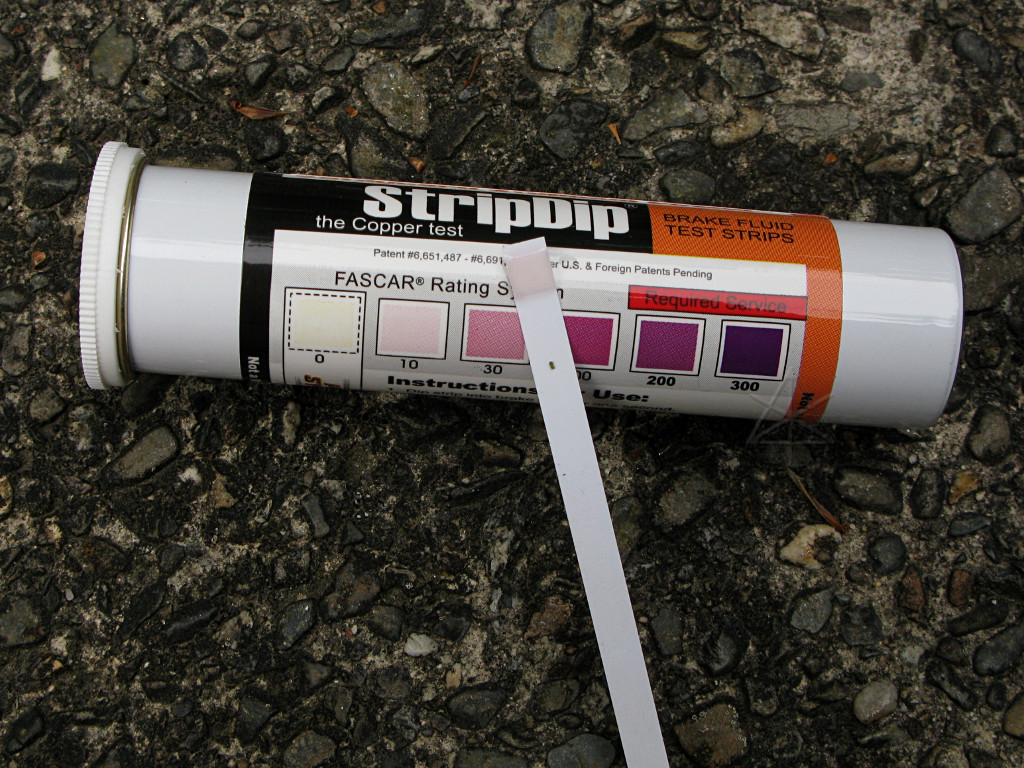
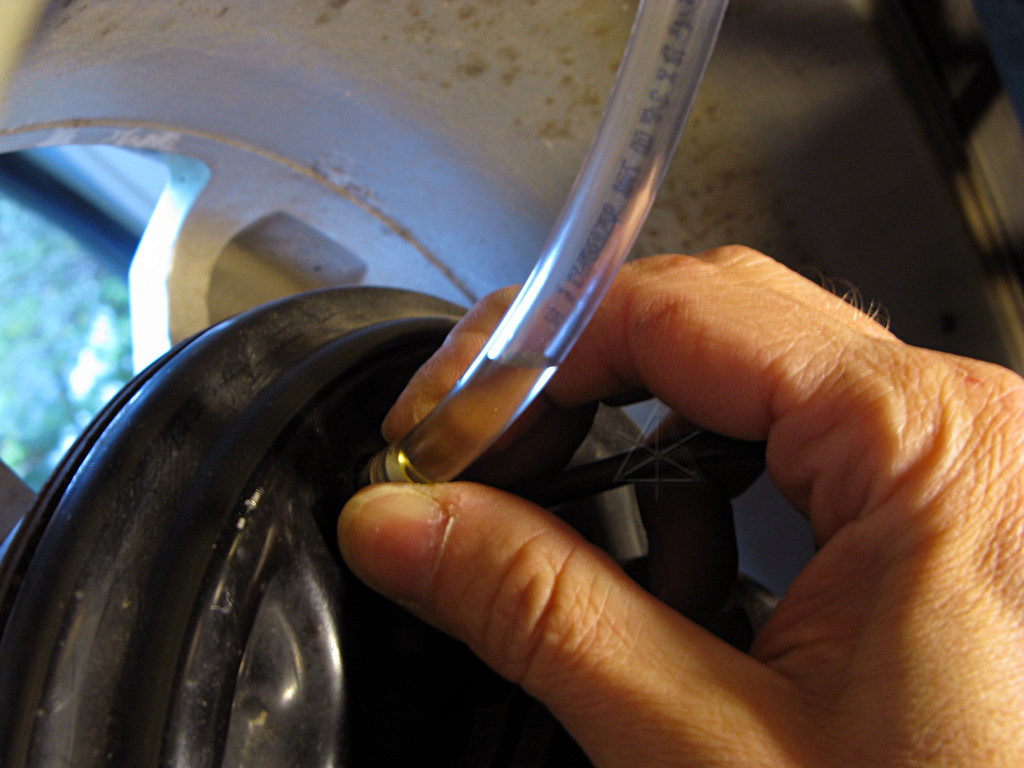
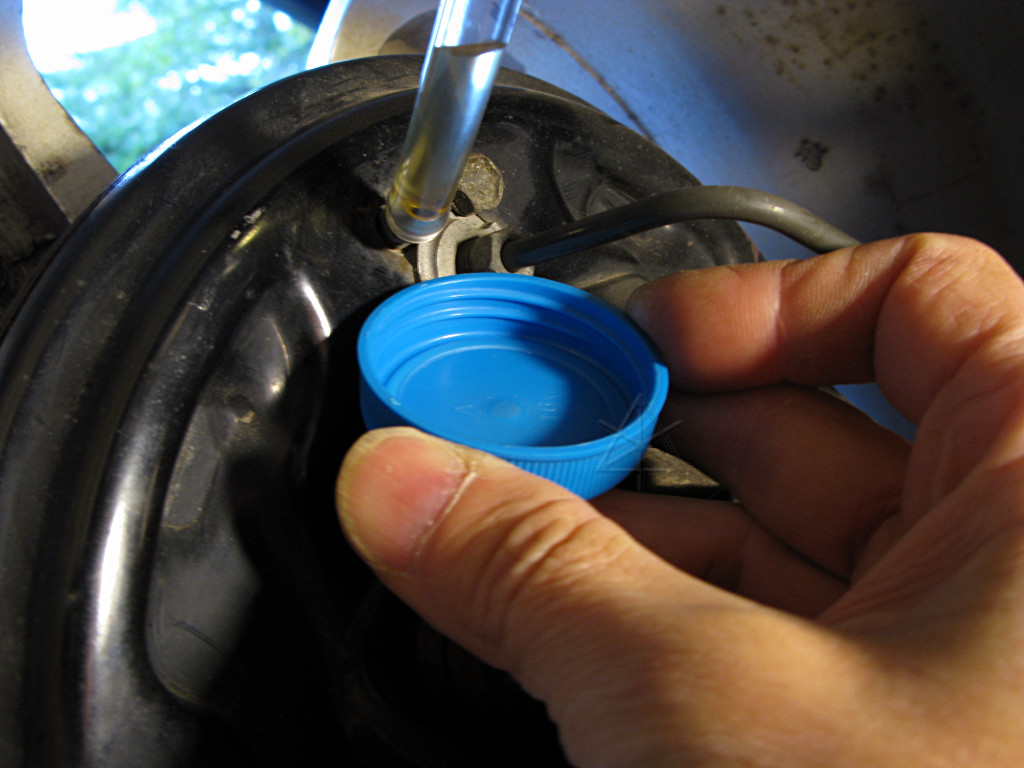
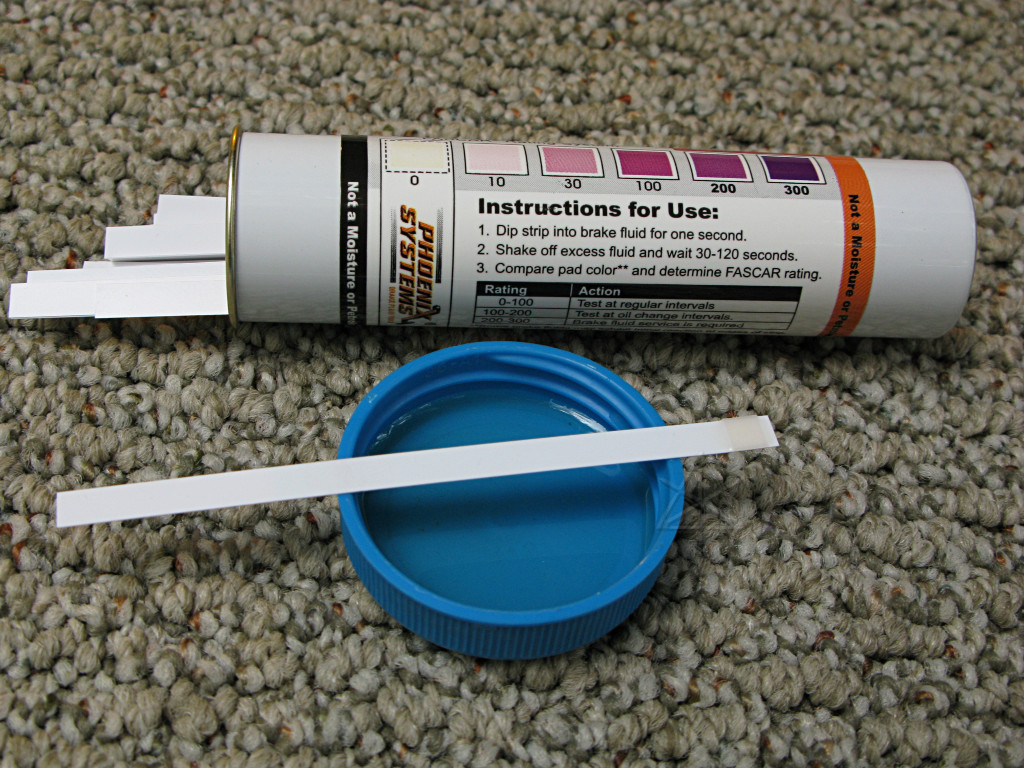
In general, the second-generation Prius has proven itself to need relatively little in the way of maintenance through most of its expected lifetime and well beyond, in stark contrast to many other vehicles, and the maintenance schedule given by Toyota reflects this by specifying little other than oil changes all the way up past the 100K point and then fairly minimal attention thereafter. The owner community has recommended a couple of extra fluid-change intervals that are prudent to take care of a little sooner than Toyota would have us believe, such as getting the factory fill of transaxle lubricant out of there between 30K and 50K, but other than that it's a refreshingly sparse list of things to worry about. But as the '04 thru '09 cars continue to age and fall off original or extended warranty, more owners will be looking to take care of the continuing maintenance themselves or seek out good independent shops who are preferably open to learning from the online community's experience.

And let it once again be stated for the record that about the *last* thing anyone needs to worry about is the nickel-metal-hydride hybrid *battery*, even up at this sort of mileage. Prius battery failures are quite rare. If a cell or two in that unit does eventually succumb to aging or a minor manufacturing defect, replacement packs are now readily available on the surplus/salvage market for less than $1000 and the technically-savvy owner can choose to replace the whole pack or go down to the individual module level and have fun with a bunch of exhaustive capacity-testing. There are a few good stories of both approaches in the forums by now, but in general there is very little to worry about with regard to these batteries [or their environmental impact!] despite all the popular-media propaganda from the anti-hybrid crowd. They're just plain wrong, end of story.

Thus, while opening up and inspecting/cleaning the pack interconnects in this car has been on the eventual to-do list, it will safely wait until later on. It's five years old now and still going strong, after having, at a rough semi-calculated guess, the better part of a megawatt-hour of energy pushed in and out of it. That would be the equivalent to something on the order of over 500 full-cycle charges and discharges of 6.5 Ah at 201 volts, but of course the tight state-of-charge management applied to these packs constrains that to many more narrow "microcycles" and more or less eliminates the effects of overall cycle life. But this page isn't here to talk about battery chemistry; we've got the rest of the regular *car* stuff to take care of.

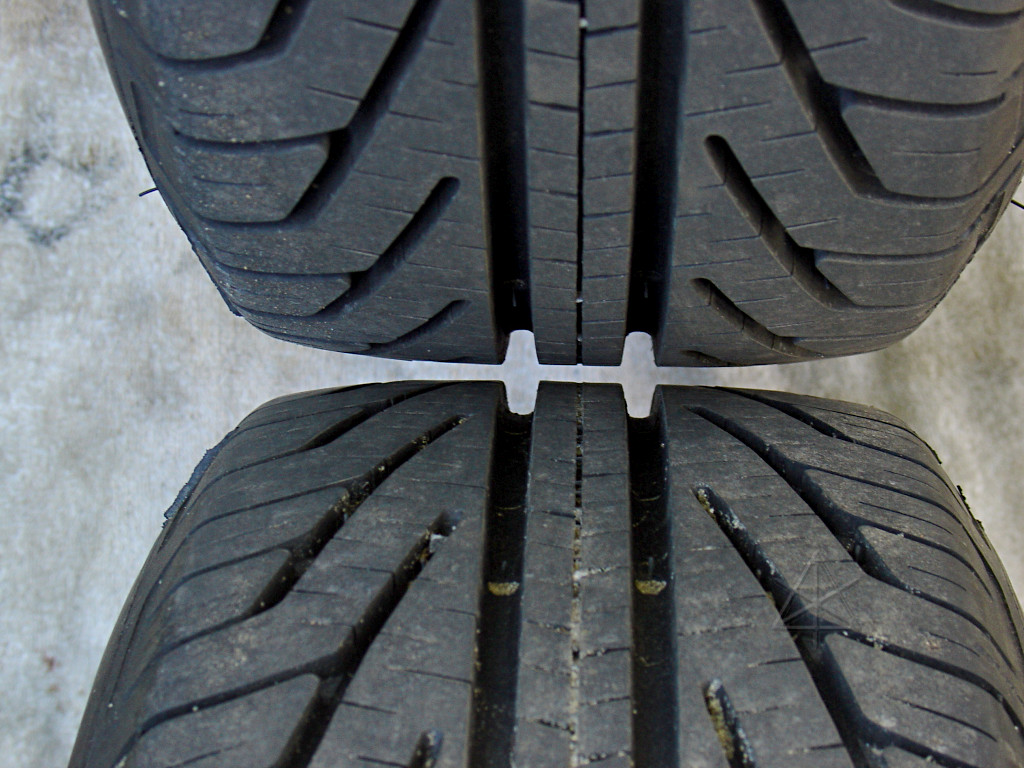
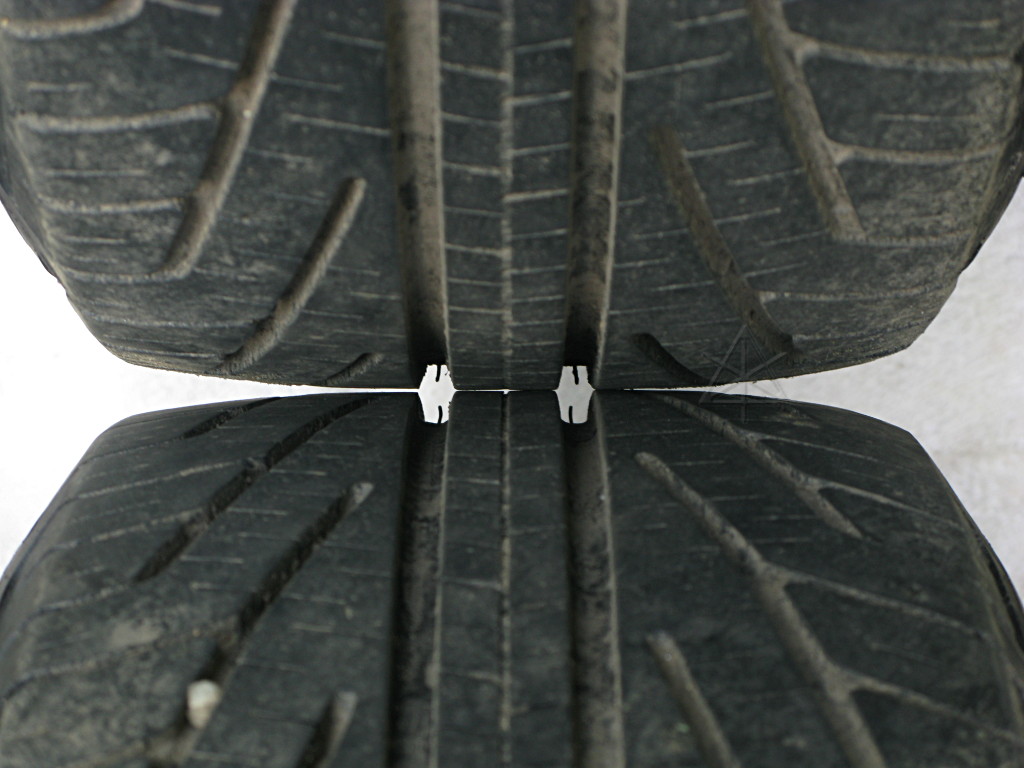
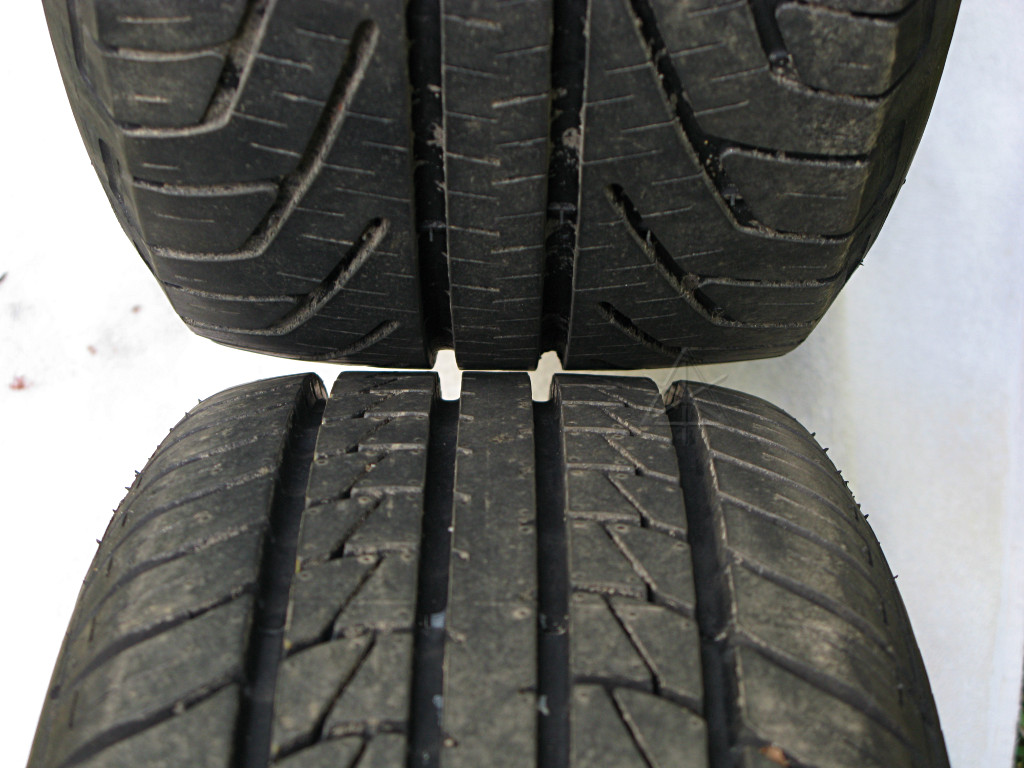
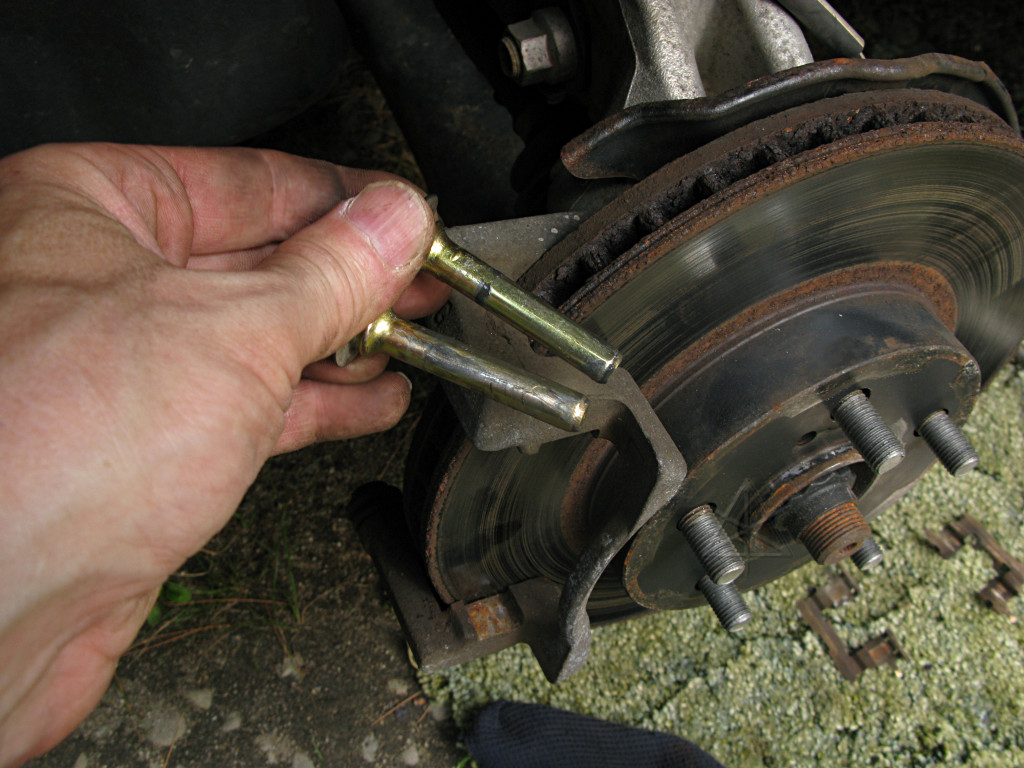
[Small images generally link to larger copies, as usual, providing more detail.]


Tires

The Michelin Hydroedges went onto the car around 42,000 miles, and by the time of this page's creation in late '09 have over 70K on them. Still plenty of meat left on the treads! Over time a few tire rotations have been done, necessarily front-to-back instead of cross pattern since the tread is directional. Pictures were taken of relative tread depth at several of these swaps, mostly to try and detect increased wear on the front tires from pulling the car along the road. Rotation is easy to do at home -- one can use the ugly yellow spare donut to hold up a given wheel while moving the regular tires around, or with two jacks one entire side of the car can be raised and the two tires on the right or left swapped directly. Using the spare provides a good opportunity to check its inflation, an often-forgotten item. 60 PSI or better should go into it, as it may tend to slowly leak down while lying forgotten under the rear hatch tray until suddenly its services are really needed.

Some of the rotation intervals were a bit longer than they should have been, to put it charitably. Somewhere around 76K I did one and immediately noticed a loud "wooba-wooba-wooba" sound coming from somewhere around the right side of the car while driving, peaking around 18 MPH when whatever was making the noise struck resonance with the suspension parts and/or body. Closer inspection and feeling along the inner part of the tread revealed that the tread blocks were becoming a little bit feathered -- where more wear was happening at one edge of each block than the other, leading to slight height mismatches between adjacent tread-block boundaries and a generally not-perfectly-round tread surface. The most noticeable wear appeared to be on the inner half of what used to be the rear tire, and the feathering direction strongly suggested that the right-rear hub was toed-in just a little too much and making its tire "crab" ever so slightly sideways down the road. This affected the inner part of the tread because the rear wheels have some negative camber [e.g. tilted inward] relative to the front wheels which are pretty much dead-vertical and thus the rears are taking most of their load on the inner half of the tread. Swapping wheels into a different camber situations suddenly brought out the effects of the feathering much more strongly.
Toyota claims that anything involving the rear axle cannot be aligned, the entire rear axle has to be replaced to correct any problems there.

That's total bunkum.

At somewhere around 90,000 miles I managed to realign the rear hub, using some shims generously provided by Bob Wilson from a kit of same he had purchased. Unfortunately I didn't get any pictures of this procedure but basically it involved finding a long straight board, laying it carefully against the tire sidewall and seeing how that matched up with the rocker panel of the rest of the car. Without the shims it definitely showed that the wheel was pointing somewhere toward the right-hand headlight, i.e. not straight; once the correct shims were slipped in behind the front two bolts for the hub mounting plate and everything tightened back down, the board lay exactly parallel with the car and I declared the problem fixed.

But it's taken 20,000 miles and another couple of front/back swaps to very slowly start working the effects of the misalignment back out of the tires now that they track straight. I deliberately decided to put up with the noise as an experiment, and also realized that it would take me much longer than most owners to get the alignment fix to "settle in" since I run these tires at fairly high pressures and thus see less tread wear per mile than many other installations. I don't mind a little tire noise, really -- one gets a certain amount of that anyway when running at 55 - 60 PSI in these things, and the MPG advantages and better braking and cornering far outweigh any conceptual yacht-like "luxury" feel that is the only argument in favor of running lower pressure.

This, in fact, is the ONLY alignment work the car has gotten since the check done before I took delivery in early 2005. Still tracks as true as the day I drove it home. And given some of the bumps it's been over, I'm often astounded that the thing has a front end left at all, let alone still in proper alignment. It's one tough little nut. Notably, all the struts seem to still be in fine shape as well -- no leaks or other issues, car still handles fine and doesn't bounce, etc. I expect to have to replace some of them sometime down the road, and when I do there are some excellent writeups in the reference section on strut replacement and suspension mods by other community members. Maybe some future "150K maintenance" writeup will include some suspension work, but at this juncture I'm probably a bit underequipped to tackle that sort of thing.


(Toward front of car)  
Left pair, 6K on the tires Right pair, 6K
Left pair, ~ 70K on the tires Right pair, 70K
*Note: rear is no longer a Hydroedge!
This pretty clearly shows the Hydroedge treadwear changes to date. There were some interim sets of comparison pictures, but looking at the current endpoints -- a fairly early state versus the present 110+K -- is more instructive in terms of seeing overall tread wear rate. Here we see wear that is pretty much dead-flat across the entire tread on all of them, as opposed to the edge wear we easily see from running at the door-placard pressure, and while I've pulled the occasional fun lateral Gs around the mountain-road bends I'm generally pretty gentle on tires so the overall wear is fairly low. But after 70K on this set there's definitely less rubber on the treads than they began with.

About a thousand miles before the second set of pix, the right-rear Hydroedge was lost after probably backing over something sharp on one of the 2009 summer road trips and sustaining a puncture that was declared too close to the sidewall to patch. So I wound up with one oddball cheap POS Korean tire just to get me back on the road, which astoundingly enough doesn't cause any handling problems so rather than replace any more perfectly good remaining tires I'll just run with the odd one, hopefully for the remainder of the Hydroedges' useful life. It's a larger circumference than the Hydroedges, screwing up my differential-speed TPMS something awful, but I'll live with that for now and just learn a new pattern in the green diamond.

The cumulative wear on the right-side front Hydroedge can still be seen, and none of them are down anywhere near the wear-indicator bumps yet. They're supposedly a 90K life rated tire anyway.


Brake inspection

All brakes are taken apart, eyeballed, and cleaned per the procedures outlined in the 50K brake check page. The slide pins for the front calipers are still quite clean here, although at this point needing a bit more grease applied before reassembly. It's important to keep them moving freely so that calipers don't wind up frozen in place and pushing only from one side or the other which would really stress the wheel bearings.

In general it's good to just remove a car's wheels once in a while and make sure it can still be done by the owner, especially if it's been anywhere near a garage where they even waved an impact wrench toward the lugnuts let alone applied it. It's an opportunity to clean off the backside of the rim, wipe rust away from hub parts, make sure the rotors or drums can still come off easily, and check the lug nuts and studs. I keep a light layer of anti-seize on the lug threads, ignoring the fervent and quite unfounded cries of those who insist they must go on dead-dry. They can go pound sand. *I* know the value of thread lube and what about 78 foot-pounds of torque feels like through the cross-wrench in my hands *and* I can always get my wheels off myself.


Front pads still in fairly good shape; a little scoring and glazing which doesn't affect their performance at all. The light skin of rust is the usual stuff from the bare steel rotor surfaces after they sit in damp air for a day, which zips right off the first time the brakes are actually used during a drive.

More importantly, the ORIGINAL pads here have substantial thickness left, at 110K on the clock. We can Visually compare them at 50K and now, since I haven't bothered taking quantitative measurements at any of these inspections. Now they're a little further down, but nowhere near what most vehicles would show by now. Here is the best possible testament for A> regenerative braking that stays off the hydraulics until absolutely necessary and B> proper use thereof. These are likely good for another 100K, unless they succumb to plain old corrosion in the interim. With periodic cleaning and lubrication of various contact surfaces, that shouldn't get to be a problem either.

Same with the rear shoes -- lots of liner left, no worries here. Minor cleanout and re-greasing of the backing-plate sliding points is done to discourage rust and make sure everything moves freely.

The right-rear brake and hub sport an unusual amount of fresh rust, in an oddly splashed-about way. I figure this was from running the steel donut rim through heavy rain for a day or two after the right-rear roadtrip puncture happened. Simple wipedown, regrease, and reassembly here.

Brake fluid

On a slightly different tangent ... after 5 years, what state is the brake fluid in? Many people would expect it to be way overdue for a flush/replacement. There are numerous articles and posts floating around on brake fluid and its affinity for water and how the more water content it collects, the more likely it is to corrode internal brake system parts and boil into vapor under severe heating and cause spongy braking. The forums are full of self-styled "experts" telling each other that no brake fluid can possibly be any good after two or three years, and when the ambient babble gets loud enough one might be tempted to start believing it.

Not so fast, bucko.


A company called Phoenix Systems is trying to debunk all that and offer that a much better indicator of impending brake system corrosion is dissolved copper, which comes from various parts of brake lines and valves and other plumbing as the corrosion inhibitors in the fluid lose effectiveness. After a bunch of studies, SAE papers, and testing hundreds of real-life on-road vehicles, they've come up with these test strips that turn various shades of purple to indicate parts per million of copper and are supposed to be about the last and best word on the condition of a car's brake fluid. Dip, wait, and compare; it's supposed to be easy as that.


Interestingly, even after 110,000 miles, this strip says the fluid in the reservoir is near-perfect and five years of sitting here and circulating through the rather complex hydraulic system in the Prius has hardly affected it at all.


Okay, there has to be something bogus going on here.


The NCF does mention that some parts of the brake system are made from newer low-corrosion materials such as phenol-resin wheel pistons, but most of the other parts -- valves, pumps, tubing -- are likely the same typical brake plumbing found on any other car. And most importantly, if the brake lines are made in the standard manner they've got plenty of copper to deliver into bad brake fluid that attacks it. While the Phoenix information is quick to point out many times over how their strips are NOT a moisture test, one would think that after this amount of time *some* sort of perceptible change would have happened. On the other hand, the stuff in the reservoir has been exactly the same golden color the entire time, whereas the brake fluid visible in many other cars is often a deep brown crud color and still goin'.

Hmmm. What to do, what to do.

This prompted a bit of deeper study on the subject, and eventually a call to Phoenix and a very entertaining and productive discussion with one of their staff. They have some interesting whitepapers on their website about brake-fluid chemistry and the product history, which I list in the reference section. I had read some of these before calling, so as soon as our conversation got going the guy knew I'd at least done a little homework. And he was very intrigued to learn of a car showing virtually *no* dissolved copper at over 100K miles! Perhaps there was something going on here that was about to shoot holes in the theory that PPM of copper in brake fluid advances fairly linearly over time no matter what you do? I floated the idea that since the lines out to the wheels are long dead-ends, perhaps the condition of the fluid at the wheel cylinders might be different and any changed chemistry there might never get the chance to make it back to the rest of the hydraulic system and the reservoir. Clearly, we agreed, the right thing to do was draw a sample at one of the rear brakes, to get as far away from the reservoir as possible, and see what was going on there.

Meaning: open up one of the bleeder fittings, which I've never done.

It is possible to become VERY paranoid about screwing around with the brake hydraulics at all in a Prius, as all the forum pundits basically agree that anything involving bleeding the system needs an OEM-level scantool and strict attention to the procedure in the service manual. However, a DIYer's best tool is a solid understanding of any system, and what one can or cannot do with the car in different running states. One of the intangible but huge benefits of having the pressure monitors on my own system is that better understanding, as it allows seeing exactly when and about how much hydraulic pressure is sent to the front or rear wheels. Reading between the lines in the manual section hints strongly that the front brakes are best bled with the brake system depressurized and in its hydraulic-only backup mode, as shown here with most of the solenoid valves in their rest position, but the rears are done with the whole car powered *up* with full boosted brake pressure on tap. And no pedal-pumping, as the brake ECU will promptly send in more fluid to make up for any rear-line pressure drop all by itself.

That has the happy consequence that rear bleeding can be a one-person job.


The bleed fitting has a little rubber cap over it. Well, it should; my car's been missing one of them on a front wheel for years.

Having a bleed hose go upward helps assure that any air bubbles would rise and not get sucked back into the cylinder. The usual trick is to bring the hose over the top of the wheel into a catch container, but since I'm not actually doing a full bleed but only taking a small sample, I simply knot the hose around the hatch strut to hold it up. It's 1/4-inch ID vinyl tubing, found in any hardware store.

It can help to have car's body partially unweighted off the suspension to create more wheel-well clearance here -- which will happen if the jack is placed under the standard lift point near the wheel and cranked up just a little, not to take the entire weight of that corner of the car but just to let the strut and spring lengthen out a little. This creates a generous gap between tire and fenderwell and lots more space to get underneath and access the back of the wheel assembly. The other side is firmly chocked and the car is powered up, and testing done to make sure that the inevitable engine-start lurch when the battery needs charging later on won't topple it off the jack.


This is my official Brake Rock. It's just the right size to bring on a little brake pressure and then jam in between the pedal and brake-light switch bracket to hold that pressure steady. I confirm the existence of rear pressure by a little glow in the pressure-sensor LED, and head around back to do the deed.

As I crack the bleeder and watch fluid slowly seep up, I can *hear* the system re-equalizing and feeding more pressure into this line as the timbre of the high-pitched solenoid valve modulation subtly changes. A fairly quiet neighborhood has its distinct diagnostic advantages.

The idea is to collect just a little bit of fluid up the hose and close the bleeder again ...


... and then dump the result into this for further study.

Even back here, the fluid looks quite clean. Perhaps a tiny smidge of fine suspended solids in with it, or that could just be stray crud from inside the bleeder fitting. This is right out of the wheel cylinder where it's been pushing pistons all this time.


The test is performed ...

... and if anything, comes up with a *better* result than from the reservoir up front, even after a couple of minutes of letting it soak in.

Most perplexing.

If Toyota had designed a whole new suite of brake parts that somehow magically prevented its fluid from degrading over time, they would have likely made much more ballyhoo about it in documents like the NCF and even the maintenance schedule. As it is, brake fluid is never actually *mentioned* in the Prius maintenance "passport" as a service item, leaving even the Toyota technicians to guess and/or try to upsell brake-flush services that might be completely unnecessary.

However, Toyota may have indirectly provided something which extends brake fluid life longer than expected -- the hybrid system! Again, judicious use of regen lets me complete the majority of my trips with stone-cold brakes at all four corners, and only when playing in the mountains or during the occasional yellow-light hard stop do they ever get any real work to do. Finding this excerpt in one of the papers hosted by Phoenix ...

	The thermal effects on brake fluid while operating in a system are
	very important to  the longevity of the brake fluid. When there is no
	thermal activity, i.e. vehicle sitting on a dealer lot for 1 year,
	there is little to no effect of thermal oxidation on the brake fluid.
	That is why brake fluid still appears as if new prior to the vehicle
	being driven. Copper levels have been found to directly represent the
	thermal effects on brake fluid condition in a vehicular braking system.
	   ... The thermal
	effects wear the brake fluid. That is one reason why a vehicle may
	have only 12,000 miles, but due to the thermal effects of the brake
	fluid, as well as others, it may have a "virtual age" to that of brake
	fluid with 30,000 or more miles.  This condition has been demonstrated
	on extreme demand vehicles that are repeatedly subjected to high
	amounts of heat.
lets me more readily believe that there's nothing more magic going on here than a really low usage factor, which is also reflected in the amount of pad wear.

Go to Part 2: Under-hood stuff


_H* 091003