Permeable-pavers driveway

    Day 3

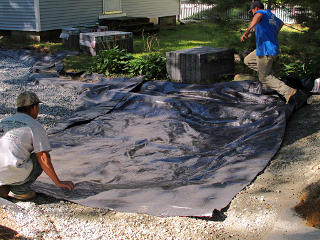
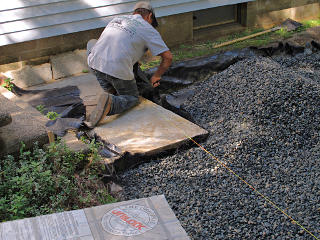
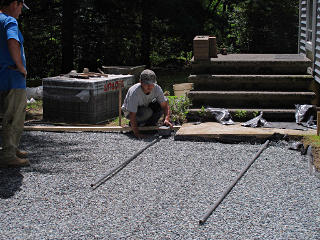
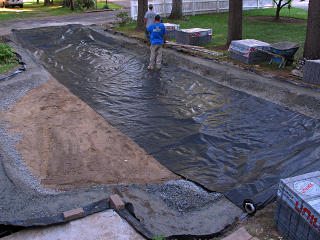
Rolling out filter cloth It was time to build the drainage bed, so the first thing that needed to go down was the geotextile liner. Same principle as the infiltration structure under the street, just a shallower base. And a different type of filter fabric; the GC seemed to favor the plastic woven style over the felt-like stuff.

This wasn't the way the fabric actually got installed; they were just rolling out and measuring lengths here.


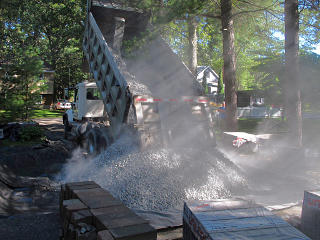
Bigger stone arrives A truck from the same local company that had supplied the road job arrived, with a load of the same inch-and-a-half-ish drainage stone. I found this highly amusing. Unfortunately it was a different driver today, who hadn't delivered to that other job and wouldn't have seen the mild irony of coming back to almost the exact same spot three months later. Anyway, with a similar great whoosh and dust cloud, we got a big mound of rock.

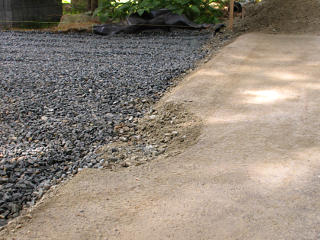
Cleaning up where the dump truck got stuck Because of the fairly sharp rise of the little temporary aggregate ramp, the lowerable mid-wheels of the dump truck snagged and made it sort of teeter on the edge and lose traction on the actual drive pairs, so it became somewhat stuck for a moment. The driver backed down and took sort of a run at it and managed to get out, but chewed things up a bit in the process so they had to fix that back up. They were about to rework that area anyway, no big deal.

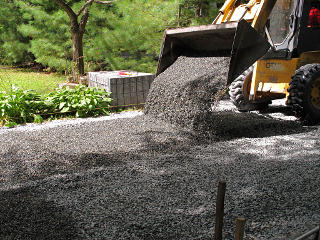
A big mound to work on Spreading first drainage-bed stone
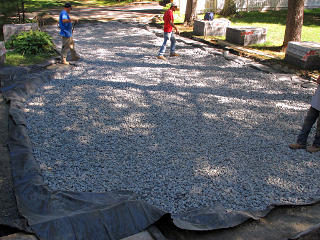
The bobcat attacked the pile and started leveling it out, into a layer which would neatly fill the lower pit area surrounded by the bond beam. Here we see how the fabric was actually deployed; wrapped slightly up on top of the aggregate layer.

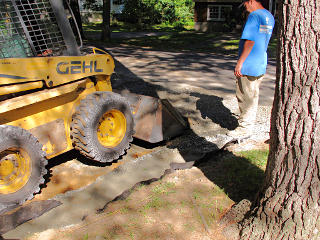
Digging away temporary ramp More of the temporary ramp got taken out, as part of the drainage bed had to come right up to here.

Last bit of filter fabric at end The last swatch of fabric was laid down. I was expecting another truck would be by to deliver more of the large stone to fill this area.

Lowest-level drainage bed Instead, what we already had got spread further into this area until it covered as much of the bottom as it was going to cover in a uniform depth.

Second load of stone Fresh from the washer, all wet
More stone then did show up, but this was smaller -- 3/4 inch crushed, and freshly wet out of the washer over at Benevento so it didn't raise the huge cloud when dumped out. And the truck could now come in over the previous layer and not have so much of a bump to deal with on the way out.

The whole idea here was the same as my downspout drywells and in fact typical of most drainage setups: largest stuff on the bottom, leaving lots of space and soil-surface exposure; smaller stuff on top to bridge the gaps and continuing to work down in size as the layers build up. As long as such a graduated structure doesn't get totally silted up, it will drain really well practically forever.


Oops, hot-top berm got broken Further digging to shape the street-end of the pit met with one small oops: despite my best efforts to keep it visible, the asphalt got dinged and a small piece of the berm got broken out. There was hardly any way the guy in the bobcat could see where it was so nobody's to blame here, but that would have to eventually be fixed up. In general I still wasn't sure how they intended to do the street connection and since I couldn't ask, figured I'd just wait and watch and learn. But I would monitor the process closely, to make sure the fiddly water-control subtleties that I knew about were handled.

Grade strings reset This new layer got spread a little differently -- up on top of the bond bed, all the way out to the edge of the hole to meet the original filter-fabric between the aggregate and the dirt. At this point the grade strings were reset and realigned over the whole area, per the final-grade mark on the original stakes which had for the most part survived all of the ordeal to date.

Trimming filter cloth Now the excess fabric could get trimmed away. Note how the grade line comes in right over the slab, just skimming it to the reference point. The final surface would match this.

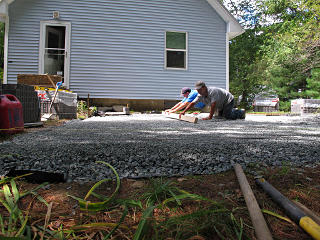
Checking rough grade level Where the big stone only needed to be roughly leveled, the 3/4" stone would need to be uniformly flat and a known offset down from the grade lines. It was time for hand-raking to finalize that, with plenty of measurement checks done along the way.

It's pretty flat out there Yup, it's pretty flat out there. Too flat. And just about the height of a paver block below most of the dirt level. The thing I could never quite figure out is how they managed to order *just* the right amount of stone to fill the depth needed and not have any left over.

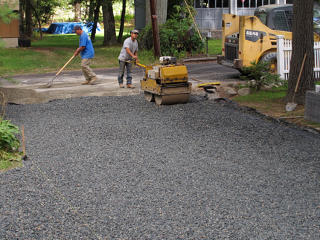
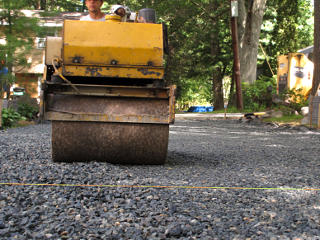
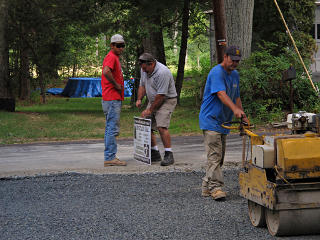
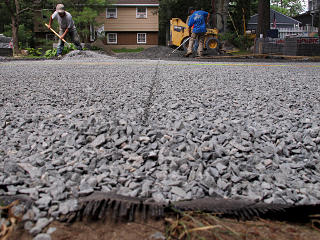
Stone layers get rolled But they weren't done flattening! Time to roll what we had, to sort of lock all that loose rock together underneath.

Gravel noticeably compacts down The layer of smaller gravel compacted down a noticeable amount, presumably transferring some amount of that displacement into the layers below too.

  The thing about a driveway as opposed to a drainage/infiltration pit is that the driveway needs to take heavy loads and not move. Rather than the relatively delicate web of round "river rocks" barely touching each other that I'd favor for the former, the idea here was that the more angular rough-crushed stone would all lock itself in with much more friction and be relatively immovable thereafter, but without any fines in between still have plenty of percolation space. There's a definite science to this, and good reasons behind the selection of material sizes. So everything needs to get mashed down as far as it's going to get, while there's still access to it.

Rigging lawn-sign The project manager arrived during all this, with a promotional lawn sign to set up. We discussed the activities and progress to date and the minor few things to think about.

Destroyed berm Once the asphalt berm was cleared off, we saw that it had taken some pretty good damage. This wasn't going to deflect water anymore...

3/8 stone arrives Pile of bedding stone
So if *more* stone was going to be delivered, what range of size do you think it might be? If you said "smaller yet", you're right. Next came a load of 3/8" stuff, again reducing the size by about half but easily able to lay on top of the 3/4" and meld with it but without really sinking in. This was the bedding stone, the layer that the pavers [remember the pavers? Nobody's actually even *touched* the pavers yet] would sit on.

The PM discussed various things with the lead fellow, among them what would get done about the berm, and took off to go monitor other jobs they had going elsewhere.


Setting screed pipes So if we thought things were flat and level now, just wait. Next was to set up some guide pipes which would help dictate how the 3/8" stone got spread out.

Distributing bedding stone And that would be, very thinly, basically about an inch of layer, just enough to cover the pipes. No, the pipes weren't getting buried in there.

Screeding grade for pavers layer The pipes in fact were part of a simple but ingenious system to screed off that layer into a dead-flat surface, ready to accept pavers. This is actually standard practice, but I hadn't seen it done before. The GC later told me about some large-scale jobs he was on where they were using long sections of train rail to do this sort of thing.

Screeded very flat Very, very flat.

Checking bedding height Once a section was done, the pipes could be shifted along and re-set, at carefully measured depths as they were nestled down. At this point leveling was done by simply pushing some of the 3/8" stone into or out of underneath the pipe at either end, and then filling in and around once it was at the right height. If screeding turned up a low spot, it would just get filled up by hand-brushing more stone into the depression and re-leveling.

Little channel left by pipe This left behind little channels where the pipes had been, but they'd get filled in later.

Whole bed screeded down After a while they had the entire bed screeded down. Have I used the word "flat" too often here?

At this point we all knew not to walk on this surface, or at least do so very gently if necessary to avoid disturbing this pristine state of things.


Modeling width of edge detail The intended pattern of pavers wasn't going to just be a featureless expanse of "brick lay", they were going to do a subtle border called "runner and soldier" with a line at 90 degrees and then a final rank of pavers butted in endwise which would help containment holding strength. They modeled this at the edge to establish the outermost width, and set strings to guide where the rest of the plain field would start.

Bobcat can handle 2700 pound paver pallet Due to a minor area miscalculation at first it turned out that a few more pavers would be needed, which the crew brought with them instead of having to mess with another whole delivery. These were on pallets, and at upwards of 2700 pounds per I was kind of amazed the bobcat could handle them -- the rated forklift load for the Gehl 6640E is 1913 pounds, but can be quite a bit higher with additional counterweights on the back. The arms can take it.

Therefore they could drop this pallet right on the street conveniently next to where installation would begin.


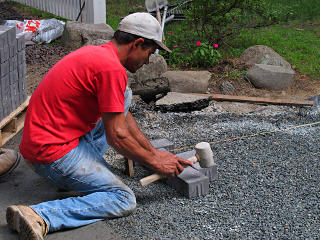
Laying first pavers And the first couple of pavers were officially laid, lightly tamped flat onto the bedding layer. [The edge-pattern model didn't count, they'd get moved again.]

Working the starting corner One bundle's worth down
They continued working from that corner out, sliding the pavers down against each other one by one. Any that were too high could get gently thumped down with a rubber mallet or even just a tap with the next brick coming in, thus shifting the 3/8" stone bed underneath just subtly enough to make things match. Again, a careful choice of size that allowed just the right amount of positioning versatility without loss of either accuracy or infiltration capacity.

The picture on the right shows one bundle's worth, either in place or about to be.

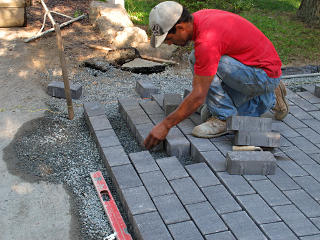
The head guy [red shirt] did most of the laying, with the other two alternately feeding stock to him and laying a few themselves. Obviously they were walking on the newly-down pavers themselves to avoid disturbing the bedding layer, so this is always a "reach over the edge" operation.


Checking paver alignment They built out to a certain point with a straight edge, and rechecked the overall alignment to make sure it was all going the right way and wouldn't accumulate any angular error.

Here we also see how they were making sure to fill in the pipe channels as they worked forward.


Slight initial unevenness The thumping-down process was only rough alignment, and the minor bits of height unevenness remaining were totally unimportant as the whole layout was going to get compacted anyway.

Laying pavers with both hands The PM and GC were right about the laying of pavers being one of the faster parts of the job; it went quite rapidly. At some points the lead guy was going at it with *both hands*, just a wild paver-layin' machine. But never being sloppy about it; he always made sure they were in right and would stop and correct minor bumps in the bedding layer whenever needed.

Quick progress, a little cleanup They used up quite a few of the bundles and it was getting later in the day, so they called a halt about here and went to the next step for what was down already. That would be blowing cruft off the top surface, so that the vibrator plate wouldn't scratch things up.

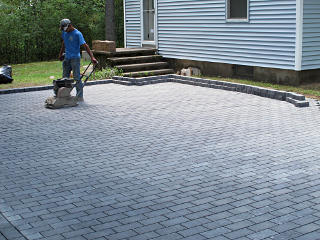
Vibrating paver layer down Unilock recommends a special plate pad for compacting pavers, but the guys have found that nice flat ones like these without a complex texture on top don't need it and hold up just fine. Besides, being just a little rough on them at this stage helps find the ones with flaws in the top surface. And yes, behind where the vibrator passed over they had evened right up. It's a self-regulating process -- a paver that's too high will take more impact from the plate and get squished down farther. And this served the double-duty of also doing final compaction of the bedding layer into the 3/4" mid-layer stone underneath it.

Compacting helps close gaps A gentle hump was designed in near the street end as part of the new water-diversion system, so the gaps were slightly wider there as the pavers marched over the curve. The compactor helped level these out too.

Replacing a couple of blocks A couple of chipped pavers
Some of the bricks didn't entirely survive this, and a few with chipped corners were pulled and inserted in at the edge where half of them would get cut off anyway. None of them actually broke, it was just minor edge nicks. This is high-strength stuff, and it just got a bit of a brute test here.

Re-seating pavers on curve The guy wasn't entirely happy with the match going over the end rise, and pulled a few out to shift them around and reseat them and make it better.

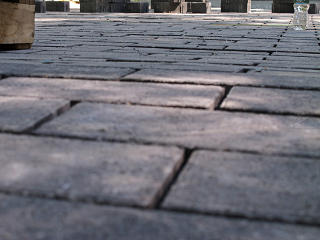
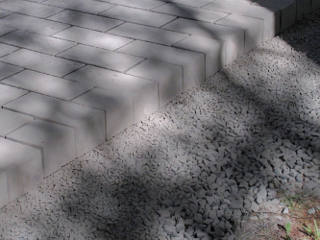
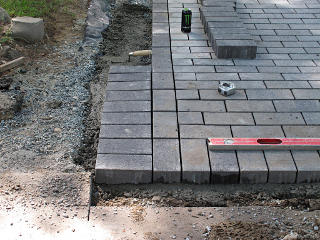
Paver rough lineup This is how they match up. Look close [click for the bigger version] to see how the little bumps nest but keep the blocks apart a fairly precise and repeatable distance. It isn't laser-perfect, but larger obvious misalignments can be thumped or pried in an appropriate corrective direction. The mating bumps don't come all the way to the surface, so once the cracks were filled they'd look completely continuous.

The minor white smudges are a bit of efflorescence from the manufacture and curing process, and would either go away by itself after a while or could be helped along with various special cleaners [e.g. mild acids].


  They cleaned up a bit and trailered the bobcat, as it wouldn't be needed anymore for either digging or lifting duties. There was more room to do that down at the intersection near where the water main work had been done, which left a couple of minor skid marks on the road as after all, there's a reason they call it a "skid steer" loader. They certainly didn't damage anything, far less than kids out experimenting with coefficient of friction [read: "burnouts"] would have. But the Evil Developer came by later and mildly bitched out the crew about that, like it was still "his road" or something. It isn't; he might have paved it, but it's town property.

But along with griping about some tire prints, he looked at the half-laid driveway saying "it's beautiful!" Well, you know how a lot of Italians are about stonework. But in theory he would have eleven driveways to build as the houses went up back there, and it was highly amusing that he asked the crew for a business card.

Not all the 3/8 stone got used -- that was the height-critical layer that *had* to sit at just the right level to bring the pavers to the grade lines, so the rest couldn't just be cheated flat over a wider area. The excess had gotten piled at the corner of the area on the street, adding to a bit of aggregate that was already there and making a bit of an obstruction along that side. My car was already parked along the same general path a little farther up too, so the head guy simply parked his dump truck across the end of the driveway for the overnight and made it all a continuous line of obvious objects that people would simply drive around. He had the crew-cab pickup to get him and the guys home for the night.


    Day 4

Nearing the stoop slab They arrived back the next morning and tucked right in to laying more blocks, almost before I was aware that they were there. Work on the main field reached toward the stoop and back edge pretty quickly. Space was left around features like the slab and edges, as special details would get filled in there.


Slab won't match quite conveniently Now it was clear that matching to the slab was going to be a little fun, as the line of pavers wasn't quite in line with the slab edge. I think that's the slab's fault, having a cockeyed side or whatever. Given the way the work was approaching it, though, the front edge must be pretty much dead-parallel with the street.

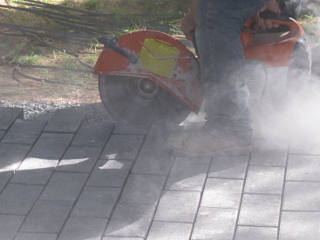
Slicing off ends It was time to start preparing for the border. That meant a lot of work with the diamond-grit saw, chopping off all the half-brick ends sticking out. Apparently Unilock doesn't routinely stock half-blocks for such purposes. You'd think they would, since it must be a pretty common need in installations like this, but apparently anything other than the size we had is a special-order situation with a high minimum. Yeah, I called them and asked.

Huge cloud of dust Cutting raised a *gigantic* cloud of dust, that mostly floated off toward the neighbor's house. I think this was the only misgiving I had about the overall procedure, but we obviously couldn't control the breeze. Fortunately the stuff that flies up that high is very fine light stuff, so it wasn't like it was dropping grit all over everything.

Diamond saw is fast Cleanly cut edge
The diamond blade made short work of this, though, leaving a very cleanly cut edge. He cut such that the little alignment nibs on the shorter runs also got mostly buzzed off too, because otherwise the blocks being cut in half would be too long to match up right.

Then I thought, isn't concrete sawing usually a wet process, if nothing else to cool the blade? Well, there's a water fitting on the saw guard but later when discussing it, they pointed out that wet sawing lets the resulting ultra-fine slurry run down into the substrate and mess up the work. The only other choice seemed to be letting it fly up and away.

Well, the right answer turns out to pretty much be a no-brainer. They need one of these. There's even a video showing it being used with the same saw.


Flipping the half-pavers around The head guy began laying the runners, flipping the cut half-blocks around along the way so there would at least be *some* of the nibs exposed to help align with.

Match edge for runner row The edge to match took on an amusing alternated look, with half the ends covered in dust and the flipped ones still clean.

Cutting the asphalt Pulling up asphalt chunks
As long as a bunch of cutting was going on, they trimmed the street asphalt back even with the damaged part and pulled open a substantial slot's worth of stuff to dispose of. Well, there went my nice little water berm entirely.

They had also brought the little pile of sand seen on the street, and were about to start using it.


Trench for bonding concrete Next was to dig away some of the stone bed around the edges, because that's where the "soldier" row would get concreted in. They didn't quite dig all the way down to the aggregate, just made a gully for concrete to slop into.

Loading the cement mixer Time to get the cement mixer going. Like the roller, amusingly small. He spread out some of the filter fabric underneath to keep the street cleaner, because he knew this would get a little messy. They used some combination of the leftover aggregate and 3/8 without seeming to care what it was -- just for filler volume. They didn't measure anything in terms of cement components, just flung stuff in with a shovel. I guess when you've been mixing concrete for a good part of your life you can do it in your sleep...

Butterin' up the trench Marshaling the soldiers
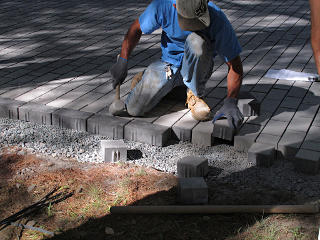
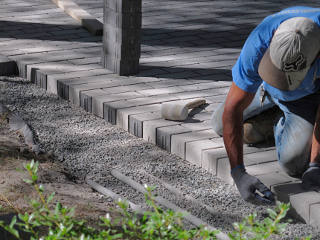
The concrete was distributed along at the edge of the pavers, and the row of soldiers started lining up. This took a bit more skill, as the concrete had to be just at the right level [e.g. a tiny bit high to float the paver, which then got tapped down to the right place]. Like with the 3/8 stone, alignment was done by application of the rubber mallet but concrete offered much finer control. Also here, much more attention was paid to exact matching to make a nice straight row. He used the level itself to buffer the tapping across several bricks at once, top and front edge, and seat them precisely into place.

Once the concrete cured, they'd be locked in place forever and serve to prevent the rest of the driveway structure from creeping outward. Not that it was going to have any particular frost problems and come under that sort of pressure, but any number of other things could put side stresses on the nearby field blocks and make them want to migrate.


Small adjustments Any blocks too far in could be simply pried back toward the edge; the trowel seemed to be the preferred tool for doing all kinds of alignment tweaks, as well as wholesale block extraction when needed, throughout the whole process.

Starting side border Having completed the front row, he turned the corner and started down the side.

Wiggling border to be more even Once those were all in and lined up, he adjusted a few of the nearby bricks to match gaps up with that row better because now the position of the soldier row was non-negotiable.

And note that we're right up to ground level along here, as intended.


Vibrating down second half Then it was time to vibrate down the freshly installed rear half of the whole thing, being careful to not go onto the soldier row more than about an inch as long as the concrete was still soft. But not stay off it entirely, as the inner ends of those blocks had to line up with the final level too. He drifted onto the soldiers by maybe an inch or so, and rechecked all the alignment afterward.

I took a short video (1.2 Mb) of the compaction process, in which the leveling mechanism is fairly clear. Best shown by one particularly high block near the middle of the vibrator's run -- down she goes!


  This was the Saturday starting off Labor Day weekend, and by midafternoon they'd reached a good "unit of work done" stopping place *and* had run out of pavers to lay out for the moment. They'd have to bring a few more when resuming on Tuesday, but for now it was time to pack it all up and go enjoy the rest of the weekend. Yup, they [and I] were fine with them working on Saturdays.

Helping the roller load They'd left the big trailer at the shop, probably with the bobcat still on it, and only had this smaller trailer the sand had come in. Next trick was to persuade the roller to actually roll itself up the trailer tailgate without slipping, mostly via well-timed injection of wooden stakes underneath.

Amazingly, they got it into the trailer I thought they might have been slightly hosed here, but wood and a bit of tugging worked and they got it in. Not sure offhand what this li'l guy weighs but it certainly felt immovably heavy when I gave it an experimental tug upward at one point. Of course it's a roller, with no suspension -- if a car had no springs I'm sure it would feel the same way. No steering, either, one reason that its handle is so long -- you just yank that end back and forth to persuade it to turn.

Days 1 and 2
Next   (Day 5, part)
Day 5 (rest) and 6

Up   (main house pages)

_H*   140905