House energy retrofit project 11

    Day 4

[Click any image for a larger version.]
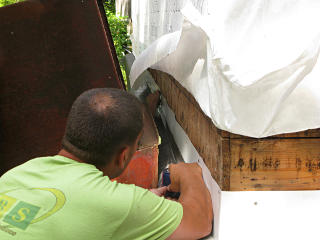
Running metal behind bulkhead With the sheathing and sill area clear all the way around, the guys wanted to try and get the metal base flashing continuous around the house. It was easy enough to send through the basement-bulkhead gap with only a little creative bending.


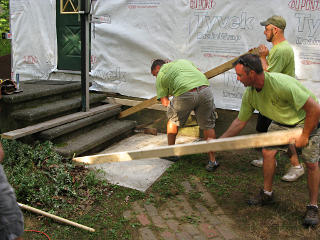
Prying the stair unit Prying the stair unit
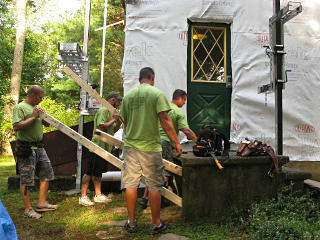
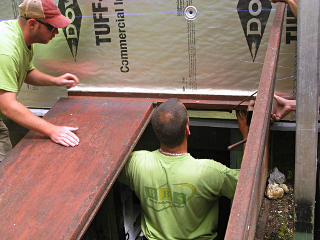
A larger impediment was the side stair unit, still too close to the wall. They declined my offer of the truck jack I already knew could lift the thing in favor of just getting a bunch of guys to huff away at it with long 2x4s. A nice little challenge? "Give me a fulcrum, and I shall move the world!" They broke a couple of boards in the process but managed to inch both ends of the stoop far enough out to work behind.

Rot and ant dust under door Here was some actual rot needing replacement wood, not to mention minor structural fixes. The stoop had sat right up against the old siding, creating a channel against the house that would trap and hold water. The ants, of course, loved this especially with a nice shady and damp area around it under the stairwell, otherwise only ever used by a passing chipmunk or two.

Door sill and sheathing pulled apart The dead wood and the door itself got pulled, exposing the whole area. We realized that there had been *nothing* helping hold the old door up -- it had been delicately balanced across the kitchen subflooring and the rotting sheathing. No wonder the metal sill had gotten to feeling squishy whenever I stepped on it; it's amazing it never collapsed into the hole under me.

The dark void at the lower right is that same convoluted return duct from the kitchen, that had the weird flopped-over dust pack in it. Here I could see the other side of how the returns were constructed, simply using a stud bay void to bring air down around the edge of the subflooring to the basement. Not exactly what you'd call "ducts in conditioned space" as cold air from cracks in the original wall's sheathing would merrily join the flow. No biggie now, this entire mess was about to become "conditioned space".

In theory I could have tried to clean that duct out more from here but I didn't want to get in the way.


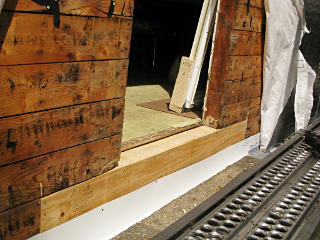
New framing under door The rest of the bad wood got torn off and new framing put down for the door, which in this case would be a new one. More borate was applied in the process. Even if some ants were left inside the structure, once everything was sealed up they'd die because they wouldn't be able to get *out* to find food.

Again, the mudsill itself was rock-solid despite the years of moisture and neglect. The framing and remaining sheathing looked a little ratty but was still solid enough to not bother worrying about.


Sill area sheathed in The sheathing got filled back in with new plywood, and then the flashing could go through on top of that.

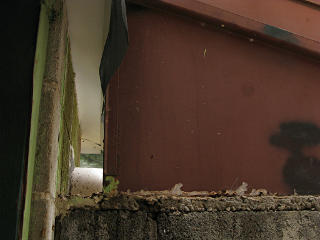
Some wood still exposed The foundation-to-sill connections are weird in this house, with the outer sheathing surface a little shy of the block wall below on the front and back of the house, but sitting rather *proud* of the wall along the east and west gable ends. This left a bit of sill and sheathing still exposed under the flashing metal, and we would have to eventually come up with a fix to seal this up. I had tried to do a little spray-foam work under the siding along here a few years ago, the tattered remnants of which were still visible.

The related oddity is that the visible end joists in the basement aren't right at the outer wall, there's a stud-width of inaccessible void behind them and the lowest sheathing here at the outside, which could make air-sealing along both those walls a little interesting. Here I was primarily concerned with insect protection.


East wall construction More window flashing
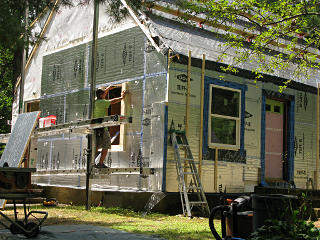
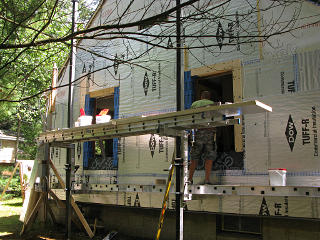
Foaming and window installation proceeded along the east wall, ignoring the door for the time being.

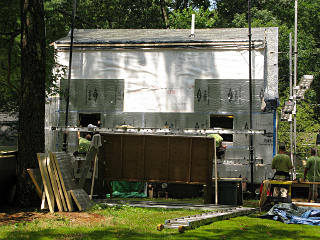
West wall construction It was almost like a race, with two more guys working the west wall the same way, and whoever was on the ground frantically trying to prep and pass them materials.

Prepping a window for installation The west-side guys had one more window to install, but they gave it the same attention to detail as the rest. Here they're in the computer room prepping another unit, before passing it out through the very opening it was about to get installed in.

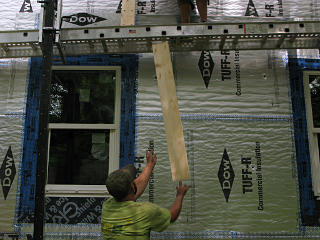
Tossing up a buck As they worked up to the second story, supplying materials began to involve more of that dynamic aerial art as they tossed stuff up -- such as whole assembled buck pieces.

Lining up another window They'd swap between indoors and out so smoothly I hardly noticed -- of course both first-floor doors were hanging wide open pretty much all day, so there was no ceremony in them just coming in and wandering upstairs to help shim and line up another window. I had done what I could to assure them that they absolutely shouldn't worry about traipsing in and out of my house to do what they needed to do, other than occasionally winding up on candid camera.

Materials of the trade A little vignette: tools of the trade when you're doing rigid foam. Caulk, short and long screws with buttons ready to pop into the panels, Dow tape. They were going through caulk fast enough that they weren't worrying about trying to close off tube nozzles between applications, and some of their guns were the type that leave a little remaining pressure on the plunger after the trigger is released. My own cheapo caulk gun had been one of those too, but it eventually broke entirely and I went and got one of the expensive ones that actually works right. As geeky as it sounds, that was one happy day.

Wall cross-section at door opening Foaming had proceeded along to the side-door space, which was still open because we didn't have said side door to install yet. Here's a nice look at the new wall cross-section, though: Kitchen subfloor and interior drywall, old and new rough framing, old sheathing and new plywood to match, one 2-inch polyiso layer, and finally the buck assembly. And at this location, all arranged with a slight downhill slope as the door sill would eventually sit here. Outside of that would go strapping and siding, for a total wall thickness close to ten inches.

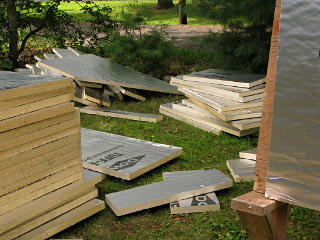
A tumble of foam cuts An impressive pile of foam cut-offs had built up in the easel area, but they were trying to use small pieces where they could for minor fill-in.

Stripped latch screws I went around to check out the new windows a little, and discovered that a couple of the latches felt loose. Not only that, the screws holding them down turned out to be completely stripped in the fiberglass. Okay, now what? I probably could have have come up with a fix but decided that since these were brandy-new, this kind of quality hiccup should have never left their shop and I called Serious for suggestions. More on this later. Bottom line was that I simply tested them all gently with a screwdriver and blue-taped all the ones that were stripped.

Lowest CO2 reading With everything so opened up all day, this was about the lowest I'd seen the CO2 meter reading. It suposedly uses readings below our 400 ppm "hockey stick baseline" to recalibrate its own low threshold automatically, and to reach that it basically has to be in plenty of fresh air which it certainly was this particular day. The temp/humidity between the expensive CO2 meter and the cheapo T/H thing from Amazon has never quite matched, but all these measurement widgets I've accumulated are well enough in the same ballpark that I'm not too worried about it.

Old dead windows and doors Today had built up another collection of dead house parts. A couple of the old windows had sort of fallen apart in the removal process, but none of the glass had broken yet even when they were pitched into the dumpster. They landed fairly flat and I guess the glass was well enough supported in the muntins that it wasn't unduly stressed. I also rescued my Simplex and latch parts off the old door, and even swiped the hinges off the frame because ya never know when a couple of door hinges will be useful.

The old door was a ThermaTru, filled with closed-cell foam inside, and actually had fairly decent thermal resistance and a good magnetic weatherstrip. I had even painted it at some point. But it was rusting out at the bottom, and the wood frame was basically toast. Time to let that one go.


Subtle finger joint in old sill Very close examination of one of the old windowsills revealed that it wasn't a single piece of wood, but an assembly finger-jointed together so precisely it was almost impossible to discern. It's barely visible in the big picture and that's even after a little attempted contrast-boost in post.

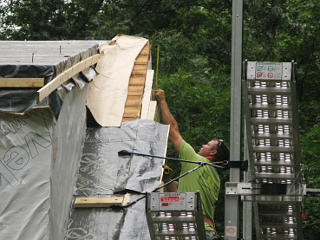
Sawing foam to the roof angle Foaming had gotten just around the rear corner, and it was time to once again do the roof-angle saw trimming.

We can't see it here due to his butt in the way, but the lighting wire over this door had been accomodated and brought out through the foam the same way as out front.


Corner configuration Corner seams in the foam were lapped in a way to prevent any straight air channels to the outside, and each layer got a strip of flashing to seal its seam against infiltration. See the big picture for how how I took this shot!

Note carefully that many of the foam boards are obviously not dead-flat; their surfaces often have a little height variation. This could leave a few small air channels between layers and what they're up against. I would say that alone is reason enough to thoroughly tape all layers, using notes from the field here to mildly disagree with what Joe Lstiburek has recently said on the subject.


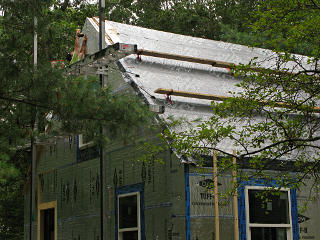
Reaching the peak With the windows all installed east and west, the guys were getting near the roof peak. Note how the foam is exactly flush with the roof sheathing, continuing the plane of the wing-wall roofline.

East peak foamed A last triangle went onto the peak, and the Grace got flopped back over everything. There was still a little work left to do here so they didn't seal it down.

Side door boarded up The new door they thought would show up didn't arrive that day, and they had to do something about the opening. To their query I assured them I was fine with using the front door for however long they needed me to, and they simply boarded up the side and ran some tape over the edges to make it nominally waterproof. They expected to get a door any day and were kind of surprised it hadn't been delivered that morning.

As it turned out, I didn't have a side door for about another week. They taped an extra piece of housewrap over the plywood the next day for a little more water-protection in the meantime.


Quick drip-edge out of tape After one of their longest workdays on the project the guys finally buttoned up and got rolling for home, and I turned my attention back to the front door a little. I realized that as careful as they'd been with the flashing, water streaming straight down the front face of the house would probably hook underneath and cling its way in toward the top of the doorframe. To try and head this off, especially as rain was expected that night, I ran a strip of gaff tape along the lower corner to serve as sort of a drip edge. The house now had absolutely no overhangs, but I figured the fellas knew what they were doing and had left things nominally able to deal with weather, thought nothing more about it, and headed off to my class that evening.

Roof leaks! It rained hard in the interim, and I returned home to a bit of a disaster. The supposedly Graced-up roof *was* leaking, exactly through those holes I had not only circled *and* mentioned to the crew, and had been assured that they were fine and wouldn't let water in. Wrong: here it was.

Bigger roof leak! Over near one end of the attic where there were two screw-holes close together at the roof edge, enough water was coming in to build up and do that typical run-down-the-rafter thing like I would occasionally see from some of the old leaks I'd battled in the past.

I THOUGHT I WAS FUCKING DONE WITH THIS.


Window framing leak It wasn't just the attic, either. Downstairs, in that very first example outie window's opening, water was seeping in somewhere around the sheathing from above and *dripping* far in enough in to miss the backdam pan below and land on more framing. Had something gone wrong with all that exacting flashing work?? I was really hoping there was some other cause and all that wouldn't have to be torn apart and redone.

Even the front door wasn't exempt, as some of that pan flashing under it had suffered a couple of rips and I found that a little water was visible from the basement, dribbling down through there onto the mudsill. My little tape drip-edge probably prevented a total deluge onto the living room floor, but the whole bottom of the doorframe was completely soaked. At that point I put down the camera and grabbed the absorbent rags.

I was *so blindingly pissed*. Leaks around the shed dormer with its decrepit shingles were one thing, but I had *never* had any leak issues below second-floor level before. This was about the closest I came to freaking out about this project, but at the same time the other part of my brain was calm and confident that all of this would be worked out and diagnosed and fixed. That didn't do me any good right *now*, though, in the middle of the goddamn night with water coming in a bunch of places. Fortunately, the rain had slacked off and wasn't predicted to be heavy for the rest of the night. And technically, if the builders had screwed up somehow they'd ultimately be on the hook for making it right.

I managed to avoid ripping out a, shall we say, very strongly-worded email message to the Synergy guys, but did send something asking about our future roofing-material planning and mentioned the leaks as an aside.


    Day 5

A wet morning Morning was still quite damp, but at least it was clearing a little. I greeted the PM as he got out of his truck with the leak news and proceeded to go through everything I'd found. He was totally baffled as to why any of it was happening, other than that everyone's assumption that *removed-screw* penetrations in Grace were self-sealing maybe wasn't universally true after all. The front door stuff was pretty obvious, as the flashing around it had definitely sustained a little damage and there wasn't much above yet to prevent water from flowing right down the door and frame.

He assured me he'd figure it all out and make good on it before end of day. What he didn't actually do was poke his head up in the attic and look at the locations of those holes I was trying to tell him about.


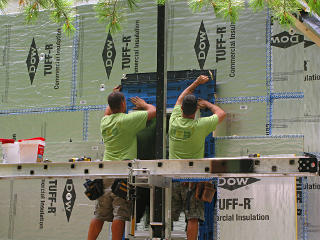
Peak foam layering rework They resumed work on the roof edge lines they'd reached the previous day, and wanted to do a more convoluted air-seal in that area. They cut back the foam layers to different levels and did the same sort of staggered flashing thing as on the vertical corners, except that here they had to cut some fairly thin patch pieces to interlace with the flashing. And of course they didn't have the roof layers on yet to really tie this into.

Stepped sealing layers It looked a little complex from the ground, and I wasn't really following what they were doing here. I had already delivered my little rant for the day, I wasn't going to bug them for a while.

I did supply them with several crap-towels to wipe down the foam with, as it still had a lot of clinging water. Even the super-sticky Dow tape won't adhere to wet surfaces.


A complex maze of air-sealing The result of this detailing was a fairly intricate maze of interleaved foam and flashing layers. These corners are apparently one of the tricky areas that tend to have air leaks if not executed right.

Gift-wrapped house The Grace was finally brought down and stuck over all this, making the whole corner of the house look "gift-wrapped" as a friend referred to it. This is why the Grace was left long and overhanging all the edges, so it could tie in all the foam up the sides and flash *over* it to the outside.

And here, one of the guys was finding and patching the screw holes left behind when they'd pulled some of the staging brackets off before. A squirt of "black jack" or similar roof-patching goop, and a little shaping so it was down flush with the surface. The theory on the front-window leaks was that water had come in right here and gone straight down inside the original wall. Seemed plausible to me given where it had been appearing in the opening.


Finishing the peak Finishing the peak
With a little more amusing cutting and patching, they finished up the peak. I was shooting against a very bright but still overcast sky, which is why the pix came out a little weird as I tried to stop down far enough to get the detail.

I'm not completely clear on why they went through all this top-edge complexity, because if you think about it, if air tries to leak out through the old roof or wall sheathing and comes up underneath the Grace, no amount of flash interlacing below that is going to close the potentially straight path out over the top edges of the wall foam. Sure, there's an extra layer of the blue Carlisle peel-n-stick under there but ultimately the air seal at this point comes down to how the Grace is brought over the foam and secured down.


Fitting foam to bulkhead gap As the foaming had worked its way around to the rear of the house, it was time to deal with the basement bulkhead. There was plenty of room for the first layer, but not *quite* enough for a full 2 inches of second layer.

Foam jammed into gap They cut down a piece of foam to fit, and squished it in there to just match the dimensions of the bulkhead frame piece.

Bulkhead flashing That way, they could flash it back to the first layer of foam like with the windows and doors, and make sure it was as water-managed as everything else. The bulkhead frame itself is designed to shed water off to the sides.

Bulkhead side gaps This left the remaining space open at the sides, but that was all under the sill flashing metal and now less likely to get water intrusion. We'd come up with something to fill these later.

Rear foaming in progress With the bulkhead now built out to the right level, foaming and window installation could proceed upward.

Tape fishmouth Not all adhesive building materials make perfect connections, and it's sometimes really hard to get them to stick onto non-favorable surfaces. Most of the connections between dissimilar materials were backed up with runs of the thinner Dow tape to make the best "water wedge" possible at those points. The top edges of those applications are critical and need to be stuck down really well without any water or dust in the way, because technically every horizontal run of tape creates a little tiny reverse flash if it peels away even a little.

Where the underlying materials often didn't lay flat it was very easy for the tape to develop a "fishmouth" on the upper edge. We did find some spots where the tape itself had accumulated water pockets inside, such as here. I was more worried about the potential effects of this than the crew; they were looking ahead to when it would all be covered under siding.

But water *does* get under siding sometimes...


Fixing reverse flashes If that water pocket collects at a horizontal seam between two foam panels and can't fall out, where's it going to go? Potentially inward between the foam edges, and now it's running down in between the two applied layers. Hit another fishmouth in the tape on that inner layer, and ... you can see where I'm going with this. While it seems like a small thing and a long shot for bringing bulk water inward especially with the Tyvek underneath all that, we need to consider the effects of many years over any particular erroneous path.
In a truly inspiring outburst of anal-ness, in his own words, the PM also took note of this and the presence of a lot of completely superfluous tape on the *lower* edge of other materials, where all it does is potentially catch and hold more water. There's no need for any horizontal tape along the bottom of other adhered flashing layers, and he was now all fired up about that and wanted to fix a bunch of these unneeded lower-edge details. I managed to catch a portion of his lecture (mp3, 974K) about "planning for failure". The whole point of having layers lapped over each other is to let water drain outward and downward, not trap it. Same reason the bottom flange of a window is never caulked or taped over; if water gets behind there it needs to seep *out* easily. So now he was asking for all that horizontal tape to get removed or at least cut away to free any lower edges of other materials, such as the Grace used as pan flashing here and the bottom edges of the Carlisle over it, and for everyone to stop applying tape that way.

On-the-job training in action.

They went around and took care of most of the areas they could easily reach, but not every possible point and it was sort of too late to revisit all of the horizontal tape seams without some undesireable effect on the surrounding materials. You can't just rip this off the foam without taking the foil-face with it.

At least one case study I had read recommended using little handheld rubber rollers on construction tape to stick it down really well, but that would have increased the crew's workload even more. We acknowledge that the outer face of the foam *is* the supposedly weatherproof cladding for some number of days during the project, and that due care is needed on these details. Some recent recommendations from Building Science even suggest shifting all horizontal tape applications upward to get more adherent surface area above any breaks in the external plane.


Rain kicker over front door All of this had everyone much more attuned to water issues and they knew the front door had some problems, so they put a temporary water-kicker over the front door to deflect most of it off to the side. Simple L of aluminum, taped down at the upstream edge.

Rain kicker working An hour after they left for the day more storms rolled through and it got a good stress-test, too. Here we see it working: most of the water that would have come down over the door got sent off to the side in a stream like a tall cow on a flat rock. It definitely helped keep the door drier.

Windows getting a water brute-test The windows were getting their own brute-test, too. Normally water shouldn't ever be streaming straight down a window like this if a house has any overhang, but here I didn't yet so the window was also the drainage plane.

Standing water in window frame They shed the water okay, but there was certainly a lot of water left in the bottom of the sash frame that hadn't made it into the fairly generous weep holes in the bottom. While it's all fiberglass and thus rotproof, these would probably have to be cleaned out once the windows were better-protected.

But the leaks weren't totally gone. With the kicker and some additional splash-blocking stuff I had wedged into the open crevice surrounding the front door it didn't seem to leak bulk water anymore, but it still certainly got wet. The various patching up top had taken care of some of the leaks *but not all*; a little water was still coming in some of my circled holes in the attic. WTF?? At this point I was too tired of this to even be angry anymore, and realized that the most poignant and shocking feedback on the work I could tell the guys in the morning was "it's still leaking".

Lots of screw buckets There seemed to be many more screw buckets in the tool dump that night, or maybe they just organized the stacks better. They were definitely going through great numbers of different sizes while working along the walls. Plenty of rolls of flashing, too. The crap-towels were also down here drying as they'd invariably have to be used again the next day.

Next section   (12)
Index

_H*   121201