House energy retrofit project 19

[Click any image for a larger version.]

    Roofing, day 2

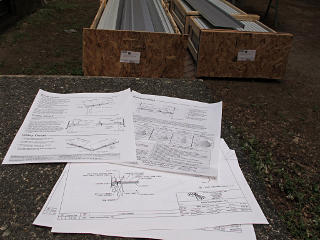
Try reading the instructions Still a bit baffled by the gable-cap problem, I went back and downloaded more of the relevant PDFs and printed out a few key sections to show the roofer that morning. When he arrived he said he had pretty much done the same thing, since the quandaries of the previous day had gotten him curious as well and we were still unclear on how the other end was going to work once he reached it. ATAS even has a video about Dutch Seam installation, but even that doesn't touch on all the little details.


Gable cleat parts revisited Ignoring that I've got the whole assembly upside down and sans actual roof panel here, it goes something like this. The panel would come in between the white Z-bend piece and the green clip. The Z-bend is supposed to close off the inboard side of the box, but not so effectively if you follow the given directions.

Their gable detail, complete with typo The problem is having pop-rivets penetrating the main roofing panels, augmented by having more pop-rivets exposed to the sky in a way that could drain in the wrong direction. [see the bigger picture for full starting-end detail cross-section]. There's nothing really to stop water from seeping around the upper rivet where it says "painted pop-rivet", down the inside of the Z-closure, and in around the lower rivet. A token gesture with butyl tape is made toward sealing, but that's unreliable over the long haul.
Now, what happens in real life when a pop-rivet gets installed? A hole has to be pre-drilled for it. With the roof panel material sitting down on the underlayment and deck and someone trying to hold a z-bar in place on top while drilling, what's going to happen at the instant the drill bit breaks through the panel? The point will proceed right into what's underneath, and rip into the underlayment and decking -- compromising the waterproofing layer right under where the pop-rivet would sit. And since a pop-rivet necessarily has a bit of bulk on the blind side, a rivet through the recommended spot would also make the panel unable sit completely flat.

Their given detail for the end gable is actually a misprint, not showing overlapping panel sections where they intended at the red circle. If readers manage to figure out on their own what was meant, it's still reliance on a line of butyl tape to try and create the effect of a continuous panel which is *never* going to hold up long-term.

Note that the recommended layout also assumes solid decking all the way out to the edge enabling clip fastening wherever needed, which we didn't have because of the shadow boards nailed onto the sub-fascia.

We needed a better on-site design to deal with all these issues.

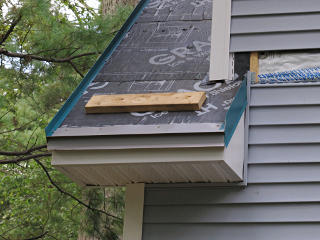
The roofer's eventual solution was to omit the z-closure, and cut the outer end cap shorter along its length and create a new bend to come down just inboard of the roof panel seam. [A section is shown later on.] It was then fastened on the side, using ordinary trim nails like on the rest of the fascia metal. The combination of the drip-edge hook and bend over the top would keep it wrapped over everything it needed to shelter. It was a little simpler than the factory-spec detail and avoided having any thru-fasteners on the upper surfaces at all.


Excess length sticking up View down front panels
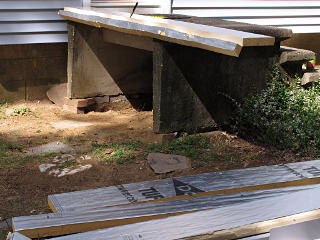
The previous day's panels had been put on at their full 21-foot length, with the excess sticking up above the peak. While it was kind of fun to look down that long run of panels with the neat perspective effect into the front yard, he wanted to pre-cut the remainder on the ground now that we knew what that measurement would be. I think he was dreading the idea of cutting the existing excess up top -- in fact ATAS strongly recommends that no cutting at all happens in the air, because it sends metal fragments all over the place.

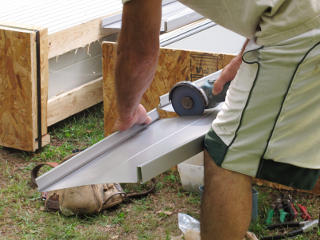
Pre-cutting subsequent panels An angle-grinder with a carbide metal-cutting wheel seemed to work quite well for bulk slicing, but boy was that *loud*. See this short video for what I mean. This probably annoyed the neighbors more than the overgrown-mosquito of cutting the siding.

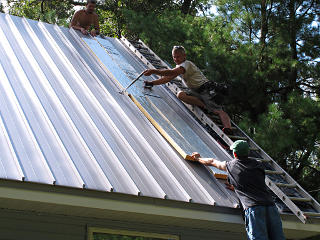
Today the roofer had brought along another buddy of his who does roofing on his own and is pretty good working at height, so with more crew on hand the work to finish across the front started going pretty quickly. As they reached the far end they were running out of room to lay the hook-ladder down on the deck, and needed to be able to put the ladder on the other side of the work line -- down on the completed panels themselves. Obviously we didn't want to do this without protecting the panel and avoiding crushing the standing seam, so some non-marring solution to support the ladder up off the panels was needed.

Well, I still had all this leftover polyiso foam out back, which had also served in any number of temporary padding roles throughout the project. I floated this idea and they seemed to think it could work.


Cutting some polyiso I fetched up some strips and cut a couple of them a little thinner to fit the 11-inch width between the seams.

Placing foam pads They laid a couple of runs into the nearby panels and taped them down against sliding off.

Ladder on protective pads The two-inch foam height was *perfect* for supporting the ladder completely off the panels. Now they could get back on it and continue adding panels on the other side.

The only downside of this rig was that the foam had to be hopped along with the ladder to reach the next areas, which involved more taping. If they had done this at the start of the run, attaching the foam to the ladder instead of the roof, it might have enabled easier right-hand work instead of having to lean over to the left of the ladder like they did all day. But with only two panels and the end cap to finish up, it wasn't worth a complex lashup by now.


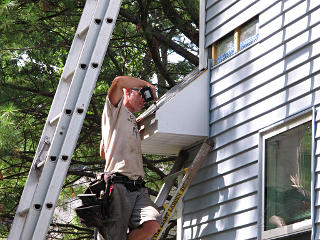
Extra cleat for ladder hook With the ladder two inches higher off the roof the security of the hook attachment was a little more sketchy, so a couple of cleat pieces were added for it to grab onto and one guy stayed at the top to spot it while the gable cleat and the last panels were being worked on.


Reflection comparison As the front roof neared completion, I wanted to get an idea of how bright the reflections from it would be. The panels aren't dead flat, but rather slightly humped up across the middle which would help spread incident light, and as noted earlier the finish is quite diffuse on its own. I set up a board on the front lawn where most of the reflection was landing and did a little shadow play to get an idea of how much light the roof was delivering over and above the direct sunlight.

Trying to quantify reflection It didn't look quite as bad as I thought but I wanted to try and quantify it, at least for an initial measurement cut, and got out the light meter. Answer: Less than ten percent, at the present early-September sun angle; I was getting variable readings less than 1000 footcandles. The final worst-case answer would have to wait until June the next year.

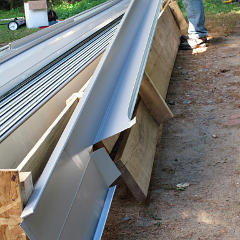
Drip edge onto wing-wall pieces Gable cleats onto wing-wall
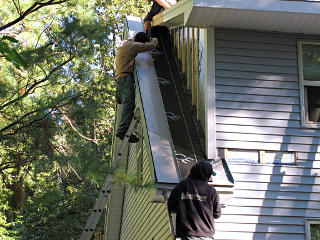
Once the front was under control they started on the wing-wall pieces, getting drip-edge and gable cleats onto the strip.

Working upward This guy was pretty agile on the roof, and didn't need to put in a whole lot of temporary steps to work his way upward.

'58 Caddy tailfins Somehow reminiscent of the tailfins on a '58 Caddy...

Looooong panel cut Almost no roof is an exact integral number of panels wide, and this one would was no exception. To finish off the front roof we need a partial panel, which would be installed clipped in like any other panel instead of ATAS's klunky tape job. Making this involved a loooooong cut all the way down the length of one, several solid minutes of carbide-wheel howl.

Fitting custom end pan This served as the final pan, hooking into the previous one normally and just bringing an equal-height lip up near the gable cleat. The custom-bent end cap would then hook over that, go over the side, and hook onto the little drip edge at the bottom of the gable cleat and pretty much look like the suggested stock end-cap but a little narrower.

There also had been a tiny amount of drift in panel spacing along the way, building a width difference between top and bottom that made the final closure need a very slight taper along the height. This didn't surprise me, as no effort had been made to check exact panel alignment.


Butyl tape goop They had to pre-form the cap and then slide it all the way up from from the bottom to have the correct interlacement with the last pan. They tried to add a line of butyl tape where the end-cap's downward fold would match up to the pan. This didn't work out so well as the double-sided rubber tape goop is very sticky and wouldn't really let the cap piece slide up along where it was applied. They eventually gave up on the tape, figuring the height of the interlaced metal was enough of a flashed situation to keep water out of the space underneath.

Frankly, I think the end cap pieces could have been bent a little less than 90 and then applied from the side, getting a final crimp down over the panel flange by hand. But tape placed between would likely not have achieved a full seal that way either; it's really only gravity that's supposed to keep water out of the seams in this system.


Pulling off excess The roofer sent the helper kid up with the angle-grinder to start cutting off the excess panel length from the previous day. He measured the amount of excess and snapped a cut line across the upper surface, and started slicing along and pulling off each freed section.


Cutting screwup, too far in Except that he was working from above and not able to see what he was cutting into on the other side, and wounding up sending the angle-grinder blade INTO the underlayment behind the panel.

I had been down in the yard when he started buzzing away, and something gave me a bad feeling about this so I went up to have a closer look. Good thing I did.


Dumbass cut right through the ridgeline grace Turned out that he pushed in so deep with this, totally not watching where he was going, that he went down through *all* the Grace layers over the ridgeline into wood underneath. A serious compromise in the waterproofing assembly.

The right cutting technique The roofer came over as I was pointing this out and intervened, showing the dumbass how to cut from below so he could see where he was and how the body of the angle-grinder would keep the wheel just above the underlayment surface.

Flinging panel excess off back The kid continued with this method but didn't really seem to care either way, having more fun flinging the cut panel sections out across the backyard and clearly not thinking about the water-management aspects of what he was doing.

I was kind of pissed about this. The two Grace layers meeting in an overlap across the ridgeline were a critical waterproofing detail, and here the kid had sliced right into the middle of it exposing plywood underneath. Now what?? Sure, the ridge cap would somewhat cover the whole ridge area, but windblown rain could easily get up under that and find its way into the hole. Not to mention condensation that inevitably happens under metal roofing with temperature changes.

At least I was up here getting pictures, and caught the problem relatively early. If I hadn't been up there he might have laid the entire goddamn ridgeline open like this. Did I mention "dumbass"? Not to mention all the metal shavings going everywhere, just like ATAS tells us not to. Really, these panels should have never gone up uncut but it was far too late to fix that now.

We needed an immediate solution. Fortunately I had noted the fix done after the builders had temporarily sliced the lower Grace layer to find rafter ends -- a new strip of flashing material laid over the ridge and stuck down nice and tight. And I remembered that I had saved various scraps of Grace and Vycor and such which were inside the house.


Patching the oops cut I brought out what I had, and was slightly surprised when the roofer cut it into narrow strips instead of using the whole piece to patch where the rips were. He evidently wanted to cover more of the ridge.

Patched all the way along He wound up running strips almost all the way along the ridge, even though the erroneous cuts were only in one small area. Part of this included little cut tabs stuck over the open ends of the panel interlocks. I guess he figured if rain came he also didn't want water going into the seam interlock areas. Not that the Grace underneath hadn't already dealt with its share of water...

While he and the other experienced guy were working on this, I brought my pushbroom up and swept as much of the metal dust off the shed-dormer as I could. Leaving that sitting around under any subsequent layers didn't seem like a great idea.


One crate down! By the end of the day, we'd gone through one complete crate of panels. The crate got knocked apart and dumpstered.

    Roofing, day 3

Entertaining water runoff Up on the shed again the next morning, it was fun to watch how drops of runoff from disturbing the dew would roll all the way down. This part of the roof was now pretty much unwalkable; even the builder whose shoes had been sticking to the Grace would probably slip right off this stuff. Think "playground slide" but without the nice landing at the bottom.


Securing panel tops I realized that the front panels were held in by nothing but the sliding clips underneath, and suggested that creating the "fixity points" at the top might be a good idea to make sure they didn't start slipping down. The clamps were all pretty tight but a good push might make a panel slide. So one screw was popped into each panel and the wood underneath right near the top. As long as a screw was *in* a Grace penetration it should remain waterproof.

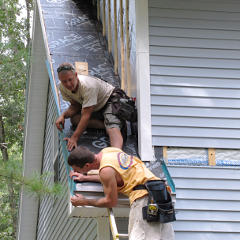
First panel onto winglet But today's main goal was to take care of the little wing-walls in the back. It looked like it would need two-and-a-fraction panels per side.

Two benders, one piece The roofer showed up with a second bender that morning, and the two of them were set up in tandem for more uniform bending of really long pieces. The problem is that pulling up on the bending handles tends to lift the entire brake off its mount, and now we'd just doubled that problem. After shooting this I put the camera down and jumped in to help hold the brake frames *down* while the bends were being made.

A complex pre-bend The panel right next to the cheekwall needed a fairly complex bit of measured bending and cutting to adapt to the corner and tuck up into the split at the ridge.

Working the corner Is that straight?
It took a bit of fighting to get this slid in and flashed under the siding corner post, but fortunately all those vinyl parts are bendable. He finally got the corner trim re-seated and called down to me, "is that back on straight?" since he couldn't really tell from where his eyes were.

The key thing to note here is that the bent-up section lays right up against the strapping, and would get the siding attached down over it for a proper water-shedding lap of materials.


Attaching shed trim As long as they were dealing with this end of the roof, they found the extra pre-bent pieces of gable trim for the shed-dormer roof and applied one, now that with the roofing on underneath it they could tell what trimming was needed. The builders had left these final pieces tucked up into the joist bays in the basement.

Filling the hole at the shed split A couple of foam pads and z-bars were used to close off the hole into the soffit space. This is important to seal up, because it would make a perfect protected nesting cave for various stinging insects if they found a hole open into it.

Another long cut Completing other winglet
The same story played out on the other wing-wall, starting with two regular panels and then the long cut and complex custom-bent piece.

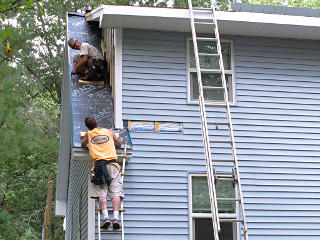
With the gable overhangs in the way, it's not amazingly easy to get a good stance on a ladder against the lower sidewall to work on the upper one. The roofer noted this in the context that he intended to do a bunch of siding work on the upper one the next day -- since he also does siding the GC had decided that it would make sense for him to finish off the cheekwalls instead of getting the other builders back out. He needed a solution for safely working up here.


This magnet actually works The roofer left me his big pick-up magnet on wheels that afternoon, and I took a pass all around the yard anywhere near the house. The builders' magnet wand was totally wimpy by comparison, and this one found and sucked up lots of nails and staples and other junk that had been hiding in the grass and moss for weeks now. I made sure to thoroughly cover anywhere my car and other peoples' vehicles would pass over as well.

The roofer had been dropping his share of fasteners too, but most of this was old nails from the demolition. I guess the "find two more nails" method hadn't been working as well as the retrofit guys had thought.


Next section   (20)
Index

_H*   121208