House energy retrofit project 14

[Click any image for a larger version.]

    Day 12

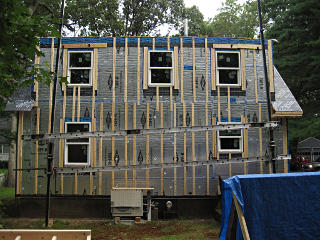
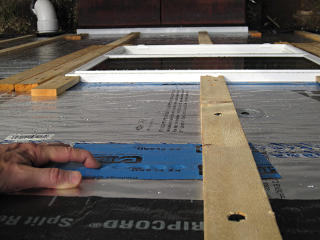
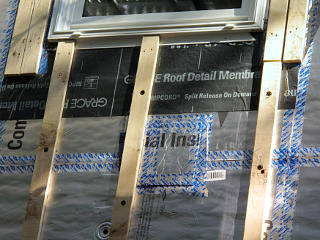
All strapped up in back With the strapping in place on much of the house and trim work well under way, my place was just about in the same state as that jobsite I'd visited in Carlisle. Then and now, the occupants were already making distinctly favorable observations about the thermal properties of the enclosure.

They must have used *thousands* of the big Headlok screws by now, and weren't done with them yet. The stud-location mismatch at the floor boundary is pretty visible back here too.

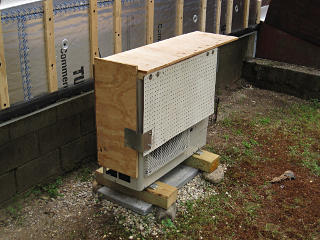
The funny little assembly down low on the wall was something relatively new too.


Better condenser cover They hadn't actually let anything fall on the A/C condenser but they'd come close a couple of times while feeding supplies up the back, and with their little rooflet gone after demolition I wanted a little more substantial protection over this. Instead of wrestling with a tarp to cover it every time the guys came on site, I threw together a little drop-on hood out of spare bits of this and that which would actually protect the coils better. This could be simply lifted off and set aside whenever I wanted to run the system, which was starting to be most afternoons after the crew headed out. We were into the sticky days of mid-August now, I needed to keep a lid on the humidity inside!

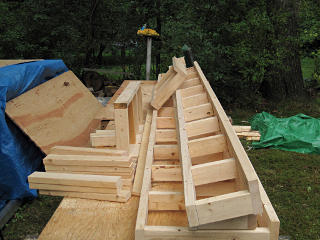
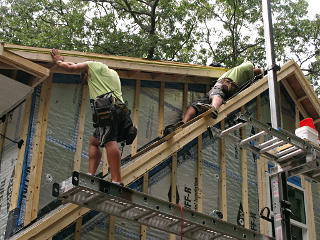
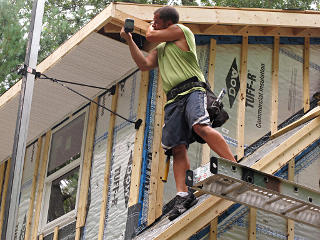
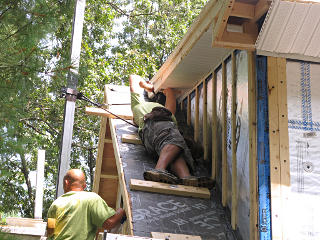
More ladders ready to go Today, though, was sort of cooler and cloudy with another threat of rain later, and a skeleton crew of two arrived. They intended to take the already-built ladder parts for the west gable and try to get those on before weather moved in.

Wrangling west-gable ladders They got to it and made pretty good progress; they didn't really need a ground crew at this point.

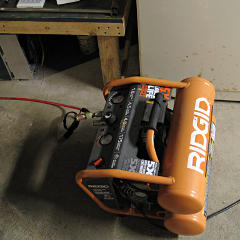
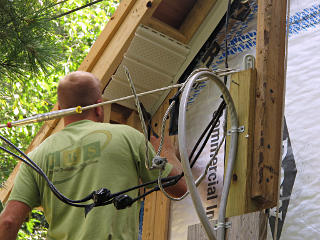
Air compressor for nailguns Where they used to bring the air compressor out to the backyard every day, the guys had gotten into the habit of just plugging it into a basement outlet and running the air hoses out the bulkhead instead. Made things easier and kept the compressor out of the weather, and I didn't mind the fact that in the more confined space it was really loud whenever it ran. The downside of that was when a friend came over for a tour one afternoon with her kids and we happened to be down here when it suddenly kicked on with its farty-noise-from-hell and scared the crap out of them.

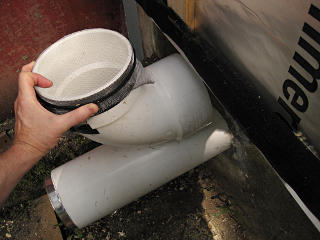
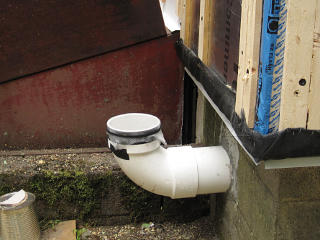
Figuring vent elbow placement While the rain held off I decided to tackle another project on my list. With the rear wall bulked out and a fairly clear idea of how thick the siding would be, I could now size the vent pipes for where they'd turn up next to the wall and cut them accordingly.

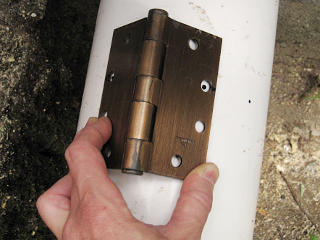
How to mark perpendicular to pipe axis So how do you mark a line all the way around a large piece of pipe, and keep it dead-perpendicular to the pipe axis? Here's one way. I found a door hinge with matching holes at the edges, and when placed on the pipe and slightly "humped" off it in the middle the hinge edges would naturally seat on the pipe curvature pointing right along it and allow marking accurate dots. Repeating this all the way around yielded a pretty good pattern, and then I aligned a piece of flexible metal strap to those to actually draw the cut lines against.

Cut lines marked up The lines got placed to be a uniform distance from the new wall, not from the different-depth surfaces they happened to poke out through. I was pretty happy with this alignment, and went ahead with the required saber-saw work.

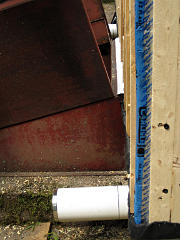
Shortened PVC pipe That took a while and a few interesting contortions to get the saw in underneath, especially on this pipe which sits a little lower, but the result was two nice smooth fairly flat ends that the elbows would fit over. The risers wouldn't be *right* against the wall, there would be a little space to allow for some sort of supports.

Obviously, my temporary ends got turned back downward before the rain came.


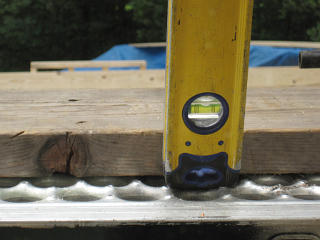
Art shot: level, pick, backyard Art shot: another little vignette that happened to be right out the back window next to my desk.

Mystery water leak at sill It did rain hard later, and evidently my leak issues weren't quite over yet as I spotted a little seepage into one of the basement joist bays. This one I couldn't figure out and only happened once. This was under one area with a particularly bad tape fishmouth clearly visible on the foam about chest height off the ground outside, already full of water when we were going around looking at that issue and it never got remedied. Could that complex water-ingress scenario I envisioned already be happening here, with it finding a path in past two foam layers *and* the Tyvek?? The PM thought it was backsplash from the ground outside coming in under the metal, but I couldn't see how -- it's too high up for that and the lower wall external to where this was didn't look the right kind of muddy to support that theory.

Well, it never showed up again anyway.


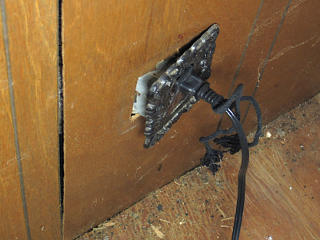
Outlet pushed out of wall I made a disturbing discovery upstairs. A *live* electrical outlet had been pushed right out of the wall and was sitting cockeyed, most likely from an errant screw driven in from the outside. I guess it was a bonus that I didn't notice this by having the house burn down around me.

Patch over multiple screwheads Here's what happened: the continuing process of trying to find the elusive studs had marched a few test screws along here, finding the back of the electrical box before finally reaching the stud it's attached to. They patched the area before putting the strapping on, leaving an impression of the screw-head landing areas underneath.

So let's think about this for a moment. The screws they had were sized to go through strapping and the foam layers, and if sent into just the foam face would penetrate deeper than usual. What if they had hit the wiring instead of the steel box? Two inches higher and they might have. The screw is potentially in contact with some part of the foam's foil facing, at any of the layers thereof. This leads to two and a half potential scenarios: 1> the screw contacts a hot lead, thus electrifying it and anything it's touching to the AC hot voltage, or 2> the screw lands on the ground or neutral, or perhaps the grounded box itself, and thus grounds the foam too. The "half-th" and less likely scenario is that the screw manages to cut through enough insulation to *bridge* across hot and something else, causing an immediate and obvious short which hopefully kicks the circuit protection instead of starting a fire in the wall. But it's the first two situations that could be much more subtle and hazardous because the error wouldn't be immediately obvious.

If part of the foil-face was driven hot and a guy put one hand on it and the other on something grounded like a scaffold pole or a corded power tool, he'd get 120VAC right across the chest -- probably with good solid conduction, as they were sweating pretty hard most of these days. If connected to ground it could remain un-noticed entirely, but a screw driven into a piece of wire at all could either slowly become a short or an arc-fault later or possibly *another* screw somewhere else on the wall that hit a hot would complete a wacky circuit between there and a grounded point through any combination of foam sections. A stretch, perhaps, but not impossible.

Extraordinarily bad ju-ju all round. I had done what I could to try and indicate where such potential [ha, get it?] electrical pathways were through the walls, but I couldn't cover all possibilities. With base construction of this vintage there's no guarantee that wiring was correctly fastened to the midlines of studs everywhere rather than just slung haphazardly through the bays, and I was really trying to account for that. A few peeks in through the stripped-down sheathing above my marks with a flashlight might have been able to located any problem points, not to mention revealing the stud offset issue itself. In fact I should have tried that just for curiosity's sake at the time, but it was hard to get near the walls being demoed without feeling like I'd be in the guys' way or raising questions they didn't want to think about.


    Day 13

Repatched the right way The PM was pretty concerned about this, and wanted the guys to pull the Carlisle and any remaining screws out and patch it better: cut out the whole area's outer layer of foam, seal the remaining holes inside at the inner layer, and then fit a new piece of outer layer back in and tape it all up. So they made good on it, but I was chalking it up as another lesson.


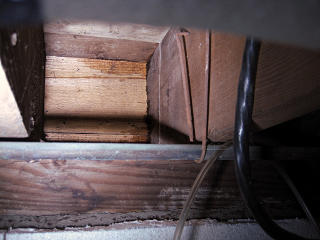
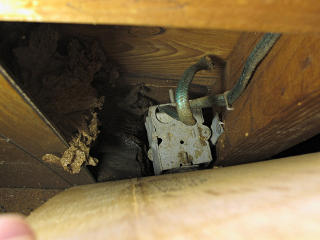
Behind the electrical box I didn't think to open up the interior wall until after this was done, but as this was under that same water-damaged shed-dormer area where the paneling was fairly expendable *and* the interior trim was still off, it was pretty easy to get a looksee into here. The screws were gone but where they punched their way through the sheathing was fairly obvious. And it's easy to see that while most of the live wire on the right is midpoint stapled, just above the box it swings a good ways toward the exterior. One of the screws could have easily landed there instead. [Ignore the wire from the lefthand fitting, it's a short unconnected piece put in apparently to balance the dual romex clamp.]

I took this opportunity to change the old two-wire outlet for a newer grounded one, and buttoned things back up. Crisis averted, at least right here. At least that old crap insulation *is* borate-treated for fire resistance...


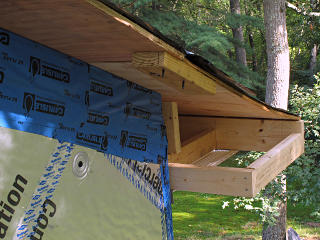
Figuring rear overhang placement Major task for today, though -- the massive rear overhang. They started collecting measurements for the plywood.

Temporary supports for ladder These parts were quite a bit heavier, and infeasible to hold up against the wall while aligning. A couple of screws served as quick support pegs.

Sketchy supports for ladder To temporarily take the outer part of the weight, they did a somewhat clever brace from the scaffold and adjusted it with the pumps. I guess if they didn't bounce too much, it would be fine... whatever ya gotta do, y'know? But the ladder was soon lagged into the wall and mostly supporting itself.

Bringing in second half Attaching overhang ladder
Some of the plywood went on, and the second ladder half was raised and wrestled into place.

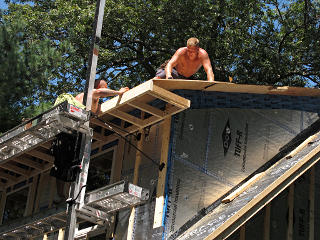
Plywood to form roof overhang The plywood run was completed, precisely matched up to the rest of the over-deck above.

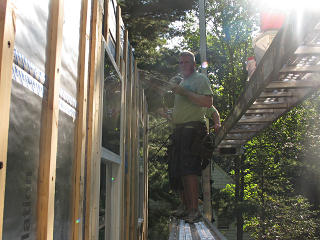
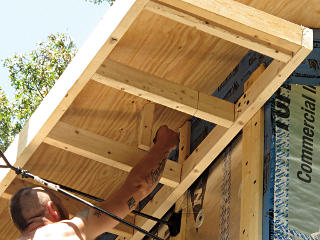
It's plenty strong! After that the structure was plenty strong, as our fellow is demonstrating here. Tension in the plywood and compression in the ladder members, even on this larger scale the thing wasn't going anywhere.

Extra bracing under plywood The plywood itself was a little bendy, though, so they added little midway braces underneath at about every other crosspiece.

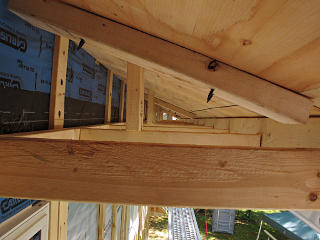
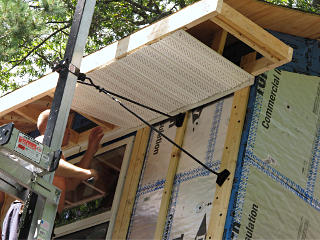
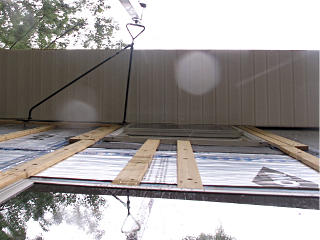
View through overhang soffit area Here's what it all looked like shot through the new soffit space: a colonnade of rough framing suspended over empty air.

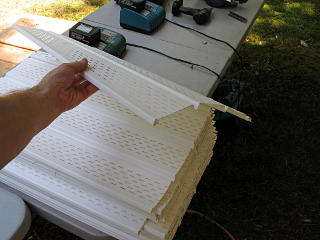
Pre-cut soffit vent pieces Applying soffit
That volume was about to get closed off from view as they attached an L-bracket piece at the inner corner and started to attach soffit-vent material underneath. Again, opting to use their own site-built fittings instead of the typical vinyl F-channel used here. Soffit comes in long 10 or 12 foot strips like siding, and they cut a bunch of pieces to the width needed. It's a little nonintuitive in that it goes on sideways in a bunch of little sections that interlock together. With this installation method each cut of soffit got independently nailed up instead of being part of a long rattly chain loosely held between a couple of channels as is sometimes done. And they got the stuff with lots of perforations. This would terminate the upper end of the rainscreen space with a nice open, vented structure to let anything underneath freely dry to the outside.

All of the overhangs on all four sides would need soffit material, so this was one of the more tedious parts of the job. They didn't try to do all of it in one shot, they did smaller areas as needed.


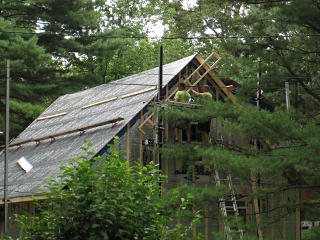
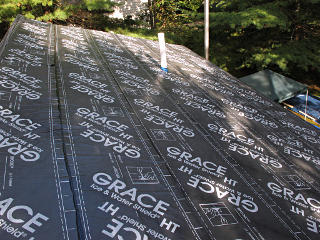
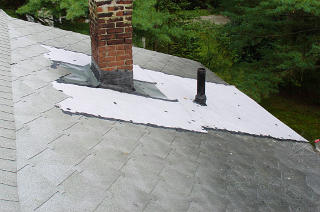
The roof is a lot bigger now Roof as it used to be
The new ply got its terminating layer of Grace like the front, and the new roof footprint was now defined. I hopped up for a looksee that afternoon and was immediately impressed by how much *bigger* the whole roof looked. Compare that to how it used to be, in a shot from a few years ago after installing my redneck roll-roofing patch job!

End ply is a little sway-backed Midpoint blocking couldn't prevent this end piece from sitting a little sway-backed at the edge; it's how the wood came and they didn't reject it and cut a different one. They likely figured adding the rake ladder underneath would straighten it right out. They were mostly right.

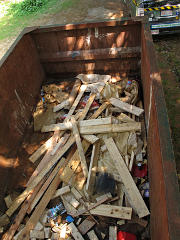
Scrap wood in the dumpster The over-roof framing and decking operations had generated a *lot* of scrap wood. I was in here rooting around for the good bits pretty much every day after the guys left, and a few times while they were still here. I wasn't sure where I'd use it all yet but even three or four foot sections of good sound lumber seemed a shame to just waste. I also recovered lots of their plywood scraps as they sized the decking pieces to match my crazy rafter pattern underneath. If it was all properly 16 on center then they likely could have used full 4 x 8 sheets to bridge 7 rafter bays at a time, but they had to slice everything short one rafter's worth to make all the seams match right. This produced a bunch of 4' cutoffs around 14 inches wide, and I snagged most of them.

Dumpster-diving right in my own yard. What a concept.


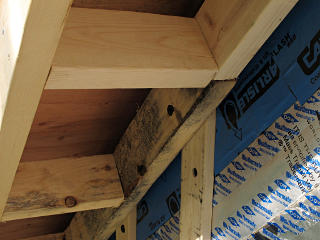
Some of the rattier wood In general they had selected fairly clean and well-kept wood for the job, but a few pieces had probably been wet at the yard and showed up looking kind of ratty. It's unclear if it's mold or some other sort of discoloring, but these few boards on the rake assembly were definitely unlike the others. Builders never really worry about this either way, they just use the stuff. Fortunately all this wood in theory would never see bulk water again so it really didn't matter.

The whole electrical issue was still gnawing at my brain, and I wanted to try and determine if there were any other issues between the insulation job and the wiring. As I pointed out, some of the scenarios could be subtle and ordinarily impossible to detect in the building process. I figured an energized foam panel would have been noticed long since, unfortunately the hard way, but what about a grounded one? Were they perhaps already grounded through some path I couldn't see? Foil-face against flashing metal in turn against moist cinderblock could do that, but at what resistance level? Much could depend on just how the various parts were in contact, but I wanted to get some idea of baseline.

A voltmeter between a foam panel near the side door and an electrical ground from inside showed a decidedly nonzero level of AC, but nothing I could actually feel. Problem there was that a voltmeter is too sensitive and likely picking up the capacitive effects from nearby wiring. I needed a test setup that could actually put meaningful current through any possible fault and indicate where there might be a dangerous path. When I started going after the foam with a multimeter I'm sure that any of the guys who were still undecided about me being a nutcase or not made their decision right then and there. The lead guy seemed fairly interested in this, though, and encouraged me to continue investigating. Maybe he was just leading me on, but it didn't matter -- I was on a major roll of geekdom, and I was going to figure this out.

It seemed more likely that an errant screw would contact a ground than a hot, with two out of three wires in the romex and the surrounding iron connected to the neutral/ground side of things. The effort would therefore focus primarily on finding ground faults.


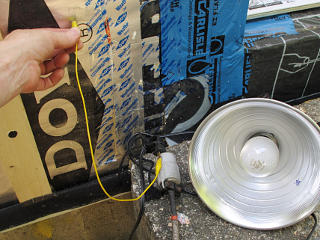
Ground-fault test against foil-face Developing a test setup got really interesting. First, a load was needed as both an indicator and a current-limiting safety, and a CFL bulb wouldn't do it because when connected between AC hot and the foam it would sit there flickering and *trying* to start -- again, not because of a solid connection but due to its getting a tiny trickle of current from capacitive coupling. Similarly, trying to feed this test from the GFCI out back made it trip immediately, which is probably a good thing. Think about insulating foam with foil facing on either side -- it *is* an oversize capacitor and highly likely to transmit some AC and certainly some higher harmonics.

So I needed power from a non-GFCI outlet and a regular ol' incandescent light bulb or none of this would work at all.


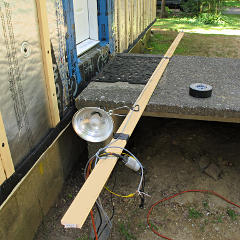
Long tester probe Next, I needed to be able to reach the panels. There were all these 10-foot pieces of strapping in the stockpile, so I ran a wire up the length of one where it wrapped around a nail banged partially into the wood, and clipped to my test light to the other end. The nailhead would be the sensing point.

So the circuit went from the hot prong of extension cord, through the light bulb, and up the strapping to the nail. If that touched a low-resistance grounded point, the light bulb would go on. After a quick test against various items like the condenser disconnect box and the kitchen sink, I was ready to go. Of course I waited until everybody was safely OFF the scaffolds and back on the ground first.


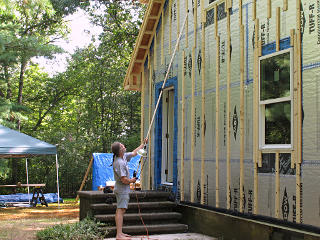
Testing all foam for ground faults Okay, so here had to be the ultimate "crazy homeowner" shot of the whole job as I went around with my handheld hot lead and tested the visible surface of EVERY foam panel I could reach, which got the entirety of all walls. I told the guys as they were rolling out that if they found my crispy corpse on the ground the next morning they'd know why...

The panels all tested negative, but that didn't necessarily rule out a connection to one of the other foil layers buried inside. There was only so much I could get at.


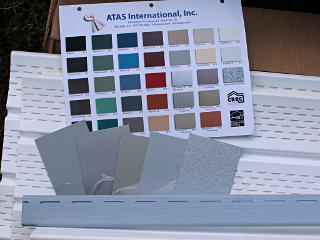
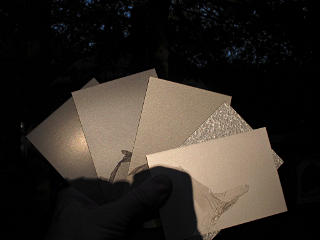
Roofing sample swatches and color chart Comparing roofing/siding colors
Ground-fault testing the foil-face didn't actually take that long, and meanwhile my roofing-material samples from ATAS had arrived that day so I wanted to check out how they might match up against the siding. Jumping back a little here -- in my roofing research I had a nice conversation with the tech people at ATAS and they fedexed me a handful of swatches for the types/colors I was considering. What I was looking for was aluminum and a fairly good solar reflective index (SRI) in the coating to keep the whole roof cooler, which implied the lighter end of the spectrum. Their whole chart is on the website in a PDF with surprisingly accurate representations of the appearance, given how photos can so often be off with respect to lightness and color balance.

The PM had brought me a sheet of siding samples from GP a week or so before, and I already had a similar folder from CertainTeed on hand. I held both sets of those up next to my view of all the *other* houses around me to make sure nothing I'd consider was the same as them. The swatch of GP's generic "blue" immediately spoke to me, and it didn't take long to make my pick so they could order the stock. This was one of those indeterminate colors that's almost no color, changing how we see it depending on how it's lit, what else is visible nearby, etc. Cool but not saturate or punchy. I happen to like colors like that; for example the car is another one of those that a lot of people call "grey" but I see as a more subtle green. So the roofing color wanted to be in keeping with that theme but still have the physical attributes I needed.

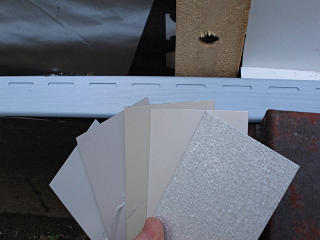
The siding hadn't really been unpacked yet but a couple of trim pieces had been pulled out to check, so I could match up my little fistful of roof colors to it and do some serious art-fagging. These two shots were in diffuse fading daylight with the same white-balance; see how the blue vinyl and even the roof samples wind up looking different just a few minutes apart? I had already mostly eliminated a couple of these in my mind but wanted to give the whole set a fair shake. The middle color, "Champagne", had a definite greenish tinge almost like the car but I knew that if I did anything in the domain of *green* that my neighbors who had to put up with twenty-plus years of the previous putrescence would come kill me. The mottled galvanized-steel that got sent along just for comparison was just plain ugly. The clear-coat aluminum looked like tinfoil and I didn't really like it -- unfortunate, because it had far and away the best SRI. That left "Dove Grey" and "Silversmith", the latter of which some part of my brain was already favoring.

This particular evening my neighbor was having some sort of family gathering, with daughters and spouses and relatives all hanging out in their driveway next to my side yard. For completeness and good relations I figured I'd consult him to make sure I wouldn't make any choices that would irritate him for the next twenty years. I walked over with all this stuff and stood there with the big silver box behind me and asked, "whatcha think?" He was funny, saying "you need a *woman* to help make decisions like this!" which really was a little sexist but it so happened that he had several women available right there. A bunch of folks clustered over and one of his daughters, I think, pointed straight at Silversmith and said, "ooh, that one's kind of jumping out at me." They also sort of liked the Champagne, but more importantly they were just loving the general class of picks I was making including the siding color. They thought it and just about any of the roofing would work together beautifully, and I think my ol' green-disapproving neighbor himself was really digging this conversation. It all helped, lending third-party perspective to my own thoughts.


Roofing diffusion characteristics With the late-day sun behind me I could also hold up the samples and study their reflective characteristics, still thinking about the poor guy across the street from my 45-degree solar cooker. The Silversmith, second from left here, seemed to be among the most diffuse of the lot whereas the Dove Grey behind it looked like generic painted metal with a much more specular bounce. Ick.

That clinched it. ATAS .032" aluminum Dutch Seam, in Silversmith. I notified all concerned, and the order went in.


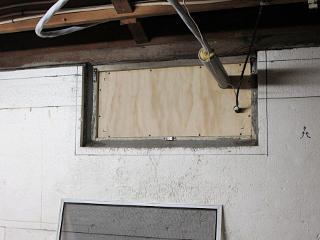
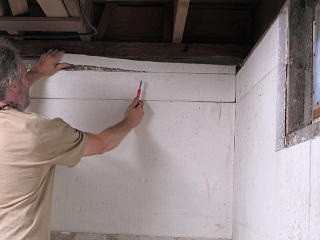
Marked lower cut-line for EPS I had already taken the edge of the existing styrofoam in the basement down a couple of inches a while back, but realized that for a good sprayfoam connection all the way from the sill to the cinderblock it needed to be cut down even farther to reveal where the sill actually sat on the block and the lower edge of that old 45-degree parging that was full of air leaks. I spent some of that evening marking the new line all the way around, using a 2x6 scrap as a convenient reference for a fixed distance off the bottom edge of the joists. No hurry on cutting it.

The little logo with two arrows and a lightning bolt is one of my interior markers where wiring goes up inside the wall, all of which I had also translated to paint marks on the outside of the foundation.


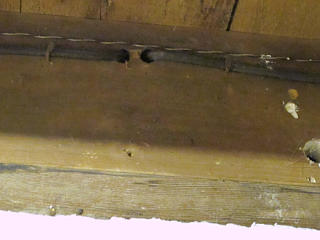
Old up-and-back wiring run methodology It's loosely based on how the wiring physically looks at these points in the endwall joist. The circuit feeds out through the joist and up inside the wall to wherever it's going, chains through the box[es] in question and then comes back *down* to continue along in the basement to the next riser point. Here's where I really should have peered in from the other side of this, through the stripped sheathing, to find out how it really runs. Too late now.

Fortunately these are the only points in the house where any joist drilling had ever happened, and in this one on top of the sill they don't affect the structure at all.


    Day 14

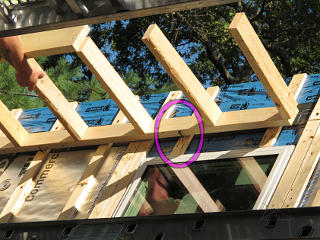
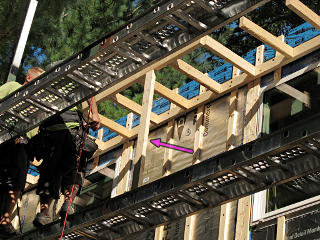
Making ladder fit: force it The next day saw the last of the ladders go up, along with finished furring on the cheek-walls. This was at the same shed-dormer corner as the swaybacked plywood, and there were clearly some alignment issues going on. The guy had to basically hump it up into place on his shoulders, do a little percussive alignment with a hammer, and then screw it in before it slipped. He got it to fit and push the plywood up to straight as a side-effect, but the stresses left that whole corner of the roof very slightly curved down in the long run.


Trimming rake edge After the whole ladder was in place, the plywood edge along with its Grace on top got trimmed flush with it. This had a major downside which will be explained later; a hint can be seen in how the shadow-board sits against the lower part of the roof. Think "rainwater management".

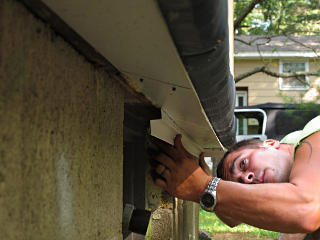
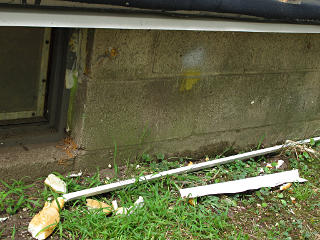
First try at mudsill trim Meanwhile, it was time to address that still-outstanding endwall sill problem and try to get that exposed wood sealed up. We talked about it a little and the guy thought he'd be able to insert the edge of a Z-bend up between the sheathing and flashing and really tie the foam assembly back to the block wall.

Well, that didn't work This didn't work out, though, because the gap was too tight to push the edge into. A bit of cussing and metal-mangling later, he gave up for the time being.

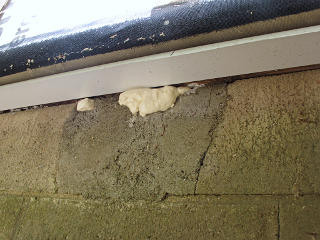
Foamed holes around main beam pocket However, addressing this area reminded me that I needed to foam some huge holes in the main beam pockets at either end, where the original builders had never done a very good job of sealing the wall. I let this cure and then cut it back flush.

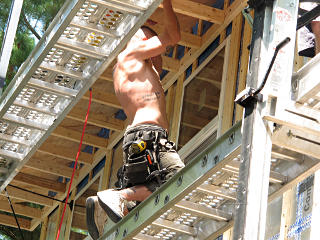
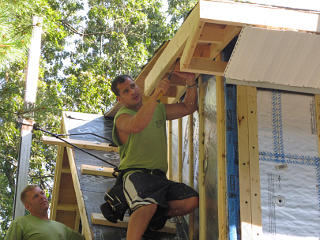
Gymnastics to get measurements They really wanted to get the rakes done, and the last one on the other side of the shed dormer was giving them some alignment headaches too. Getting measurements led to some amusing positions. The whole ladder got passed up and down a couple of times before it was finally trimmed to fit right.

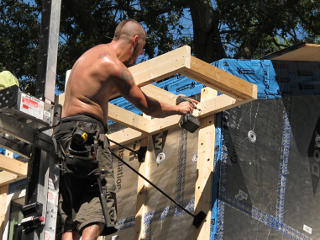
OSHA approved carpentry Finally it was fastened in. These guys are really good at the rock-climbing-style steep roof carpentry techniques.

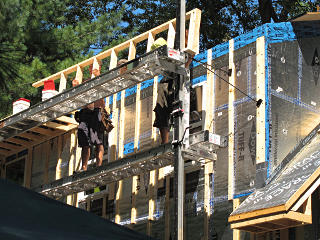
Working soffit near power pole Lots more soffit had to get installed, pretty much everywhere.

Gymnastics to install soffit This involved some more gymnastics on the cheek-walls to work up into the split as far as possible.

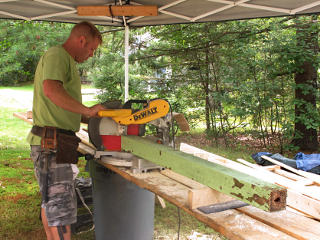
Re-using portico supports Someone had the idea that the nice rot-resistant 4x4 pillars from the portico would make good fill-in wood for the basement bulkhead. I had rescued these from getting pitched, and they were sitting off to the side of the yard waiting to get some appropriate pieces cut from them.

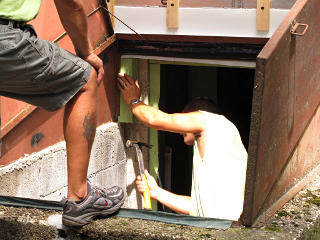
Basement bulkhead fill blocks The first piece happened to fit *perfectly* on one side.

Shaving down beam piece a little The other side needed just a little shave-down to fit. Every so often we find it necessary to use a saw as a power sander to do that teeny little bit of trimming we need...

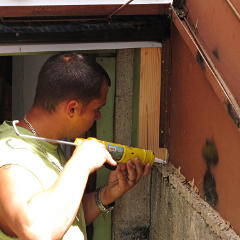
All filled, caulk it up With both pieces in and deck-screwed to the bulkhead flange, some caulk was run around various junctions. Not that it would make any difference for air-sealing, as this is all outside, but perhaps it would be a little more bug-proof. Of course they can wander in through the generous gaps past the bulkhead door when it's closed.

I'll probably need a new bulkhead some down the road but this ol' steel one is actually still in pretty good shape, works well when its various moving parts are greased, and all of this will probably get repainted at some point.


Rain coming down wall The guys finished the day mostly slaving away on the soffit, and it rained most of the next day so they didn't come at all. During that rain I noticed that water was still coming down the wall -- how could that be happening, since I had overhangs now?? Looking up gave me a hint that a little water was running along the soffit pieces themselves and then dropping off right next to the window. But with the new sub-fascia boards bare and ends of the soffit basically hanging out in the weather, this wasn't so surprising. What was mildly surprising was that no effort to protect any of that stuff had been made -- then again it was all external to the foam-face drainage plane assembly which universal faith was being given to.

Second round of EPS cut-down I took the opportunity of a quiet day at home to finish cutting down the old styrofoam. I knew this whole sill-to-wall area was a huge infiltration point for cold air, and it would be nice to eventually have it air-sealed. We were still up in the air whether to use closed-cell or open-cell here, though -- with impermeable foam and metal already all the way down over the sill on the outside, I didn't want to risk burying the whole thing in a moisture tomb.

Next section   (15)
Index

_H*   121203