House energy retrofit project 05

    Strange miscellany

A couple of days later the electrical inspector finally came around to eyeball the project. Apparently when he had heard that I was installing a metered sub-feed he was thinking I was constructing an illegal in-law apartment or something. I showed him the whole rig and how the subpanel wires were hanging over by where the air-handler and outdoor connection would go and I think I clinched it when I waved at the meter and said "this is my equivalent of knowing how many gallons of oil I burned". The only bit of planning he wanted us to change was to mount the outdoor disconnect for the condenser unit higher than on my foundation wall; we agreed that a fencepost or the like would suffice and it was close enough to the wall penetration that the conduit could just hang across the gap and we didn't have to do any underground piping.

But for the most part, I was ready for the HVAC install and notified my contractor accordingly. It took a bit of squeaky-wheel-ism to get him to respond, but he finally surfaced to say he was finishing up a couple of other jobs and couldn't schedule me in for another week-plus. So I had a little downtime to fill with my continuing education and strange hacks.

Some example random factoids and observations, just to express the fairly diverse areas I was digging into:

  • NACHI is an interesting site all about home inspections and inspectors
  • The Maisotsenko cycle is a fascinating psychrometric trick that takes the swamp cooler to whole new levels
  • Appion makes some nice HVAC tools, as does Fieldpiece, and their
    manuals are a good informative read
  • Demilec has a soy-based spray foam made primarily from recycled plastic
  • There is a company called Big Ass Fans that markets to industrial and farm air circulation applications
  • There's not a lot of information about how stretched-nylon-strip humidistats work, but I finally
    found this article that explains a little more
  • The Green Building Curmudgeon offers a long email thread about ventilation and related topics
  • HammerZone has a lot of amusingly-written DIY articles and rants
... you get the drift. One research rat-hole would quickly lead to another five, and after a while my poor little brain [aka the "wet bulb"] was close to exploding. But as I pored through more and more papers and case-studies and conference slides and videos, thoughts on things I could do would occur to me and I made sure to note them down to chase later. In other words, there's enough stuff out there on the internet that a fairly deep education in building science and HVAC can be had completely for free.

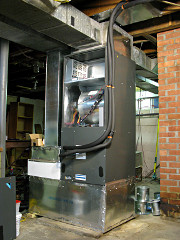
One simple idea came while putting some of the ductwork back together: I realized that simply keeping an end cap off one end of the return system would cause the air-handler to pull primarily from the basement, thus supplying already-cooler air that would probably need a bit of drying anyway. I flattened the locking tabs and added a pair of nice handles, making it an officially removable piece and a beautiful solution to the basement circulation and drying problem. Well, once I had an air handler again. With a supply register for the basement area already present at the other end, it would allow for nice circulation of conditioned air down there in addition to upstairs. It was a passable theory, anyway, as I looked at the completely disconnected duct ends hanging over the furnace pad without any good way to push any air through them.

Fortunately the weather was generally nice and I could pull a little fresh air through the place using the front door stormdoor and the like ONE openable screened window I had left. The hack dehumidifier kept the basement under reasonable control in the meantime, but I could tell that the warm-weather humidity was already trying to seep in.


[Click any image for a larger version.]

    Surveying the field

I managed to get away from all this stuff for a while at an annual weekend gathering down on the Cape. I headed down early before some weather was scheduled to roll in and did a bit of biking on the Cape Cod rail trail. The perfect, calm and cool afternoon faded into increasing winds through the evening, and by morning the shoreline was getting blasted by wind-whipped rain that came and went throughout the day. Since we were more or less trapped inside and I was still obsessed with my new study topic, I went exploring the air-handler in the meeting facility's attic and the tankless water heater in the closet downstairs and some little Sanyo mini-split compressor units next door.
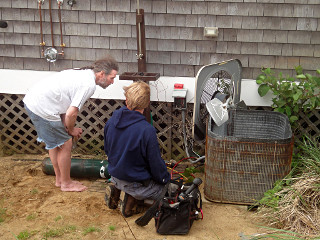
Full of HVAC questions It turned out that the air conditioning in the common-house we were hanging out in wasn't working and the management had put in a repair call, so a guy showed up to look at the system. Not like we actually needed any air conditioning that day. The poor fella was out in the chilly, damp blast trying to do a leak check on this miserable rusty old piece of crap, but seemed entertained by some of my questions and intrigued to find someone in this random gathering of weirdos who could talk shop with him. Units like this do *not* last very long in salt air, and this particular problem was a leak in a badly rusted inline filter/dryer can. The compressor sounded pretty unhappy when he tried to fire it up later, and he went off to find the property manager and recommend complete outdoor unit replacement instead of dorking around with this thing any further.
 
In the process of watching him do his diagnosis and in my other wandering around I saw evidence that the industry is plagued with some pretty shoddy work. Most HVAC equipment is held together with cheezy sheet-metal screws but once those are threaded in for the first time, they can last solidly for quite a while if a little bit of care is taken to not cross-thread them on the next insertion. Like with machine screws, a little anti-seize on the threads profoundly helps long-term workability too. But this guy was just zipping the dry, rusty screws in and out with his impact driver, which almost guarantees that the holes are hopelessly stripped after about five rounds of this treatment. This appears to be pretty common in the HVAC game, and I noted it as something to bring up with my guy later.

There were some really sloppy installations in other parts of that facility, with units just plunked down on mounting pads without any sort of anchoring and lineset runs obviously done in a helluva hurry. I spotted some really awful wall penetrations for linesets and electrics, where someone had obviously banged through whatever was in the way with a big hole saw and just poked the piping through it, never even making any effort to block up the rest of the opening later. Shouldn't part of air-conditioning a building include sealing it against obvious random air leaks?? You could bet *my* pass-through back home would be 100% tight once I got done with it.


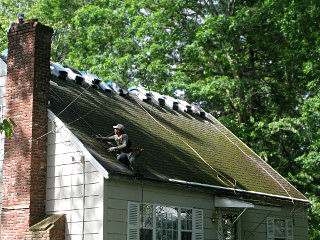
Neighbors bare-minimum roof job The following week brought a re-roof job next door, where my neighbor had finally decided to do something about his crumbling moss-covered shingles but in the cheapest possible fashion. Five or six guys showed up, none of which spoke a word of english, and they were done and out of there by 2 PM. They did a second layer of shingles without stripping the existing one, and while they dabbed at the moss on the front in a token fashion with a rake and knocked off the worst of it, the rest is still under there. They also did the typical deployment no-no of "breaking the back" of the shingle bundles across the ridge, as advised against in various manufacturer references (pdf). Fortunately it was warm enough and these shingles were cheapass thin stock that the mistreatment probably didn't crack them. And yes, this is done by low-budget roofers all the time but doesn't make it right.

Shingles slid from above The guys were clearly good at this, though; they had an interesting teamwork dynamic going on where the guy up top would simply let a new shingle slide down to be caught by the guy nailing in the lower courses.

Containment for masonry-bashing I needed to get back to my own work, though. The HVAC guy had surfaced long enough to email that sending an HRV duct through a cinderblock wall would be okay, allowing me to conveniently reuse the area that already had the holes for the oil fill pipes. I needed a much bigger hole, though, so more chisel work was in order. I set up a little containment bay to catch the inevitable bits of flying concrete, and started the process. This would be the only penetration to *not* go through my special panels.

There was a big lump of cement occupying the block void between where the old pipe holes were which I thought would be an arduous pain in the ass, but after realizing the whole thing was a little loose a bit more work got it to conveniently pop out as a unit but without taking the entire outer face of the wall with it. This was a convenient stopping point for now, as I didn't want to open the entire hole quite yet without having a life-size duct to put through it. I stuffed in a little fiberglass to keep critters out and put that project on hold.


Crew of guys for temp power pole The electrician called a day or two later saying that RIGHT NOW would be a good time to come set up a temporary attachment pole so the power company guys could come get the street drop detached from the house. They showed up with a crew and a very long pressure-treated 4x4 and started shoveling.

Temporary power service pole With ten feet in the air and only two in the ground with no concrete, it needed bracing in the typical temporary "saw power" fashion we often see at construction sites. The secondary staking from the braces to the ground seemed a little sketchy when the whole thing was wiggled, but they insisted "that ain't goin' anywhere".

Ground finally put into the ground In addition, they dug a small trench and sank the grounding rods farther into, well, the ground, and attached the clamps and wiring with plenty of excess coiled up for when it would eventually go into the meter box.

    HVAC finally begins

I was frankly a little worried about my HVAC contractor. He had gone 100% radio silent for over a month, not responding to voicemail or email at all -- not like I was hounding him or anything, just one or two questions and seeking a vague notion on a start date. I was becoming genuinely concerned that something bad might have happened to him. It seemed a little odd to simply not hear from him, even if only a quick "too busy" status, especially considering that money had already changed hands.

Well, it turned out he hadn't died in a car crash or skipped town with my first check after all, he'd just gotten into the busier season [it was warming up, after all] and had various Life stuff going on in the meantime. Once back in contact we finally agreed to hold off for the rest of the rainy week we were in at the time and begin work on the next one. He showed up hot on the heels of the electricians that Monday but not to actually start, just to review the job and get some of the newer specifics I had for him and confirm the equipment orders with the supplier for the next day.

Once we were back in good communication everthing seemed fine again and he was still interested in the larger context surrounding the project, thus allaying my vague fears that this job was never actually going to get done.


Turbulence in duct configurations I showed him this graphic which I had snagged from somewhere, maybe as part of a presentation about duct design, and asked how close we could come to implementing some of the better ideas shown here. We both understood that space was limited, but he seemed to find it interesting.

Making hole for HVAC lineset At the end of our re-orientation he gave me my homework for that night: make the lineset hole with 2" PVC, and rip down the rest of the old furnace return connection I'd left up in case he wanted to use it. This pass-through hole could go more toward the center of the panel, not impeding the swing of the Malco cutter, and only needed to be a 4 inch piece to protrude just a little bit on the inside and outside.

Taking down the rest of the old return and heaving all the associated crap onto the junk-heap left a totally clean and open work area for him around the furnace pad, not to mention giving the satisfaction of tossing the last of that junk out of the basement.


Cutting sheet metal for first ducts First duct fix, panned return feed
The next day he arrived with tools, a helper, and a big roll of sheet metal and started cutting pieces for ductwork adaptation. I was kind of surprised he didn't have some kind of powered cutter, but he's been hand-shearing metal for years and is good at it. The first task was to extend a joist pan from the return for where the HRV would hook in.

We both understood that joist-panning is viewed as poor practice in today's HVAC market, but that it clearly made the most sense for this installation. With all the ductwork within the conditioned space, Minor leaks -- especially in the return system that needed to pull a little air from the basement anyway -- were a total non-issue here.


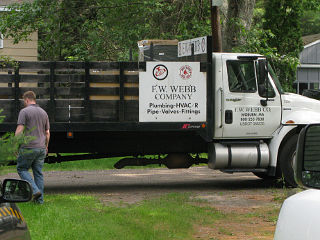
HVAC equipment delivery This bit of work was interrupted by the delivery truck arriving. I had no idea that F.W.Webb, a Northeast-local chain mostly dealing with mainstream heating and plumbing, would also be one of the major Daikin suppliers.

New HVAC stuff! Bringing air handler downstairs
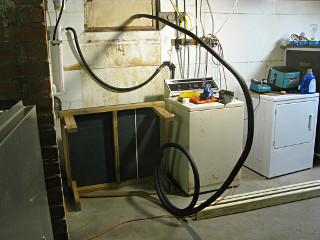
The gear was brought around to the backyard, and the air-handler brought downstairs. Fairly heavy beast, it was. The shot where he's being vaguely careful to step over my sill piece and not trash the weatherstripping is a nice counterpoint to the oil tank removal -- out with the old, in with the new.

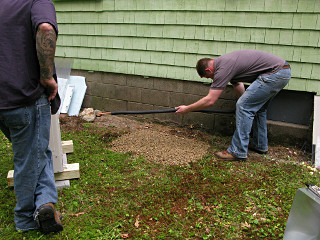
Gravel base for condenser pad The guys took a quick run out to Orangeland to pick up some supplies, including a couple of bags of stone to serve as leveling and stabilization for the condenser pad. The ground right where we'd decided to place the unit was pretty level already, especially after a little trim-up with a shovel, but this would help prevent too much sinking once all the weight was sitting on top. "It will settle", said the HVAC dude.

Sawing condenser base timber Thinking ahead a little during my own forays to the Despot, I had grabbed a hefty piece of pressure-treated 4x6 thinking it might give a nice height boost for the condenser, considering that we *do* get snow around here. It was perfect -- he just sawed it in half and used a few of my large screws and the stainless steel washers to attach it to the pad from underneath. [Why *he*, the professional, didn't carry this sort of hardware stock around with him already I couldn't quite say, but we were both glad I could supply these extra parts.]

Although I'm fairly certain that if I hadn't encouraged a little more attention to mounting the unit, it would have wound up just sitting on the pad with no attachment like so many other installs.


Lineset fed from inside Here comes the vapor line
They fed a bit of the larger refrigerant piping through from the inside, extending enough for a nice S-bend to get into the unit.

Bending the lineset Bending the 5/8" line was no easy matter, however. They had to move the assembled unit and pad aside off the stone again to make some room, and then due care was needed in applying force to the hard-drawn copper pipe to get a nice bend without kinking it. Once the S-bend was in and the end of the pipe pointed straight out from the wall at about the right height, we slid the unit back over it so it stuck straight through to the front.

This would have likely been much easier if the guy bought himself a good tubing bender, but he insisted that he was fine just doing this by hand.


Flaring the pipe The final bend was upward at the front of the unit, and the pipe was cut off and flared to go onto the fitting. He used an ordinary generic flaring tool, not one of the nice exact-45-degree ones you're actually supposed to use with fittings that handle R410A refrigerant. Hmmm.

Lineset run to the outside The smaller liquid line was a lot easier to wrangle and run out next to the first pipe, and after a while the completed lineset was hooked up at the outside and clamped up fairly neatly up to the joists. There was no way they were going to run it above the water pipe like I had sort of envisioned, but that's okay, it made the transition to the ceiling over "utility row" where the laundry stuff is and still tucked up nicely out of the way.

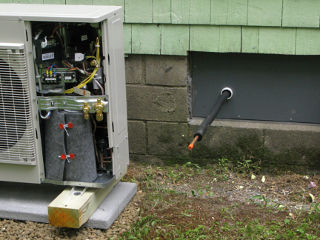
It turned out my 2" PVC pass-through was *barely* enough to get all this and a control cable through, and in hindsight the installer wished he'd asked me to do a 3" pipe instead. They had to leave a small gap in the liquid-line insulation on the way through, hardly a critical thing. At least it was in, and a smaller hole would be easier to seal up later.


Building a frame Support frame
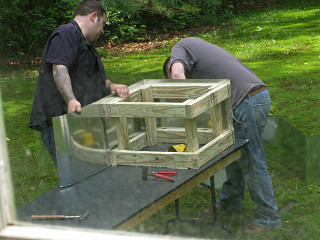
I busied myself with some other things and after a while realized that they'd been outside for some time, and went to look and discovered that they were making a little wooden frame. I was reminded of my HRV table hack thrown together out of scrap lumber, but this was from the new pressure-treated 2x4 they'd bought that morning.

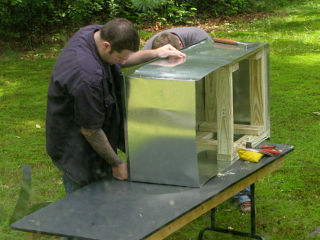
Bending a bunch of sheet metal After that was together they started cutting and bending more sheet metal, first just down on the moss until I brought out my beefed-up work table for them and made it all so much easier.

The bender he's using here is beautifully simple: a flat plate with one or more fixed-width slots in the edge, designed for typical sheet metal used in ductwork, trim, and other construction.


Assembling the air-handler base Completing the air-handler base
The wood and metal went together to form a complete base box for the indoor unit. Yes, the wood remains inside and holds up the weight of the air handler.

Air handler in place atop its base The completed box got placed on the pad, and then the three of us huffed the air handler up on top of it and carefully slipped it in between the connecting flaps to rest firmly on the wood.

Here we see not only a typical worker butt-shot, we can also see the fairly massive A-coil inside the air handler and the blower housing. This coil would be the central element of pretty much all my future heating and cooling. We also noticed a bit of an oddity with it.


Top of AHU coil, missing many loops Given the overall size of the thing, it looks like the manufacturer starts with a 2 or 3 ton coil framework and simply leaves some fraction of the pipes unbrazed and out of the loop to make a lower-capacity coil. Interesting. There's still quite a lot of thermal mass in all that metal, though.

Brazing the lineset Brazing the lineset
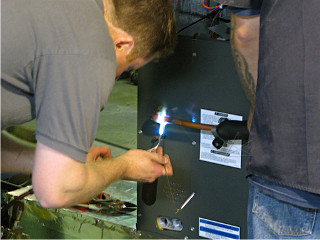
With the destination for the lineset now in place, it would be prudent to get it connected up to lessen the time it would sit there with regular air in it. Refrigeration gear is fairly sensitive to moisture, and even though the system would get vacuum-dried before startup why let the line stay open longer than necessary?

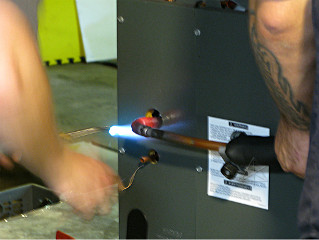
However, this bit of care was essentially negated during brazing, as I watched with perplexity as he went ahead and torched things up *without* flowing dry nitrogen through the piping like every reference I'd read says you're supposed to. Of course I asked the question, and got a vague "been doin' this for a lotta years, it's fine" handwave in return. Well, evidently this fella hasn't watched the definitive video showing what happens when you let the inside of copper pipe heat-oxidize at the temperatures used in brazing. Right here I was convinced that my nice new system was being at least slightly fucked up as I watched. Where was all that crap going to go as soon as refrigerant started flowing?

To the installer's credit, even though he didn't go as far as wrapping wet rags around anything, he *was* being careful to not heat the pipe too far into the box as there's a thermistor buried in a wad of foam *right* inside there on the big vapor line. Almost impossible to avoid melting the near edge of it just a little, but apparently the thermistor itself survived. Why Daikin engineered this to put it there instead of farther in, I couldn't imagine, especially as it should reside closer to the actual coil.

Much later I got some insight on this -- the unit is actually made by Goodman, which recently was at least partially acquired by Daikin. I'm skeptical about the wisdom of that, as Goodman seems to enjoy a rather lukewarm reception by the HVAC technical community and their only saving grace seems to be price point. Perhaps Daikin figured it was easier to take on a company already making ducted air-handlers instead of designing their own from scratch? Either way, this particular equipment line apparently hadn't yet had time to benefit from Daikin's own careful holistic-thinking Japanese engineering fixes.

It is therefore quite interesting to note that the next minor model change of this unit switched to flare fittings instead of braze stubs. Installers ignoring the warnings about brazing is apparently enough of a problem that Daikin decided to just eliminate the whole issue and do flares everywhere.


Cutting opening for filter rack The next order of business was to start the ductwork adaptation, beginning with the return side which his mounting box was part of. After cutting, bending, and attaching a cover for the open part of the box, the installer ruminated "Hmm, I'm going to have to cut most of this away again" as he went to install the large filter box on top. Well, that's how it goes; it was easier than trying to custom-bend an adapter to go around all four sides.

Attaching new return duct A long time and a whole lot of what the industry refers to as tin-knocking ensued here, as they built up the return structure and tied it into a new hole cut into the old return duct. Simple in principle, somewhat fiddly to implement in practice. It's hard to cut and bend galvanized *exactly* as you want with hand tools, there's always a little drift in how things go together.

Return duct and filter box in place But at the end of that day, the return structure was in place and done. A little ghetto here and there, perhaps, but every one of these adaptations is different and the guy prides himself on being able to custom build these setups for each new situation. Due to minor imprecision of the various parts or even unevenness in the floor pad, the filter box was slightly racked and its lid didn't close quite right until I wedged a small plastic shim between it and the air-handler housing. Easy fix.

Through the filter hole we can see the wood structure under the air handler, too. Yes, he oriented the vertical 2x4s to interfere the least with air coming in.

This filter placement in the straight-down airflow is more optimal than having it after a 90-degree bend at the bottom or right up under the air handler inlet, which would place it in a much more turbulent flow. It's also nice from a dust-catching standpoint in that anything that lands in the filter stays put and doesn't fall out when airflow ceases or worse yet, as the filter is removed.

If I had been doing this I would have tried for a somewhat more gradual opening transition downward into the filter box, but that would be a much bigger headscratcher to lay out and bend up ... and with the reduced airflow of the new system, it didn't really matter. Later observation [e.g. "where's the dirt"] showed that the filter was getting fairly even airflow anyway.


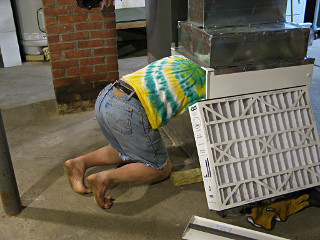
How far can I climb into ductwork? This filter box is a Trion Air Bear, and is huge. While it's not quite the same as crawling through the Dirty Ducts upstairs in Building 10 at MIT, I can fit my entire head and arms through the opening -- enough to at least examine the bottom of the A-coil with a mirror and a flashlight. That wouldn't help me be able to clean it, though, so at some point I think I'll need to cut an access hatch through the other side of the support box.

The filter has foam strips along the sides and the rack has them front and rear, for a nice tight seal all round when the filter is installed.


Supply distribution box The next day's major project was the supply distribution box, fairly simple in concept but requiring a whole lot more tin-knocking work. Where the old furnace duct transition had been just an empty box above the heat exchanger, this one got a small vee piece at the top to help split and redirect the blower airflow 90 degrees into the ducts out either side. Not exactly the ideal "pair of pants" supply duct-turning configuration, but a nice detail for the limited space we had.

AHU ductwork complete This went into place on top of the air-handler and short takeoff sections were added to tie it into the old ducts. The joints mostly got sealed up with Hardcast "iron grip" mastic and aluminum tape.

I say "mostly" because he missed a couple of seams and details here and there, notably on top where we couldn't see the joints. My job as the picky homeowner was inspection of each day's work, and this one turned up a few things that needed to be fixed either by the installer or me. I wound up doing a few final ductwork details later on, especially after observing that the inevitable condensation runoff down the supply system when cooling would have seeped *into* the air-handler unit without a little extra taping to flash it toward the outside of the box.

[Sure, I hear the pundits saying "insulate the box and first N feet of the ductwork!" and understood at the time that it would alleviate condensation issues, but really, all of this is inside the conditioned space so any sweating in cooling mode dries right off again, doesn't drip into anywhere bad, and is generally not a problem especially after my moisture-management fixups. On the other hand, I later discovered a different reason to reconsider supply duct insulation.]

As I looked around the unit a bit more I extracted several lost screws and little "fishhook" shards of cut sheet metal dropped down around the coil, which I figured couldn't be good to leave in there. The no-nitrogen braze thing was still bugging me. And that morning the installer had brought a bunch of wrong-size duct fittings for the heat-recovery ventilation feeds, and I decided that I needed to be firmer about what I envisioned as the overall ventilation design the next morning because we hadn't really gone over it in detail.


Alternate condensate tray clamped back The innards of the air-handler itself felt sort of cheaply built, with lots of metal edges that were never deburred. There's an alternate condensate tray for horizontal installations, which was basically just flapping loose up the side of the box close to the blower inlet and definitely interfering with airflow. I decided to fix that, scrounged up a little clamp out of my junkbox and drilled a hole through the case to screw it down and hold the edge of the tray firmly back against the housing. I was tempted to just buzz off the entire lip of grey plastic, as I'll never use the second tray in this installation, but figured I'd show my guy this fix first and ask if he wanted to do anything better.

Romex is not data-grade wire One of the oddest things the installer had done was run the two-wire data line between indoor and outdoor units as a piece of *romex*. As in, 14/2 solid-core electrical cable. I really questioned this for data use even at low speed, as not only does it have no conductor twist at all it fought him every step of the way to bend it and get it into these screw terminals. I even offered him my extensive stock of various small-gauge stranded data wire, which was declined. I couldn't convince him that this was a poor decision, and resolved to just fix it later.

Next section   (06)
Index

_H*   120621