House energy retrofit project 10(b)

    Day 3,   part 2

[Click any image for a larger version.]
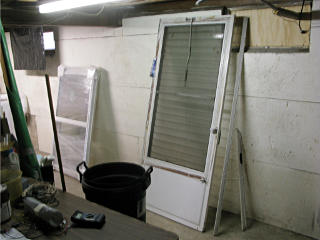
Storm door stashed in basement Along with the front windows, the front door would have to be integrated into the new bulked-up exterior surface. The old storm door needed to be out of the way first and it got stashed in the basement for the time being. It was sort of a ratty old thing with a fairly ineffectual jalousie window and slightly torn screen, but I figured it could be re-used.


Ripping rest of front door casing I would also be keeping the original main front door instead of getting a new one, especially since I'd already put work into sealing and insulating the unit itself, but it still had to temporarily come out of the opening so it could get correctly re-flashed back in. For that, the rest of the outer casing had to be pulled off.

Ants! All around front door As soon as they pulled that top piece, carpenter ants apparently *boiled* out of the slot behind it. I wasn't immediately on hand to see but but I heard them noting it out loud and calling for bug spray, borate salts, the shop-vac, and for your humble photographer to come catch some of this. A lot of the ants had fallen or been knocked out by the time I got up there with the camera, but there were still a few in the woodwork desperately trying to save their grubs.

I *thought* I had seen a few of them wandering up and down around the portico area ... The guys probably encounter this fairly often, especially on retrofits of older buildings.


Vacuuming the ants Front door tipping out
One of the guys tried to keep up with the falling cascade of ants and suck them all up as the door got loosened and tipped out of the house. I had no idea that the door could actually come out that easily, and this was clearly going to be another one of those watch-and-learn moments.

Huge queen ant We spotted what must have been the ant colony queen, trying to heave her massive bulk up the wall and being assisted by a worker -- they'd locked jaws and the smaller ant was running backwards helping haul the weight upward.

But ya know what? They were carpenter ants, pests, trying to live in *my house* and eat *my wood*.   *Squish*.   Yuck.


Big gap under door I found myself looking down into a fairly simple structure underneath with the main sill of the house at the bottom, already dosed with borate, and began to realize that how a door sits in a wall isn't really all that intricate.

We can see into the basement We can see up to the outside
The cross pieces of wood under the doorframe were simply the first-floor joists resting on the mudsill, and through the spaces I could see straight into the basement from outside and lots of front-yard daylight from down underneath.

While we couldn't see all the wood down behind the concrete stoop, what we could see looked quite sound. This was another one of those questionable areas, being on the north side of the house, previously under some small roof valleys, and evidently somewhat ant-infested.


Front yard construction chaos The scene across the front yard was looking pretty chaotic by now, with the brake and saws and worktables and my poor door banished across the yard to lean on a tree for a while. The large slanted board is an interesting tool that this particular team purpose-designed for this kind of work.

Cutting easel It's a cutting easel, to make slicing foam far easier than trying to lean across a flat table and keep things aligned to get a straight edge. Here the guy simply had to measure, plant the T-square at the right place, and draw his knife down along it at a very easy working angle to start a cut. A couple more passes by hand using the first slit as a guide, and the foam would split with perfect edges.

Foam and tyvek layers Successive layers of foam had the seams staggered vertically and horizontally away from each other whenever possible, except of course at assembly edges. Here's that same corner they turned earlier with the second layer of polyiso starting, *not* matching the first one. The very oblique sun angle I happened to catch here really shows the texture of the Tyvek drain wrap, too.

Moving wire for light Sheathing opening to find light wire
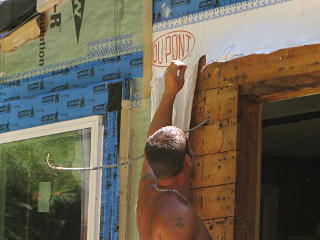
A little bit of fiddling was needed around the front door to fish the lighting wire back from where it had run into the portico and bring it down through the wall instead, to [with bit of guesswork] about where you'd normally mount a small sconce next to a door. I was thinking ahead to large overhangs which would make a light over the top of the door rather infeasible. This one position would be fine for one small light, as I didn't see any need for big fancy carriage-house-style lights on both sides of this door like some houses have. He had to cut away a small bit of sheathing to get enough access behind and bring the wire down.

Light wire through new place He drilled a hole and brought the wire through in about the right place, and buttoned the wall up again.

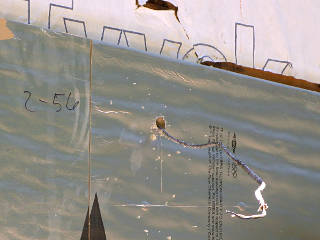
Light wire through foam Then as foam was applied, he put holes through each layer and kept bringing the wire to the exterior. I'm not sure if this got air-sealed, though...

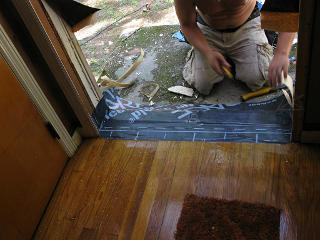
Flashing the door bucks The door opening received the same type of bucks and flashing as the windows, just taller. The difference, though, was that the door would effectively mount back in as an "innie" -- to sit on the original framing and get trim extended outward. Since doors and sills have to carry more weight, it makes sense to keep it over the bearing foundation wall underneath. Doors don't have nailing flanges anyway, and can thus sit pretty much anywhere along the depth of an opening.

Some new framing under door To that end, some additional framing was nailed in under the door opening to fill in some of the joist-bay gaps and create a more solid surface.

Here's where my picture happened to catch a metal sill pan in the vicinity but I don't think it was actually used. There was a little confusion about whether this door was going back in temporarily or permanently; we hadn't really talked about how the process would work. I guess most clients just order new doors, but this one was in pretty good shape and I'd already put some work of my own into it, and saw no immediate reason to replace it.


Door sill pan with I&W Still, the appropriate water-management details had to be set up. Maybe that metal pan was under here, maybe it wasn't; ultimately, it wouldn't matter.

Sill end chop Putting front door back in
He trimmed down the old sill piece a little to fit and started to tip the door back in, but with the new flashing and other material added underneath it got really tight as it seated back toward its original location.

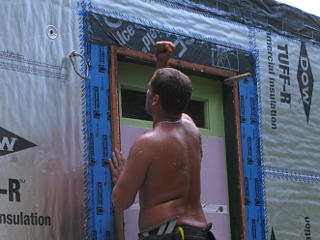
Forcing the issue A bit of rather authoritative persuasion was required to get it fully back into the opening.

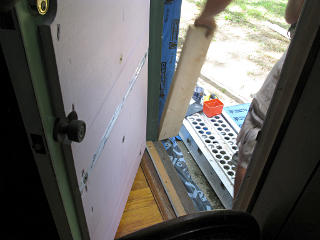
Reseating door back against floor Various tapping and other forceful manipulation finally got it to seat in against the flooring like it should.

Deadbolt opening A few long deck screws secured the frame back in place, including the long screws for the deadbolt strike that go through into the framing for added strength. The screws simply bridged across the gap between doorframe and rough opening, and without any backing material had to be tightened carefully to avoid spreading the frame apart.

Door seal still maintained Even after the bit of rough treatment, the door still seemed to work well and match up to close against my added threshold piece and weatherstripping. Not that an air seal here would matter when there was nothing but a little backer-rod temporarily filling the big gaps around the frame! At least that would keep the mosquitoes out for now.

Angle cut to foam at roof transition While all the front-door fun was going on, the rest of the wall had gotten foamed and it was time to trim it up at the roof-to-wall transition to match the angle. A hand saw was by far the easiest and most precise tool for the job.

Grace secured over front foam The roof-deck Grace got its remaining release paper removed and was brought over the corner and stuck down, forming another air and water seal. Note that any water coming down that Grace layer would get sent out to the exterior face of the foam before falling.

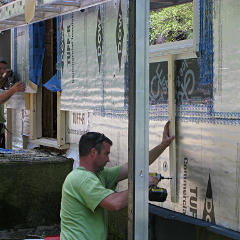
First furring piece goes on At some point the first piece of vertical furring had also gone on. This would become the nailing surface for the siding, leaving a generous ventilation/rainscreen space behind.

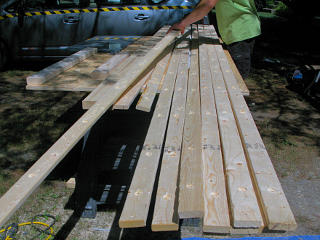
Furring pre-countersunk in bulk Another guy was busy bulk-countersinking a lot more strapping, in preparation for it going onto the house.

More strapping goes on A little more of that went on; the guy located the stud markings on the metal to center on and assumed that all my original studs were plumb. The house structure *is* pretty true in general, so this was valid thinking.

I believe the largest overall structure inaccuracy they found the whole time was a half-inch sill height mismatch from front to back, and said other houses are often way worse than that.


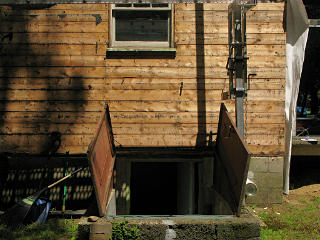
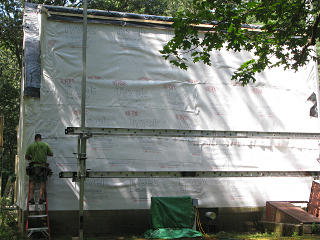
Rear wall all clear In the meantime, the rear wall stripping had been finished and all the detritus cleared away.

Basement bulkhead clear of wall This left the basement bulkhead floating completely clear of the house wall. The gap would eventually need to get filled, preferably with insulation to avoid a big ol' thermal bridge from the steel bulkhead.

[Taken slightly earlier while the tarpaper was still on]


Minimal rot over basement door I was pleased to discover minimal rot behind here, as it had been another area where water tended to collect over the years and had *definitely* had an ant problem or two but mostly into the siding. The mudsill itself was discovered to be rock-solid, a huge relief to me. We would bury this area too, along with its minor water-problem history, behind stuff that would forever more keep it dry.

Rear all housewrapped By the end of the day, the whole back had gotten housewrapped too.

Day three, done. I was still living in a mostly-white windowless cube, but it was starting to slowly turn silver.


Next section   (11)
Index

_H*   121201