House energy retrofit project 27

Most of what I considered major items remaining on the to-do list were done by now, with a few small things left and various bits of fussing inspired by more discoveries. Most of this section has to do with going through the second winter, armed with what I learned from the first one.

    Perimeter defenses

[Click any image for a larger version.]
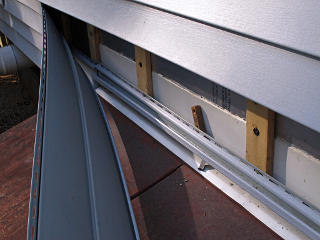
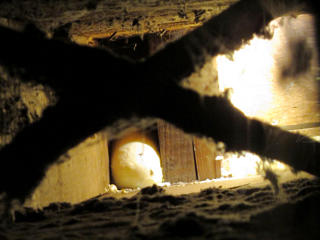
Unprotected opening into drainage space While poking around the basement bulkhead I had the sudden realization that the rainscreen space immediately above the bulkhead door had never been covered with bug screen at all. It was all flashed nicely, but anything small enough to walk or fly up through the slot in front of that would then have free reign over the whole space behind the siding. As this had been one of the areas with the most historical carpenter ant activity I was a little paranoid about it, and pulled the siding apart to investigate how to close it off. I love my zip tool.

Odd that this hadn't even been mentioned by the builders let alone dealt with, as they'd been pretty thorough with the screening around the rest of the perimeter. I guess I'd gotten lucky over the summer that nothing had decided to take advantage of this flaw and move in. With a few tolerably warm days still available this was worth fixing now, even if winter was about to keep the insects at bay anyway.


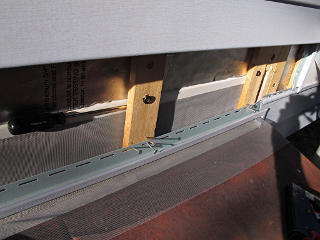
Fishing screen behind strapping The siding terminates here with both J-channel and under-sill trim, so I determined that screen could wrap over one and under the other and the siding itself would close off the gap once put back. It was a bit fiddly to loosen the lag screws and pull some nails out just far enough to let the screen pass up behind, but it needed to lay firmly against the flashing. The siding nails go all the way through the strapping and a little way into the foam, and thus would help hold the screen once driven back in.

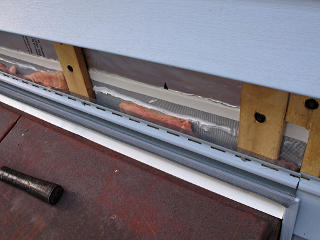
Gap now protected With the under-sill trim back on, a caulk connection to the wall flashing, and a couple of wads of fiberglass for some bulk across the space, the gap was now protected against small intruders. A dab of sprayfoam at each end finished it off.

Funny story about intruders of a somewhat larger persuasion. One morning I was sitting quietly inside, and from somewhere above me I heard a muffled thump, swish, scrapescrapescrapeslidescrabble ... and after a very brief pause another *thump* from outside the window at ground level. I looked out to see a squirrel walking around looking *very* confused; it had clearly made the jump from the pine at the southwest corner over to the roof as they used to back in the days of nice soft rotting wood to land on, hit the metal roof on the steep cheekwall part, and could do nothing to stop sliding all the way down and off the end. Completely unhurt as they're tough li'l buggers; it eventually put on its best "aah, meant to do that!" game face and scampered off.

Time to trim that tree's near branches back a little more, I suppose...


    Other little details

Mongo rip out tree stump with bare hands! One of the old stumps out front had finally degraded enough that it could wiggle, so a minimum of digging around underneath enabled Mongo here to rip it out with his bare hands! Not 100% true, actually, as a modicum of prying was needed. Upside down it had a positively scary shape, and I thought it might make a nice Halloween decoration.

Unfortunately this wasn't any of the nearby yew stumps, which were still quite sound and probably destined to remain so for the next fifty years. I sporadically kept dosing those down the drilled holes with Stump-Out, seemingly to little avail. Delignification, my ass.


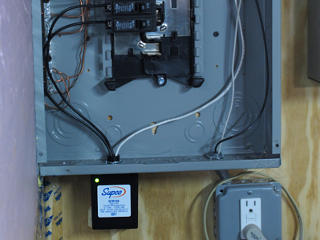
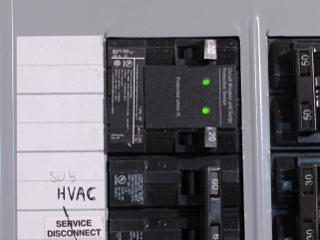
Whole-house surge protector Way back when the electrical panel got upgraded, the electrician had mentioned adding a whole-house surge protector especially if I was installing a heat pump. I declined at the time because it sounded like a superfluous up-sell I didn't need, but then I started looking into what they really are and what's involved in adding one. Bottom line, I did a little research into clamping voltages, kilojoules, MOV versus SASD devices, and the wide pricing range for something that might soak up errant spikes in the electrical system. The guys over at hvac-talk seemed to favor a few of the less expensive units that seemed to be completely adequate for helping protect things like heat pump inverter boards, so I went with this Supco [apparently the same as Sycom] mounted in a convenient knockout under the panel and hung off an additional pair of breakers. Installation was totally straightforward.

It's not easy to know if these are actually doing their job or not, but the idea is that if either of the breakers trips or the LED goes out, the unit has probably taken a good hit and partially self-destructed and it's time for replacement.


Updated surge protector   Update:

In early 2016 I received a one-line piece of email out of the blue from someone I never heard of, saying "get rid of the Supco its a fire hazard".  Before simply believing that I did quite a bit of research, including talking to some design-level people at both Supco and Sycom who originally designed the product.  There is more info findable on the net including this review of the SCM150, but correctly points out that there have been no official recalls and installations that had problems were arguably on HVAC branch circuits and mostly located outdoors.  While the units are supposedly weatherproof, that is far less optimal than an indoor installation right at a service entrance with a good solid low-resistance neutral connection, as I had.  The major cause of overheating was a *sustained* large neutral imbalance, causing continuous overvoltage on one side of the service, which the Sycom/Supco design would likely fail to either fully absorb or open thermal protectors to disable itself, leading to thermal runaway.

Even armed with all this info and some assurance that my installation was at far less risk than typical HVAC jobs, I decided to update the surge protector with this convenient clip-in unit from Siemens, which fit perfectly into my Murray panel right up near the main connections and has a neutral lead running all of three inches straight to a solid bus bar.  It also provides two spare 20A breakers for whatever expansion I might want to do later.  The Supco remained installed but simply turned off for the interim; it could serve as a backup protector if the Siemens got hit and/or extra surge capacity over severe storms or something with a watchful eye kept on it.  One could naively say that if having a surge protector is good, having two is twice as good, right?

Interestingly, the SCM150 isn't even offered as a product on Supco's website anymore, and no equivalent whole-service protectors are listed at all -- just single-circuit consumer grade plug-in types.  Maybe they decided that the better part of valor was to get out of the load-center level market entirely.


    Into the second winter

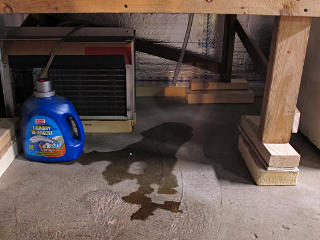
A little HRV condensate The weather was turning noticeably colder, and one morning I found a little dribble of condensation under the HRV drain meaning that incoming air was well under the interior dewpoint. Time to put the bucket in place for the winter! Again, this didn't need a whole dedicated condensate pump for the minor amount of water it would produce over a season.


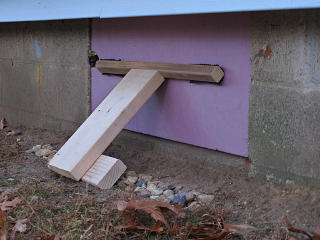
Basement window cozy A new idea to try was temporary exterior insulation for the two basement windows. This consisted of a couple of accurately cut slabs of foam and a couple of simple "leaners" to keep them in place. The hidden feature is the screws in the lowest crosspiece protruding down into the dirt a little to help keep the foot of the assembly from sliding back. With the outdoors going cold and dead I wasn't worried too much about wood in contact with the ground, as these would get taken up again in the spring.
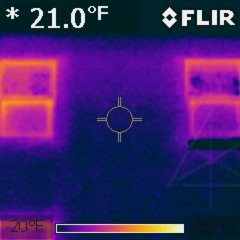
These actually had a quite profound effect on the interior temperature of the basement windows. The outer frames were still a little cold due to direct contact with the concrete, but the "box" of still air formed between the window sash assembly and the foam raised the temperature of the inner panes to about 57F where they had both been in the mid forties or lower before. The merits of exterior insulated window shutters are well known -- Thorsten Chlupp discusses them quite a bit in his long video on passivhaus envelope design in Fairbanks AK.

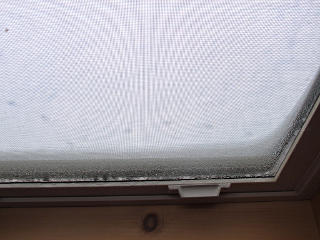
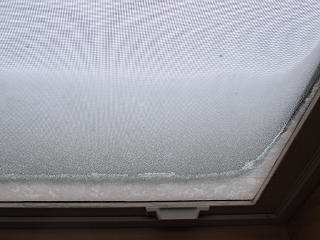
The only drawback was having to remove the assembly on the west side window once in a while to fling the dryer hose out, but laundry could wait for a less frigid day to minimize overall loss. For me, the minor inconvenience of *not* having a permanently ducted dryer outlet and its associated inevitable and horrendous leakage is far outweighed by keeping the envelope nice and tight. Such a setup might not even be to code but wtf, it meets my requirements.


    Chasing more air leaks

Small air leaks through old foam Unexpected cold spots
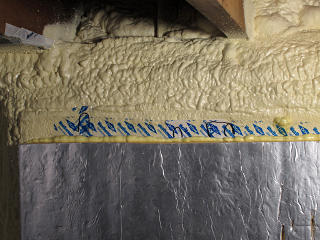
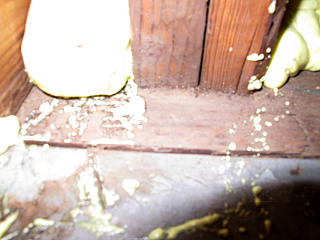
I could finally do some more "blower door" test runs, or more properly "blower window" as my depressurization rig was the box fan upstairs with some blocking around it to contain airflow. It was plenty of pressure differential to make cold air come howling in wherever it would and get spotted on the IR. It was a reasonable suspicion that a year of temperature cycles and settling could have opened up new gaps in the shell just about anywhere! After some time of running it I found chilly spots in some unexpected places -- in general it seemed like air could slowly diffuse right through the foundation wall *and* the EPS styrofoam wherever it was still exposed. But as I've learned it's not that surprising, when you think about the porosity of both substances. At one place in particular I had previously slapped some tape along the old stuff above my new insulation layer thinking that it would suffice to seal it up, and that turned out to be a bad assumption. The two pictures are of the same area, and the issues are obvious.

I wound up stripping off most of that tape and caulking deep into the little butt-joint seams in the EPS that were bringing in most of the infiltration, and then adding another layer of sprayfoam along the top of everything. Where there weren't actually visible seams the remaining exposed EPS, as little of which showed anymore, definitely became a bit colder during the test which could only be from incoming exterior air working its way in *somehow*.

It was easy to become rather obsessive about more air-sealing over the course of that late fall, as I still appeared to be fighting some remaining issues near the sill pans at the front and side doors. The problem there was that leaks around anything mounted in a rough opening can let air wander in and travel just about anywhere through the framing structure to show up in unexpected places. The root cause was basically unfixable now, but I could try to go after the secondary effects. It was a bit of whack-a-mole for a while -- I'd stop one air leak and a couple of smaller ones would show up elsewhere nearby where they weren't before. But steadily less so, and I was prepared to hunt down as many accessible endpoints as necessary to minimize those leakage paths. Ultimately dollops of sprayfoam got squirted into quite a few little corners and joints around the new reinforcement framing under the front door as it appeared to be needed and even some subfloor board gaps at the edges. The IR imager gave greatly enhanced visibility into all this, although the remaining cold spots I could find started being more likely from conductive loss through wood or thinner spots in the sill-area foam job than from actual air leaks. For more perspective on all this and good examples of what may need to get chased down in a typical home, watch this video from the folks at "Green Dream" in Chicagoland. One thing to also keep in mind is that wood shrinks a little when it gets dry and cold in the winter, which may affect how doors and windows fit and close, and I needed to stick a few small bits of the high-compression open-cell type foam strip here and there to augment some of the door weatherstripping.

On the bright side, the other recent changes seemed to have succeeded nicely. The basement was generally much better sealed, and even that dubious cut-n-cobble job in the storage shelf looked great, no cold spots at all in there. I didn't see any problems around any of the "footing" for the new polyiso so I'd apparently done a pretty good job on sealing that up as it went in. Persistence paid off: overall the place was definitely quite a bit tighter than when we had done the actual post-reno blower door test -- probably pushing passivhaus level by now, although I didn't have a way to actually measure that. Running the depressurization for over an hour without the house notably cooling down at all and only showing minor isolated and explainable cold areas was a pretty good indication, though.


    Back on autopilot

It was time to head off for another roadtrip for a while, and this time I left the ventilation enabled on its minimum setting as the house started to cool down just prior to leaving. This would ensure that the relative humidity wouldn't climb too much as the interior drifted down to the "setback" temp I'd set at 52F, which I definitely wouldn't be around for. By the time I got on the road everything had pretty much equalized at 57F and the basement slab was still slightly *warmer* than that, so it would take quite a bit longer to reach setback against an ambient in the mid-30s at the time. Winter heat-pump strategy had become a single programmed event in the controller -- on weekdays, simply shut off at noon [e.g. go to the setback temp, the way Daikin defines it], where it would remain unless I was home to actively turn it back on after peak hours were over. So I didn't have to change any of that before taking off.

I returned in a leisurely way in the early days of January, overnighting at the home of a semi-distant relative in rural Pennsylvania right as one of the winter's several big snowstorms arrived to blast the northeast. The run up the backbone of Virginia had become progressively more, uh, interesting that afternoon and it was nice to be able to get away from the highway and its rapidly increasing collection of vehicles slid off the road toward evening. As the storm passed over it got *wikkid* cold, down to 0F or less by the morning when I helped her shovel out and began my last leg for home.

Said relative had recently replaced a woodstove with a small propane-fired stove that simply exhausts its burned gases into the living space. I was mildly horrified, thinking there was no way these were code anymore, although I know that unvented combustion heaters of all sorts are in common use all over the world. With a source of clean fuel I guess they're not all that hazardous but on coming into the house I could definitely smell some combustion gases and the humidity in there was likely higher than it should have been and landing its share of condensation on her windows. I urged her to go buy a CO detector asap at the very least. On the bright side this little burner, located at one end of the house, was actually keeping the whole place warm by itself with no help other than a small booster fan to push a little air down the hall. Her late husband had put some good work into tightening and insulating the house, and it appeared to be paying off.

That night's storm was the first or second in one of the coldest winters on record for most parts of the country, which kept everyone pinnned under the "icy polar-vortex finger of death" until well into April 2014. In the meantime it dumped lots of snow and ice everywhere, paralyzed the entirety of Atlanta GA, and probably boosted national oil and gas profits beyond all expectations of corporate greed. The oversensationalized "omg this one's going to be huge" reports from weather.com and such became a commonplace weekly heartbeat, and at some point I think they even gave up on their apparent imperative to name every storm that whisked through because there were so many. Naturally I was like "bring it", because it would enable a lot more testing and experimentation on the house with a nice steep temperature delta going on.


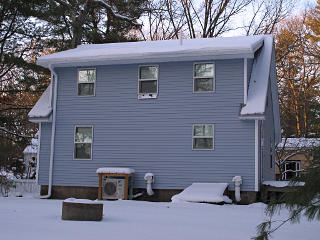
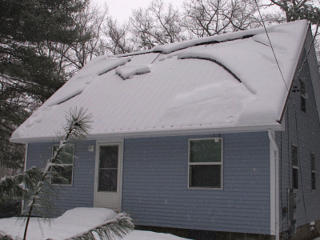
Frosted home First thing I did on arriving back home was to troop into the backyard to check out the sugar-frosted house and see how the snow-guard was doing. But that post-storm day had been so cold that none of it had started to slide at all yet, even on the steep parts on the sunny side.

Ice in the wall test hole Then I went inside to investigate the stabilized "minimal life-support" conditions. The interior was solidly down at the expected 52F with the basement generally around 50, and my little test window into the concrete wall actually had ice in it.

HRV duct condensation-catcher doing its job Not only was there plenty of condensation on the "drip lip" around the HRV intake, it was cold enough to have frozen in place into a tiny icicle. The little water-management kludge was doing its job -- the condensation was concentrated on the metal tape, and nothing had touched the wood.

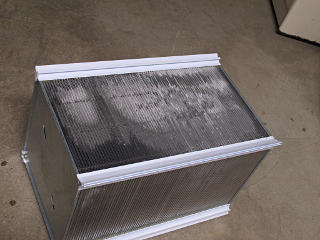
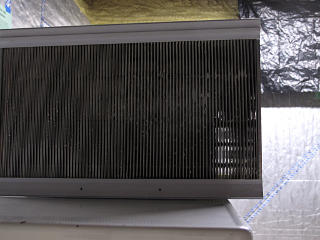
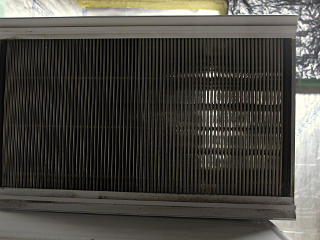
HRV core a little iced up It was also cold enough that the fixed-time defrost cycles of the HRV weren't quite keeping the core from icing up a little. There's a temperature probe at its intake but it's unlikely that the unit's firmware tailors the defrost runtime to *how* cold it actually is. Something to ask the folks at Fantech about, perhaps...

Through iced axis Through warm axis
    Intake path     Exhaust (warm) path
The icing wasn't really a problem, though; there was still plenty of open channel through both axes of the core assembly. And now that I was back home and heating to a real setpoint, the recirculated interior air used to defrost would be warmer and thus more effective.

The basement was exhibiting some of the nonlinearity I expected, holding a delta of only 2 or 3 degrees under the first-floor setpoint instead of about ten once I brought the upstairs back to normal. Early calculations from energy use and heating degree-days over the time I'd been gone indicated some improvement in the whole-house BTU / hr / degree-F figure I kept reducing all my data points down into, but not quite as much as I'd hoped from the re-insulation job down there. On the other hand, simply having the lower setpoint seemed to drop the whole-house btu/hr/F figure itself by about 25%, using appropriately compensated HDD figures. But none of this had gotten a nice long run against the deep cold at a normal interior setpoint yet, and further investigation was clearly warranted. The slab itself read about 48F at center and a bit less near the edges, which was cooler than the average listed earth temperatures for this area, but I still had my theory about edge conduction and the external wall surface being able to siphon more heat away from the general mass of earth under the house.

Another interesting datum was watching it take about 7 kwh on pure resistance heat to bring the hot water tank from 50F back to 120F, from which I got a pretty close match for the specific heat of water. Variance from theoretical would come from the fact that water stratifies and the lowest layer doesn't get heated to the full temp of the rest. Thermodynamics! Physics! The formal definition of BTUs!

It wasn't too long before I had to put things back into "standby" mode for another week while off working that year's Arisia, on return from which I found similarly cooled-down conditions but not quite as extreme. From that point on I would be able to go back to a normal heating and ventilation level and run the house in largely steady-state conditions for the rest of the winter. I dutifully logged my meter reads and heating degree-days every evening, using midnight as the sample point as it would better match how the degree-days were calculated up at Wunderground. And it got quite cold over that time, sometimes down to "design night" temperatures where it felt like the heat-pump was running almost 100% to compensate for the loss. That wasn't entirely from the gradient, though, as the afternoon shutdown over peak-metering time on weekdays got things a little behind the game and each evening had to add a recovery period. I think the deepest temp drop on any of those days was down to 59 or 60 degrees inside, from the nominal 68, and after massaging a few figures I made a rough guess that the aggregate specific heat of the house and contents was between 8000 and 10,000 BTU per degree F. So going into the coldest evenings it would take several hours to come fully back up to temp while fighting both thermal loss and mass at the same time.

    Containing the cold loop

Within that stable framework I could try changing minor variables to see if it made any measurable short-term difference. One thing I wanted to experiment with was interrupting or containing the convective air loop around the window shades. Since these couldn't have zero clearance to the boxes there had to be an air gap at all four sides, letting the chilly windows "pump" air downward behind the shades. Numerous infrared shots couldn't really tell me how much of that cooled air might have been mixing with the rest of the interior air -- nothing ever showed it actually spilling down off the inner edge of the window ledges, but every time I put my hand on one of the sills I could feel the cold air flowing out the gap next to the shade almost like there was a draft.


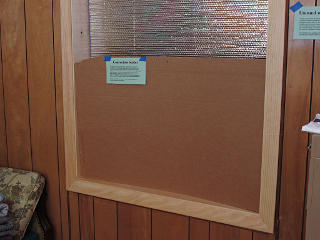
Convection stopper for window box The easiest test pieces were simply pieces of cardboard, accurately cut to 90-degree lower corners and just a little too wide to fit into the boxes without bending slightly. The outward pressure from the bend kept them in place, and I could snug them down and wiggle the edges back and forth a little to minimize any remaining gaps. This basic idea had formed a little before the open-house, so the one here got its very own descriptive sign and was actually one of the slightly *less* well-cut pieces from which I learned to make the rest better.

Without convection-buster With convection-buster
    Without blocker     With blocker (removed for pic)
If nothing else, the presence or absence of the convection-busters definitely affected how much condensation landed on the lower sashes. I started to wonder if this was really a good idea, as too much of this might build up and start running down to soak the wood. Now, I had already sanded and urethaned all the window boxes so among other things they'd be more water-resistant, but that couldn't really get down into the small gaps between the window frame and the box. At least in really cold weather more of the condensation froze at the bottom, so it wasn't actually going anywhere immediately.

Convection buster external frame comparison I made blockers of one sort or another for every window, and selectively put them in over different periods and recorded surrounding conditions. The results were sort of unclear in general. External IR shots seemed to show an un-blocked frame (left) running just a little warmer, but week-long comparison heat-loss tests back and forth with *all* the blockers installed or taken out seemed to show no significant changes in the overall btu/hr/F measurements one way or another. I just wound up with more water accumulation on the frames and maybe it felt a little less "drafty" if I was right next to a window box. As far as I could tell none of this involved actual air leaks, after the meeting-rail fixups and the fact that most of the windows are at elevations nearer the neutral pressure plane anyway.

A number of effects probably canceled each other out. First, the shades are mounted fairly deep into the boxes which sort of keeps the whole convection game contained toward the exterior, possibly affecting the inside far less than I suspected. And with the blocker in, once the cardboard became cold around the bottom it might have been conducting *more* heat from the room right into the loop on the other side. A minor difference in indoor-to-outdoor temp over the area of the frames themselves probably wasn't enough delta change to be really significant.


Some of the condensation issues got mitigated on the south-facing windows as I also played around with completely unshading them on sunny days to try and capture some free heat, at which point the condensation could evaporate away. Unfortunately these windows aren't really optimized for that with the low SHGC glass units, so that didn't seem to help a whole lot on the heat-loss side. I suppose a more idealized setup here would have been double-hungs with complete sets of seasonally changeable sashes, the winter pairs with a higher gain coefficient and still able to benefit from the radiant protection of my blinds once night fell. Or maybe that would all just be too much PITA factor and storage headache...

    Enough with the windows, how about the door

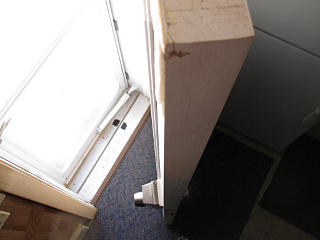
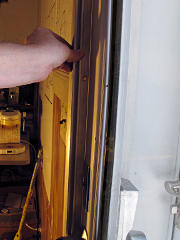
Door slightly warped back The new side door is a fairly good heavy unit but with the weatherstripping pressing uniformly on the edge all the way around, that apparently added up to enough longterm stress to start warping the door slightly. Especially around the top where the half-lite glass is and the door structure is a little less stiff than the solid part below. I noticed a tiny sliver of daylight beginning to show up along the top edge where it hadn't been before, and the door wasn't quite aligning with the frame along the top edge. Looking down the side of the door showed a subtle but definite back-bend going on.


Door curvature A straightedge along the area where the half-lite starts revealed about where the worst of the warp was, a little above the lock. Said aluminum rail, more goodies from hoarded scrap metal upstairs, turned out to be the perfect piece for fixing this.

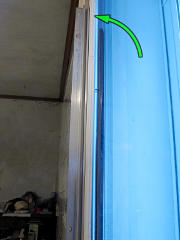
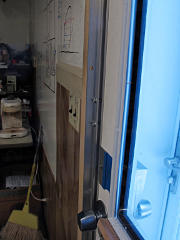
Door reinforcer high, with pad A couple of lag screws at the warp held the rail right to the door surface at that point, and a thin piece of foam at the top went in up top where the arrow is. This stressed the rail out at the top just enough to push the upper corner of the door back toward straight. It seemed to work, bringing the whole top edge back very close to correct alignment, and the door would likely further warp slowly back to a better position over the long term. The main point was that it handily closed the little almost-gap in the top weatherstripping with no other changes needed.

There are definite merits to those new Euro-style doors that have multi-point latching, which is why they're becoming popular for passivhaus construction. They also have multiple contact planes of weatherstripping and can basically be made submarine-hatch leakproof. This door isn't bad but once the weatherstrip gets tired or the bulb that sweeps the threshold underneath wears out, I'm sure some more work will be needed on it.

The odd little diagrams visible on the whiteboard-wall above the light switches are actually relevant to the ongoing studies too.

Door reinforcer low

    Caught in a pressure-enthalpy loop

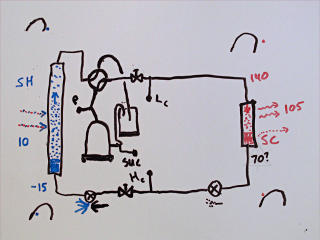
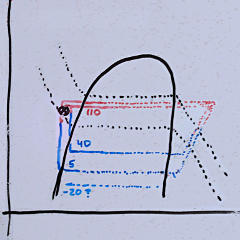
Refrigerant loop with SH/SC noodling P/H diagram with guesses about heating mode
While idly cruising through posts at hvac-talk, I saw someone mention that for many heat-pump systems, subcooling at an indoor coil in heating mode is generally more than at the outdoor coil when in cooling mode. I thought about it for a while and couldn't come up with why, asked, and didn't get any good explanation on the forum either. It's pretty busy over there, so my question probably just got lost. So I hit the whiteboard and tried to envision what was going on inside the refrigeration cycle that might cause this, especially in systems without fine control of expansion. Here we have the dee-lux-o conceptual reversible refrigerant loop, with two expansion valves, an accumulator, and suction and discharge monitoring taps. And some ballpark real-life temperatures noted where I could get figures from the controller.

One interesting spec is that heating-mode capacity is generally a larger btu/hr rating than cooling. My best guess why is that compressor heat is beneficially used in the first "desuperheating" step as hot gaseous refrigerant reaches the indoor coil functioning as the condenser, losing quite a bit of sensible heat before it gets down to saturation temperature to begin with. In cooling mode that extra heat is unwanted and has to be dumped outside against an already high ambient, requiring more work to achieve a given cooling capacity. Interpreting some of the data from the Daikin controller I could see that compressed gas arrived at the indoor coil respectably hot, despite its longish trip through the big pipe from outdoors, but the average condensation temperature showed as the more modest 100F and change delivered through the supply ducts.

This still doesn't explain needing more subcooling at the other end of the indoor coil, but consider where the liquid is heading next: it has to eventually go get colder-than-cold to pick up heat from the outdoors, so it makes sense to not carry any more spare heat than necessary outside again before the real expansion step. Holding back more high-pressure liquid and doing a little pre-cooling can leave more heat inside, and is why Daikin uses the indoor expansion valve to further regulate what's on the way to outdoors. Average system temperature is also likely less with a much colder outdoor coil than you'd have inside in typical cooling mode, which might tend toward having more liquid-state juice in the system. Another key factor is that the indoor coil in the air-handler is generally smaller than the one outside -- thus the refrigerant's long heat-yielding journey from hot-gas, condensed, and further cooled would need to occur indoors across a *smaller* exchange area to match the the opposite events outdoors. Thus, I surmised, larger desuperheat from the compressor *and* more subcooling inside are needed to keep everything in balance.

In the right-hand doodle I envisioned it all as a larger loop around the P-H diagram, particularly on the bottom where evaporation would occur along a much colder isotherm [the black dotted lines]. The colder it is outside, the lower the bottom path of the cycle has to sit to achieve the 10 or 12 degree delta needed underneath ambient to be able to pick up enough heat. This might also explain why the compressor draws its full-bore 7 or 8 amps in heating mode all the time, but moderates down to 3 or 4 or even less in cooling mode. Longer path from just-evaporated gas to sufficiently compressed and heated gas, and no worries about latent load.

If you do thermo or work in HVAC and I'm totally talking out my ass here, let me know and kick me some good references. I was just noodling some concepts but I'd still like to know what the true "professional" answer is [and I don't even remember exactly what type of system the original thread was referring to, most likely TXV.] I'm still wrestling with the fundamental idea that compression of the gas doesn't somehow start condensing it immediately, but apparently that process includes enough heat gain without an opportunity to transfer any of it away that the compression part of the curve stays safely out of the "dome" until it reaches the condenser.

If *none* of the above makes any sense at all and just made your eyes glaze over, let me simply reiterate that modern heat pumps are awesome.


    Dollars and sense

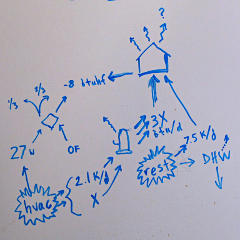
Where do the kilowatt-hours go? Another whiteboard doodle had to do with energy flow of the whole house. Logging HVAC kilowatt-hours and heating degree-days wasn't the whole story, and as the day-to-day calculations developed I was taking into account the HRV loss, plug loads, my own body heat, standby energy keeping the compressor warm, and the fact that most of the heat from the hot water would wind up outside in the ground.
The script developed for the day-to-day data reduction got pretty ugly, but basically boiled down to three components on any normal day: HVAC heat that wasn't thrown away outside from the crankcase, HRV exchange losses and fan watts at the standard rate I ran it, and about 35000 BTU/day of fixed overhead from general electricity use and my hot little bod. A consistent run of days with meter readings, HDD figures, and whether or not I was running on the resistance heater instead of the heat pump [which I did on occasion to roughly confirm running COP] would get reduced to BTU/hr/F and averaged at the end, with expected variances coming from how sunny and/or windy it was any given day, heating cycle start and stop times relative to when I took my snapshots, and random factors I could never identify.

But in the end I got a pretty consistent whole-house steady-state average of about 185 BTU per hour per degree-F, and when I went to research ballpark demands of typical code-built houses of similar size I was gratified [or is that mildly horrified] to find that they're up toward the 500 - 800 or even higher range. Note that this is *just* a heat-loss figure for the envelope, not taking into account how the heat gets produced -- that's a second calculation that comes later. At around 240,000 BTU over the coldest days I needed the equivalent of what would be roughly 2.5 therms of gas or 2 gallons of fuel oil at typical furnace efficiencies, the big difference being that I grabbed about two-thirds of *my* BTUs out of the thin icy air. Figures from colleagues willing to share some of their energy cost data seemed to center more toward 7 or 8 therms or gallons on a worst-case day, so even though I wouldn't have minded seeing lower losses for this place, I was doing pretty well by comparison.

To jump a little ahead of the running story line for a moment, here's the part that everybody wants to know: what was the heating bill??

The HVAC subpanel meter said it best, after subtracting the late-October read at the point I began heating for real and accounting for peak/nonpeak loads and pricing: $200 total for the winter, over and above normal plug-load and occupancy heat sources. And through an unusually cold winter of almost 6100 degree-days from October to April. To be fair, a 68F setpoint isn't for everyone and the place spent some intervals even lower than that at the setback temp. So continuous occupancy at a more typical 72F would have run a bit more, but not by a whole lot and it's still one of the numerous ways this beats the crap out of buying fuel oil and having half my house unusable all winter. Watching the tankers pull up to the neighbors three or four times apiece over a season does bring a certain feeling of smugness, but let me qualify that by saying that my IR camera and cans of sprayfoam stand ready to help *them* out too if they need it. They just haven't learned to ask yet.

That btu/hr loss over the whole shell area also yields an effective whole-house R-value of about 17, not surprising considering the nominal 26-and-some of the wall assemblies then punched full of windows, doors, ventilation, and still sitting on the cold naked slab in the basement. In effect, that's my new "bulk Manual J" for the place.


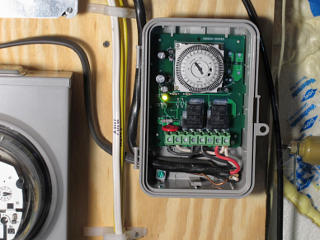
Water heater timer installed HVAC costs aside, I had a couple of other strategies for reducing overall energy costs -- for one, turning off the water heater over peak times. A manual process at first, but I eventually wearied of going downstairs to flip the breaker off at noon and finally got and installed a water-heater timer. This is an Intermatic WHQ7 or whatever its updated equivalent is, the seven-day version of their electromechanical timers actually made by Grasslin in Germany. Product reviews strongly indicated that this was a far better choice than their more popular electronic EH40 which frequently suffers from typical chinese quality[?] control and stops working.

Once around the dial is an entire week on this model, and each tripper represents a two-hour block. It's easy to see the programming to stay off over the weekday peak times, with generous margins on either side. I don't even come close to using all the stored water over those ten hours and what stays inside the Marathon tank cools down very little.

This unit was not entirely without its little problems, though. The clock module wasn't mounted very well and presented a risk of being yanked right out of the case if stressed wrong, requiring a couple more screws and backing nuts to affix it firmly in place. And wrangling 10-gauge solid wire through tight little areas wasn't exactly fun. Additional wiring complexity comes from the fact that you have to supply jumpers between the line inputs and clock power, it isn't already wired by default. This seems to be a fairly common configuration for water-heater timers in general, which seems odd given that the clock power supply auto-senses its input voltage anyway.

Per my norm of being the pain in the ass with the hard questions, I called Intermatic support on the clock problem. Once I got them past the denial stage, they had never realized that their measly two screws holding it in were merely threaded into holes through the fiberglass circuit board that barely gripped them. They do now. I thought German engineering would proactively catch something that structurally basic, before thousands of units went out the door.


    Ice is maybe not so nice

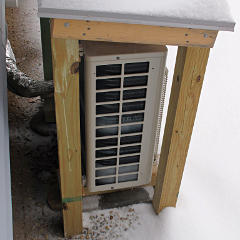
Defrost cycle dribble I watched a couple of defrost cycles on the heat pump a little more closely, using the IR camera to try seeing exactly what was going on in the piping. The outdoor coil is pretty clearly split into upper and lower halves, but refrigerant propagation when beginning cold or warm cycles didn't seem to travel uniformly from one end to the other -- rather, it created various patchy areas of temperature that seemed to drift around in the piping following no logical pattern. I can't explain that -- it might have something to do with the way the refer boils as it moves, but it ultimately did the right thing and defrosted. As ice melted off the coil the water would basically dribble straight out some holes in the bottom plate, the main hole being under the center of the unit so it just landed on the base pad and spread out however it was going to go.


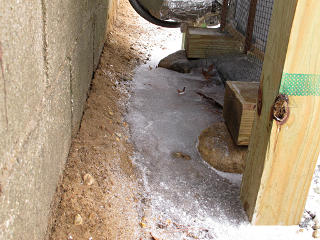
Frozen lake of defrost water Since some part of that ran toward the back, eventually a substantial lake of (re)frozen water built up on the dirt behind the unit. The weather was cold enough that it didn't have time to soak into the soil before solidifying again. This seemed kind of silly but easy to solve.
Aside, my new grille was working wonderfully. Nothing at all ever accumulated on it, even in the middle of howling snowstorms. Daikin knew their crappy original grille was a problem anyway -- in one of the newer installation manuals I found this passage in slightly off Jinglish:
     Remove suction grill on the rear so that snow will not be accumulated in the rear fin.
So Daikin's answer was to simply chuck it, rather than engineering something better that still afforded a little mechanical protection.

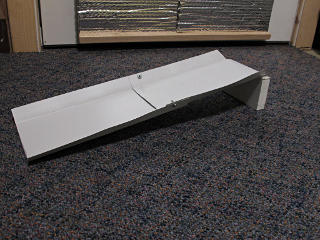
Drainage ramp concept A solution for the drainage problem was pretty easy in concept. A simple gutter to direct the bulk of the dribble in a specific direction, whacked together from a couple of scraps of coil and a hunk of Azek.

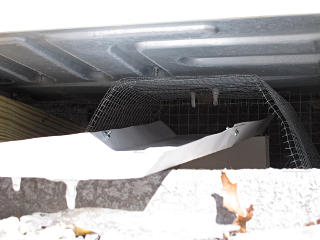
Drainage ramp in place and working It worked quite well, and fit nicely under the existing screen guard designed to keep critters out of the works. The drain hole is easily big enough for a mouse, and mice have been commonly known to nest inside outdoor units and eventually kill them. [Yes, the units, not the mice unless they happen to bridge the power while climbing around inside.] The operational warmth attracts the critters to come inside and homestead! So the quarter-inch mesh keeps them out but allows free defrost drainage, and then in the summer a wad of fiberglass gets added above to plug the hole [as defrost isn't needed] to keep the hornets from getting the same sort of idea.

Conveniently, the secondary drainage holes are right under the coil fins and thus pretty much self-blocking on their own. But the main one in the middle is in a big open area under the fan with sloped channels running to it.


    Roof rambling

Hanging blocks of snow As the steady stream of winter storms came and went, the region went through a crazily mixed-up variety of snow dumps and cold snaps, which alternately let snow slide off the roof or glued it tightly in place. Or some combination of both, which left these slabs and cornices amusingly trapped for several days. It got cold enough that they weren't going anywhere -- for laugh value I even went up in the attic and thumped on the rafters with my heels to see if I could crack things loose from inside, but nothing went until it warmed up some.


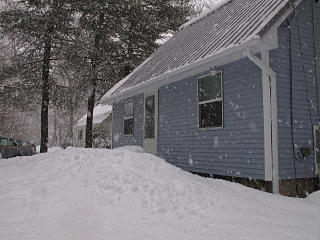
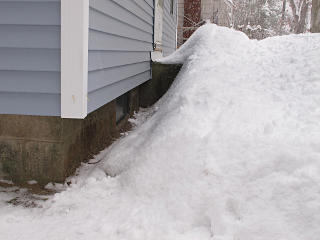
Giant mound in front yard Without a snow-rail on the front, it eventually all had to slide off and over the course of the season, built a pretty impressive mound along the front of the house. This was still okay, as I rarely use the front door and there's nothing delicate underneath that I care about. The soil out front is also plenty permeable to absorb the melt later.

My only concern was stress on the edge of the gutter, particularly as any pack started to slide. This was largely allayed by happening to be out on a warmer day when I saw a fairly thick layer begin to move, and watched it swish gracefully right over the lip without any apparent hangup on the way. If anything the small change in angle helped the snow land farther away from the wall. So for the moment, the gutter seemed in little danger of getting ripped off by snowpack slide. Long-term, much would likely depend on the weathered consistency and stiffness of any given layer of snow which can vary all over the place.


Wall is still clear The generous front overhang still kept the giant pack nicely away from the foundation, even over the course of multiple dumps. I got my winter workouts clearing the driveway over and over, but never had to mess with this. It all packed down hard enough that it would have been well nigh impossible to shovel anyway. Being that it's also the north side of the house, I figured it would just take until June for this glacier to melt.

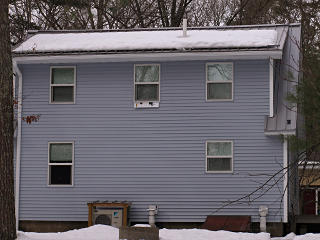
Snow rail doing its job But how about the snow-rail I'd gone to all the trouble to put on the back? Well, it spent its first winter doing its job admirably, holding everything above back in all conditions until it was ready to melt for real and flow down via the gutter. The lower foot of the pack still slid down and either fell and/or got snagged by the gutter and melted off; that was far more minor than the big thuddy avalanches in the previous year and I didn't even notice when any of it landed.

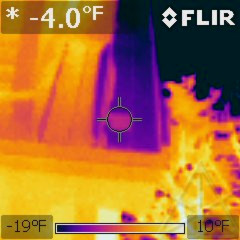
Take note of the little black spot near the bottom of the right-hand strip of roof by the cheekwall.


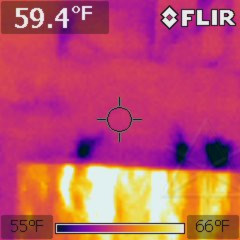
Night sky radiation study patch Seen in the crosshairs here, it's another intentional patch of gaff tape, which had to be on the large side so it would fill the sensing spot on the IR camera when shot from the ground. This was for evaluating night-sky radiation, as it was one of the factors I was starting to believe reduced the insulation effectiveness somewhat at cold temperatures. Note the IR scale carefully -- while the rest of the house is sizzling at 5F or so, my test patch is showing considerably cooler than that -- because it's facing the sky which is reading far lower than anything else in view.
Night-sky radiation is an interesting phenomenon that makes exposed objects colder than one might expect. It's what forms ice on car roofs when it's above freezing, causes damaging frosts on crops when it doesn't seem that cold outside, and can either beneficially or detrimentally cool a house. It's one of the several underlying reasons more insulation is generally applied to roofs than to walls. The effective radiant temperature of outer space is very low, presenting a huge thermal sink overhead that incidentally also helps keep the earth from being crispy-fried by petawatt bombardment of continuous broadband energy from the sun. On the dark side, any object facing upward generally wants to release its heat toward the emptiness of space, and succeeds in doing so under fairly common conditions. There's an interesting arm of research going on about this for building cooling applications which is somewhat recent but has its roots in knowledge thousands of years old. Even the DOE is getting more interested in bringing this theory to modern practice.

What I don't quite understand when reading such studies is why metal roofing is usually the chosen upper surface, as its emissivity is often less than materials like wood or asphalt. I suppose metal will conduct that radiant "coolth" inward more readily, or something. It also usually isn't just bare metal, as typical roofing has some form of coating that changes the surface characteristics anyway but hardly makes it a blackbody. The finish on my standing-seam is fairly *reflective* in the infrared and various other bands that contribute to its favorable SRI rating, and any time it came into view in the IR camera at night it would basically show the temp of the sky above it -- in effect, really cold, so I assumed those were all false readings. That's different from the effect of the roof's native *emissivity*, so to try and get that baseline for how cold the metal itself had gotten it needed a slap of my standard "uniform measurement surface". Sure, thermal probes stuck in under the panels would have been better but it was a little late to conveniently do that. But now it was clear that the roof *does* run 10 or more degrees colder than ambient on clear and calm nights.

Why the concern? Well, if the metal was getting much colder than the ambient temp then the effective thermal delta through the roof assembly would be *more* than the generic inside-to-outside. Which would also easily put its outer layers down around the temperature region where polyiso foam exhibits a weird *decrease* in R-value. Something about the blowing agent gas and how it's contained in the foam cells makes it exhibit a bit of a "hockey stick" decrease in insulation value below 10F or thereabouts, as discussed here. [Look at the graphs carefully.] If the upper inch or so of the polyiso stackup headed toward 0F or less, then it seemed likely that I'd take a hit in R-value over my head which is the traditional place where we want *more*. Oops. Maybe that's why the attic and kneewall spaces generally showed a bit colder than the rest of the place.

So, artifically deep delta *and* the "polyiso penalty" giving less R-value up top at certain times! As I phrased it in a forum post, I seemed to be having issues with, uh, nocturnal emissions. Although I didn't track it minute to minute it felt like the heat pump was running an awful lot on those coldest nights, and these factors could have had something to do with it. Still, the house didn't actually lose warmth other than over the mid-day shutdowns which aren't *strictly* necessary if I really need to heat, so I guess I didn't have to go load up the roof with straw bales like the ancient Persians. There was also no visible spike in energy usage for clear nights, or if there was it got lost in the noise of day-to-day variance anyway.

To mitigate the low-temp effect in a more practical fashion, possibly something to consider for colder climate construction, might have been using XPS foam for the outer layer instead. The Dow Weathermate tape probably wouldn't stick to it as well, but something like Wigluv 60 certainly would.

I took similar house-to-roof delta readings in mid-spring on a much warmer clear night, and the difference was still on the order of 10F. It's not just a winter thing.


    Slummin'

Confirmation sheet (paid in full) I decided to pop into the Building Energy conference again in early March, but on the cheap after one of the participating organizations offered a freebie trade-show pass. In the process of signing up [at yet another third-party registration-handling site called PulseNetwork] I discovered that by just changing a digits or two in the URL containing my obvious customer number I could not only see any other attendees' registration details, I could *print out* their barcoded confirmation sheets which was basically the credential everyone was expected to bring to the conference to prove what they'd paid for.


ZOMFG, forehead-slap time.

I honestly thought that such astoundingly basic web-application coding fuckups were a thing of the past after the field learned many hard lessons over the years, but here it was staring me in the face. I could have just as easily gone in under the name and $600 full conference registration of some earnest hardworking local carpenter with an attendee number a couple off from mine, which would have likely screwed the rightful owner at least temporarily out of receiving his own ticket when he finally showed up as well as causing all kinds of other mangement-level chaos. Rather than exploit the issue for personal gain I immediately brought it to the attention of PulseNetwork and the IT guy at NESEA. In the role of the latter I would have been absolutely *ripshit* that a provider I was paying good money to risked jeopardizing my event in such a stupid and completely avoidable fashion.

I later talked to said IT fellow at the conference, and while he expressed far less desire to rake Pulse over the coals because he didn't want to "make waves" or "burn bridges", it was now at least on everyone's agenda to fix the problem before the next conference. To me that's just lame; there have to be a thousand other event-management providers out there with far better coding and security clue that I could choose from. One word, guys: HASHES.

So I checked in as myself and just slummed around the tradeshow for a few hours, which was completely sufficient because frankly in the previous year I didn't learn all that much in the for-pay sessions. The conference has too many parallel tracks to begin with, making it hard to choose among multiple abstracts of potential interest. I figured I'd just wait for the slide decks to go up on the website and pull them down to read later, which I had already found to be among the better self-education methods available.

I still ran into a few folks I knew by then including one of the principals of Synergy. I learned that they had severed their relationship with the subcontractor that had done my project, but that said sub was still out there getting plenty to work on. [I didn't encounter anyone from said sub at the show, however.] I chatted with some local Daikin reps and learned that their latest ENVi controller [an adaptation of the ecobee and tied to the same web portal] could independently run resistance strip heat in "emergency" mode, but on further investigation it turned out that this still doesn't work over the existing "P1/P2" data link and separate wiring and relays would still be needed, so it was basically no different from my existing auxiliary thermostat setup. I had a long and interesting chat with one of the founders of Air Pohoda about their new ERV design. I picked up a sample roll of Wigluv tape, which came in handy for a couple of small projects later on. I popped by Pinnacle's display and assured the fellow who had done the hardware fixes around my place that my windows were still performing admirably.

The real surprise came from finding a booth with several people peddling a bizarre product called the Aquapol, which claims to utilize "free energy" from space to power a device that's supposed to force rising damp in masonry walls to recede just by its presence hung up somewhere overhead in the structure. [It looks like an oversize aluminum-clad hornet nest.] While there's all kinds of such woo-woo snakeoil out there I was mildly astounded that NESEA had let proponents for one of them into their show without vetting their claims first. I really thought they were more discerning than that. Well, one more nail in their coffin, I suppose. Many of the conference papers and slides did become available a couple of months later [hosted on Dropbox, not even NESEA's own website anymore], so I got a good look at what the choir was preaching to itself that year anyway.


    Where do we go from here

Extra slab insulation test New cold front in corner
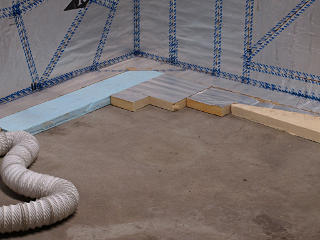
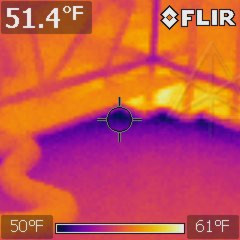
Back home I seemed to be happily insulated against rising damp but I did appear to be having a mild case of creeping chill. While my "footing" of foam around the basement slab perimeter with its larger diagonal bits across the corners seemed to be insulating against the coldest parts I had seen in the past, it was clear that the slab perimeter temp still ran quite a bit below that at the center. This was clearly visible on the IR from the gradient to dark blue under the edge of the foam. Recalling the previous attempts to insulate the slab I decided to experiment a little with the few chunks of foam I still had left, and temporarily built out a little more at the corners and along the rest of the footing a bit and see if that would help any.

Within a day or so the cold had advanced inward and was now showing up in a similar way under the *new* edge. So that goes to show what a lousy insulator concrete is, at something like one R per 8 inches. There's actually a different calculation used for slabs based on "F-factor" which I don't really understand and seemed primarily applicable to slab-on-grade, so running some math through that wasn't useful either. The new line wasn't *quite* as cold as it had been farther out but was clearly trying to trend below the nominal earth temp under the house, especially obvious when I peeked at the floor underneath the temporary foam once the gradient had settled back down. This was more confirmation of my theory that the void columns in the block wall were "bringing" coldness down from the above-grade part all the way down to the foundation footing and coupling into the edge of the slab. It's actually the reverse of that of course, with heat leaving at the edge and finding its way up and outside. With the new wall insulation the exterior wall itself would likely run even colder and be more of a sink for the escaping heat.

Not that any of this was really extreme loss to begin with, but I already knew its contribution to the flow nonlinearity and was still noodling a few ideas for mitigating it. I didn't really want to mess with building a permanent insulated subfloor. A different approach might be to insulate the exterior exposed wall surfaces, not all the way down but just far enough into the dirt to keep the direct cold air off. At the conference I had learned of a few new rock wool insulation-board materials from Roxul, which seemed like it might be appropriate for exterior and at-grade use as it's bugproof and rot-proof but freely lets moisture pass through.


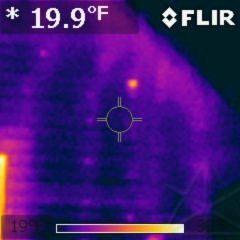
A tiny warm spot during 'blow test' After various progress on finding remaining air leaks via the typical blower "suck test" runs, I wanted to do the inverse to see if I could spot any additional leaks from the exterior. This would need a calm night, so any escaping warm air wouldn't get immediately swept away on the breeze. I finally got one, and set up to run the fan the other way around on a "blow test" and try to push my warm air *out* of the house for a while.

Nothing really egregious showed up, particularly anywhere behind the soffit strips where I would expect the highest probability of sealing issues -- I was grateful for that as getting access into there is doable but not easy. But there was this one tiny little hot spot in the midst of a wall, and I immediately knew that I was seeing the other end of what had one gable stud bay in the kneewall area looking somewhat mysteriously colder during the suck testing. And I already had a suspicion as to the exact cause.


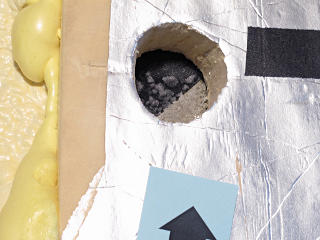
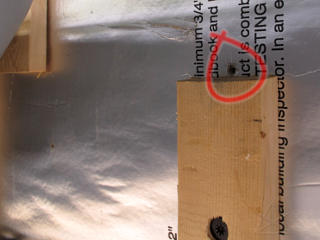
Mystery hole found It took a little hunting around and more zip-tool work, but I finally found it hiding just above a piece of strapping: a hole where clearly a long Headlok screw had been run in through all the layers, and then removed and never patched. Maybe from one of the temporary scaffold-brace attachments. It must have missed the stud inside, or it wouldn't have been quite as obvious an air path. A shot of caulk and a bit of tape over the area closed it right up; easy in this case because out here *is* the main air boundary. That's why pressure testing in the nontraditional direction is better for really localizing flaws at this layer.

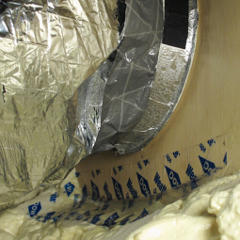
Blind shot of foam in return duct On the blow test I also spotted a little warmth around the top corner of an ex-basement-window panel, positionally corresponding to one of the return ducts on the inside. The sill sprayfoam job had necessarily gone around the outside of all the panned-joist returns, so there were a few areas that hadn't received the full treatment. A connection to the outside from inside a duct is just as valid as one from the normal basement space, but the next problem was how to try and seal that from the inside without de-panning a major part of the sheet metal which itself was already buried under sprayfoam at the end. I could get to most of the corner joints in the relevant stud bay from above but at this one particular place [the hack room grille, featuring the "not a dead rat" in part 02] there was a double stud in the way of reaching part of it. I could see all this from way off at the other end of the return run where I could pop the camera up through the "changeable cap" area, but that didn't help actually getting in there to seal anything.

Looks like the gap got filled This and the previous picture are actually my completion checks from the available viewpoints; I managed to crane my arm down from above and around the corner enough carrying a can of sprayfoam and basically blind-guessing what I was shooting at, and after it expanded it looked like I'd pretty much covered it. About the best that could be done without major disassembly, especially for what was likely a very small leak anyway. Just reminds us that sill areas can be problematic just about anywhere along.

One thing to keep in mind about air-sealing in typical attics and basements is that the more toward the top or bottom an improvement is done, the more of a double benefit it has. Stop the infiltration in the basement and you've already reduced a large part of the outgoing leakage in the attic before even heading up there, and vice versa, because stack-effect pressure deltas are strongest at the top and bottom. Overall my builders had done a very tight job on the upper reaches of the house and I'd just taken care of what on that scale might be considered the last major leak in the form of the small screw hole, so with air basically trapped dead in the attic and upper story there wasn't a lot trying to come in the basement anyway. Easy proof of this could be had by cracking a basement window and feeling how much cold air streamed in on my face -- with an upstairs window either closed or open just a tiny slit, the difference was profound. Suck/blow fan available or not, well-understood stack-effect can be used to good effect for preliminary testing in any building.

Over the course of the winter I made a few informal evening "energy audit" visits to the homes of some of the folks on the owners' mailing list, which not only benefitted their understanding and prioritization of the issues in their own places, it gave me some different scenarios to look at on the IR and learn more about what to expect where. We didn't fan-test any of those houses, we just ran around the nether regions and living spaces spotting the most major "blue plumes" and doing a little hand-diagnosis. In some where they'd already done a bit of improvement it was sometimes reassuring for them to go into the street, shoot their own house with the imager and lock the range, then swing around to some neighbor's houses and see them glowing bright yellow by comparison. Like Dr. Joe keeps saying, there are still an awful lot of bad buildings out there.


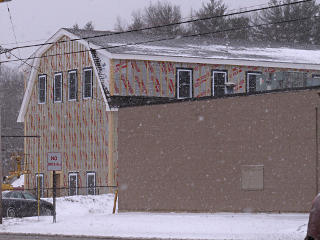
Another wrap-n-strap job in town It was therefore nice to see a "wrap-n-strap" job going onto the exterior of new offices that a local business in town was having built, even if done in Ikofoil instead of Tuff-R. Clearly this methodology was becoming more mainstream, reaching the commercial sector as well. I also popped over to the site of a new high school building going up across town, a project that was actually going for LEED certification. They built a nice wall mockup near that project's office trailer that showed how they were minimizing brick-tie thermal bridging at the curtain wall and how to install the insulation and integrate the different window types with full air sealing, mostly as a reference for all the jobsite workers to get up to speed on the details but also a nice show-n-tell for anyone curious about the construction.
What had me generally chuffed was the fact that now I really understood what I was looking at when seeing sites like these. And as that eternal winter wore on it was fun to drive through neighborhoods during various stages of snow-melt, and be able to do the instant visual energy-audit thing on the houses just by looking at the roofs. I could tell not only how good the insulation might be but *where* it was likely located from the rafter patterns that formed, e.g. at a standard attic floor or stuffed into a cathedral ceiling based on what parts were either insulating or bridging. Obviously which direction any given roof surface faced had to be taken into account, but there was plenty around to compare and get a baseline. Big round bare areas were a dead giveaway to a misrouted bathroom fan duct or leaky hatch or other major loss point inside, and for the very few roofs with [by comparison] a nice thick undisturbed-looking layer of snow still sitting up there, I wondered what their owners had done to improve those envelopes.

    And speaking of wrapup ...

This seems like an appropriate place to declare an endpoint to the sequential renovation/retrofit writeup itself, as it is largely complete at this juncture. It was quite the journey, and anyone who's actually wandered through all 150,000+ words of it has covered more than two typical novels' worth of territory and has my unwavering gratitude for hanging in with it that long. Still a little shy of "Moby Dick" scale, but whether that qualifies it as an epic whale of a tale or not I can only hope it's been informative and/or entertaining. It remains here for all as a reference work, collection of rants, celebration of geekdom, historical curiosity, or whatever anyone wants it to be.

Subsequent fixups and other home projects that happen to get documented get their own independent description pages now. The first of such to go up, for example, details a roofing fix to improve water-resistance of some poorly constructed joints. Some amount of plumbing work seems quite likely not too far down the road, and an improved driveway may come under consideration soon. Energy tracking in some form will doubtless continue indefinitely, especially if more major changes that affect it get made. But sometimes it's just a nice place to quietly cozy up inside on a cold winter night and try to get some more writing done.

For the rest of the independent pages, consult the Index near the bottom.


_H*   140522