House energy retrofit project 02

The coal bin was gone and a lot of junk had left the building, but I still had a lot more cleanup to do. The basement still smelled like mold to some degree, and there were several more areas that hadn't been touched in twenty-plus years. Conversations between me and Synergy were beginning to work toward an actual agreement, including significant steps such as some initial "consulting" money changing hands and them coming by to measure all the relevant window and door openings. I found another HVAC guy who seemed to understand my needs; more on that later. With these promising developments and plenty still on my own preparatory to-do list, I had to tackle the rest of this and get it done.

[Click any image for a larger version.]

    Dark shadows

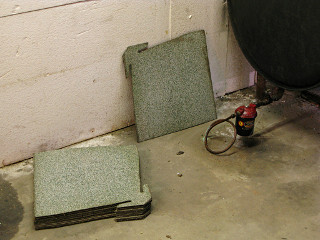
Spare hurricane-shingles The old roof shingles were a slightly unusual diagonal design, often called "hurricane" shingles with little tabs designed to lock the downward corners under the next row. I found a few spares that had never made it onto the roof. In theory I could have used these to replace a few bad ones up there, but at this point they were far enough gone that bending the old ones up to try and access the nails would have just snapped them off. To their credit, what was up there had lasted far longer than anyone could have expected.
Here we also see the now-completely-illegal unprotected oil feed pipe running right into the slab on its way over to the furnace. Environmental officials had dealt with enough leak issues in such setups and dug up enough basement floors and contaminated soil underneath over the years [at huge homeowner expense] that most states had mandated that these either be re-run through leak-tight enclosing "smurf" tubing, or moved overhead where any leak would be immediately obvious and get fixed. That included existing installations; there was no grandfathering of these and if it meant jackhammering a trench across the basement floor, that's what they wanted everybody to do. Piping up along the ceiling might be easier but often created problems with air bubbles getting in and making oil pumps lose suction; that's exactly why the Tigerloop de-aerator was invented.

At this point I could hardly believe that I had been seriously considering upgrading the rusty old oil tank to a Roth dual-wall and running new lines with a Tigerloop and staying with oil heat. Getting rid of this whole mess, especially when I hadn't done anything about the feed pipe a year and some after the effective date in Massachusetts, was another nice side-effect of deciding to kick the oil habit.


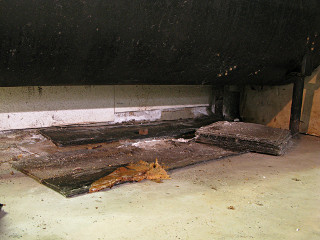
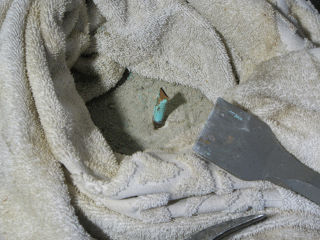
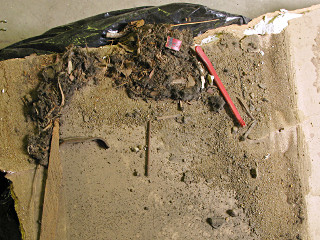
Horrors under the oil tank The shingles were part of many lurking horrors I found under the oil tank. The tank had to go so obviously the stuff underneath had to go first, and it got more disgusting the farther I excavated into the gloomy depths. Was it all mold? Efflorescence from the wall? A bit of both, I figured, as I extracted more old shingles, rotten cardboard, stray scraps of styrofoam, plenty of spider egg sacs ... eww.

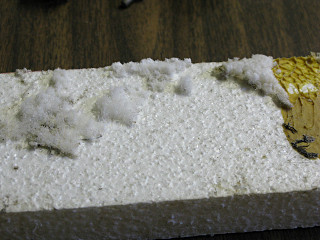
Efflorescence up close The efflorescence is sort of pretty. After all, it's salt crystal deposits, making patterns similar to what we find in salt flats out west. But it also means that parts of the wall may not be quite as dry as I thought.

    Masonry chisels are awesome

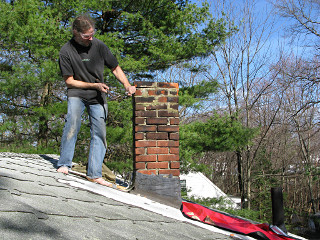
Starting to crack chimney apart It was the middle of March, but our non-winter had already turned into gorgeous days of 65 degrees outside for a while. Heating season wouldn't be over for a while yet but this was a nice opportunity to start cracking the chimney apart and begin its eventual takedown to about attic-floor level. It didn't need to be this tall just to vent the furnace; half this height would still have it meeting code above the roof-peak level. I wanted to at least get started on this since I knew it would be a fair chunk of work.

Chiseling this stuff loose was rather fun. Eye and ear protection absolutely required, of course. Footgear?? Bah...

[By contrast, the previous winter had brought a rapid succession of heavy wet snowstorms that had everyone up on their roofs desperately shoveling three feet of soggy stuff off before the roof caved in and learning all about ice dams on a deeply personal level. Quite a few roofs in the area, particularly flat ones on commercial buildings, didn't survive.]


Bag o bricks I wasn't just going to fling the bricks overboard and put big divots in the lawn; I needed a way to gently lower or carry them off the roof and make sure all the cement fragments got collected too. As a kid I was in the Boy Scouts for all of about two months -- bailed out of it mostly because I couldn't stand the pseudo-militaristic religious nonsense that they tried to impose on everybody and most of the troop was just arrogant little rich-kid snots who goofed off the whole time anyway. But I still had this old but official BSA canvas frame-pack from some of our camporee activities, another piece of arguable junk that should have been disposed of long since but now was perfect as a relatively expendable rucksack I could carry bricks off the roof with. Swinging onto the ladder with 50+ pound batches on my back was a little tricky, but it worked well even if "dumber'n a bag of bricks" had become the phrase of the day.

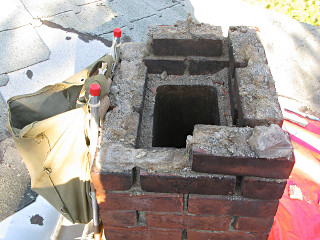
Chimney partially disassembled The chimney got taken down to a little past here at first, just below the inner flue-pipe opening since the furnace was still active. Because the flue ended here, the mortar right around it had been *completely* destroyed by combustion acids and was now just sort of a yucky powdery mix of sand and soot that the bricks were gently resting on. Most of them I could just lift out of this area without any chiseling and drop into my bag, trying to minimize the amount of corrosive dust flying around.

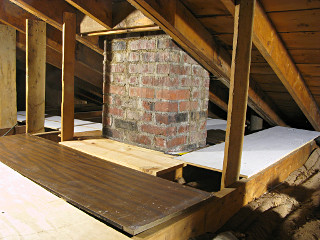
Temporary attic-floor around chimney Inside, in the attic, I prepared for eventually reaching this level by banging in more quick temporary pseudo-floor right around the chimney to catch the disassembly detritus. Another good re-use of random flat wood stock I had kicking around. I figured that later it could get moved and become a little platform nearer the attic hatch to provide a little storage area, but the attic really isn't usable living space. It would, however, need to be ventilated once the gable vents were gone and it was completely enclosed by the insulation job outside. The plan was to use the remains of the chimney to pass a duct all the way down to the basement for that purpose. Most people never think to do that, they only ventilate the living space.

    Rot & roll

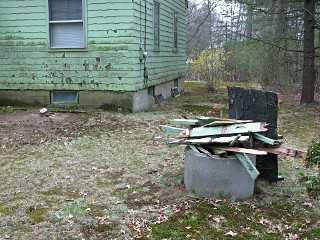
Lawn decoration destroyed The stupid fake wishing-well or whatever lawn decoration out front finally got demolished, with spur-of-the-moment help from a friend who came over with a chainsaw mainly to finish off the yew bushes. The little rooflet was so generally decayed that it fell right over with a little persuasion. The yew trunks, on the other hand, were incredibly tough with the spring sap just starting to rise, and gave the chainsaw [which admittedly could have been sharper] a serious run for its money.

We can see what the presence of the yew bushes had done over the years -- north side of the house, shade, moisture, lousy paint ... great combination, huh.


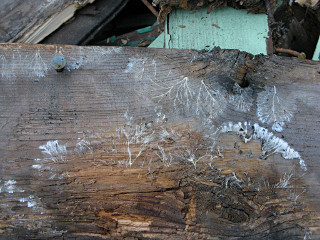
Artistic fungus rhizomes Interesting fungus rhizomes turned up on the decayed well-decoration parts as the layers got separated.

Old porn collection In the process of cutting down the top edge of the basement-wall styrofoam to a uniform height and cleaning out all around the sill area in advance of the anticipated spray-foam job, I found someone's little porn collection from 1950-odd tucked up into one of the joist bays. Hilarious!

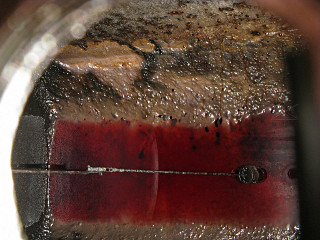
Bottom of oil tank I ended March with very little oil left in the tank -- on perfect track to finish off heating season with the thing dead-empty. At this point I could see all the old crud in the bottom -- heating oil is not particularly well-filtered before delivery, and that's why we have additional filters on furnace systems. It was okay that I was close to running out because temps were already generally warmer. It had been a mild winter anyway but still just cold enough to collect the stats I needed.

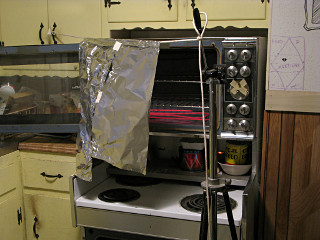
House heating with electric oven To plan for when I didn't have oil to burn, I experimented with some hacks for quick-n-dirty electric heat. Question: can an electric oven heat most of a house? Answer: yes, running 2 - 3 KW against the outdoor conditions we were getting at the time, it just takes a bit longer than a 60,000 btu/h dino-burner. A small fan to move some air around helps, as does some rudimentary radiation-deflection [aka tinfoil] to avoid uselessly heating the exterior wall across the room. This would be my backup heat source once I ran out of oil, to of course be used only under close adult supervision.

    Duct work

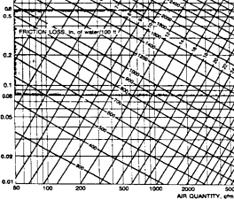
Duct size chart In addition to ACCA Manual J for calculating building heat/cool loads, there is also Manual D covering air-handling and ductwork design. This is a bit more important than most people think, as ducts that are too restrictive will greatly reduce the performance of an otherwise perfectly good HVAC system and cause occupant discomfort complaints. Air has a certain specific heat capacity, and if that's to be the medium to carry heat to or from a space then one must ensure that enough of it can reach the target area per unit time. Manual D is all about duct sizing [ahem, that's *duct* sizing] and CFM and static pressure, a certain portion of which can be summed up in this chart or a slide-rule type of tool called a "ductulator". There is also a bunch of info on how various bends, junctions, transitions and takeoffs affect airflow and that all has to be plowed into a proper duct design.
I don't even remember where I found this graphic, another crazy tangle of logarithmic lines that does make sense once you study it for a bit, but it's called an "air friction chart" and gives a lot of information in one easy-to-read place. Most residential designs land in the rectangle bounded by .06 to .6 inches of water and maybe up to 2000 CFM, between the slightly heavier-looking horizontal lines that presumably indicate a sort of sweet-spot area of static pressure. Area conversions from round to rectangular ducts are left to the user, but I quickly figured out that my 10 x 3 inch runouts are about equivalent to six-inch round.

Some HVAC guys are outwardly leery of re-using an existing duct system for any changed heating/cooling plant, and encourage grinding through a full room-by-room Manual D which can often result in recommendations to replace a lot of ductwork. "See, the computer said so!" ... Cha-ching! But when a system is being *downsized*, as mine was about to be, one could easily argue that an existing set of ducts would be completely adequate as the overall airflow would be *less*. Undersized ducts are a common problem cause, but slightly oversized ones, especially when contained fully within the conditioned space as mine are, can perform perfectly well. I spent a little time angsting about whether my old ducts would be sufficient but after firming up the capacity math and noting that I'd be going from 1000 CFM to about 600 max at the blower thus almost halving the flow, I knew I'd be fine with it.

My system has a slight advantage that was somewhat unusual back in the days when it was built. A traditional forced-air heating configuration ran the supply ducts out toward the exterior walls and tended to place registers under windows, in an effort to combat cold air sliding down off the crappy single panes of the time and minimize chilly drafts that people would feel. But the old system here has the supplies toward the inside, with the warmed air kept near the central core of the house for its short trip to the outlets and the *returns* placed on the exterior walls. The advantage in a better-insulated scenario is that the supply air doesn't lose as much heat into the surrounding basement before being delivered, and if the return air gets chilly on its way to the furnace it doesn't matter, it's going to get warmed up anyway. In many downsized systems with lower airflow, minimizing heat/cool loss in transit becomes a little more significant because the air stays in the duct longer. In systems with ducting run through unconditioned spaces such as attics, it's much more significant as a lot of energy can be lost even with insulated runs in good repair. Since my basement is part of the conditioned space anyway, it matters far less and thus my "duct loss" figure is zero.


Twisting register louvers to a more correct throw There were nonetheless a few things I wanted to accomplish to improve the duct system in preparation for the air-handler changeout. The warm-air registers originally all had their grille louvers angled downward -- for a heating-only system that's fine in theory, as it helps warm the floors and avoids blowing air directly toward the room occupants. But because they were also imposing more of a tight direction change on the air coming *up* to them from below, they were always a bit noisy and probably increased back-pressure through the system as a result. Moving to a heating/cooling system, coupled with my experience over the years with using the furnace fan to circulate cooled air from the basement, made me think that the "throw" of these things could be improved with some simple rework.

I was right. As I removed these things for cleaning I took needlenose pliers and simply twisted each metal slat around to angle upward instead -- this made a *huge* difference in throw angle, straight into the middle of the room, and the overall system was suddenly much quieter with the blower running. I should have done this 20 years ago.


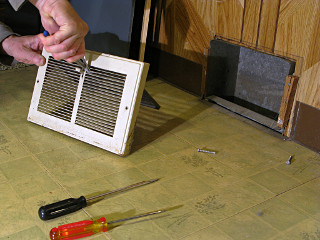
Return grille removed to reveal horrors within But I didn't do that or anything else to the ducts 20 years ago, and by now I figured a nominal bit of cleanout and examination was in order. At the very least I wanted to open up all the registers, fix various loose screws, and vacuum out all the supply and return ducts as far as I could reach in at both ends but not get too fanatical about it. Here we also see why I couldn't just flip the registers 180, as they're top-to-bottom asymmetric in how they sit against the wall and floor.

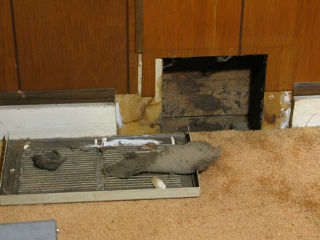
The returns are a little more interesting in that they just feed straight into stud bays. That's exterior sheathing visible in there, with building paper peeking through the gaps, not to mention a couple of perceptible air leaks from the outdoors. Here's one of the primary reasons for doing external insulation -- trying to stuff the existing walls would never be able to deal with this sort of thing. This return path in the computer room has to work around a double wall-stud before reaching the basement which is why the opening is so much narrower than the register. [Really, they could have just built it shifted over by one...] And that's not a dead rat laying on the grille; it's a lump of something akin to thick dryer lint that I pulled out of the depths.


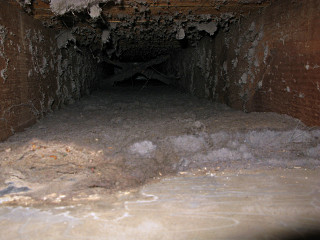
Return duct dust-pack A mirror and a flashlight, or better yet holding the camera down the hole and blind-shooting with flash, revealed quite a bit more. The lint-pack appears to have accumulated in a rather interestingly solid fashion along the bottom of returns ... with what almost looks like mealworm carcasses embedded in the cross-section left when I vacuumed some of it away. Weird! I probably don't want to know what sorts of interesting infestations this place has had over the years, but fortunately that's all way in the past.

This is looking down a "panned joist" return. It comes down the stud bay behind a wall to basement level, and then two joists and the subfloor form three sides of the duct box and sheet steel is nailed up to close the fourth on the bottom. Common practice back then, considered an abomination nowadays. But it's what I have four of, and even with this slight restriction they not only suffice to get plenty of air back to the air handler, a little bit of side leakage past gaps in the panning just helps more conditioned air circulate around the basement so it's all good.

While some of the heavy dust deposits got removed, it was impractical to get all of it so the rest could just continue to lay there as had done for decades. Street wisdom says that these popular commercial "duct cleaning" services aren't really worth it and are likely to kick dirt up in weird ways and just make any existing problems worse, so I simply dealt with whatever I could easily reach and the rest would remain entombed forever. The filtration in the new air-handler would be much better anyway, more likely to catch any further stray dust drifting around the system.

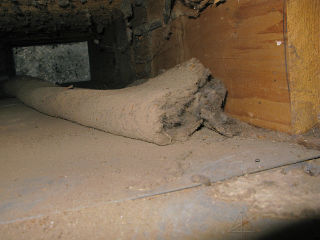
Return duct dust oddity The return from the kitchen is particularly interesting, as it's against a gable wall instead of being right over a convenient joist bay. It goes down through a little framed construct, hangs an immediate right turn into a partially panned joist and then drops into the main return about four feet later. That geometry either led to the normal airflow folding the lint-pack completely over like this, or maybe I did it with the vacuum hose, I can't really tell. Getting this shot was entertaining enough: I'm squatting on the kitchen floor directly above here with my arm craned way down the hole [at right] trying to hold the camera flat against the back of the panning, so this is the best I could do. This particular duct blocks direct access to the sill area so spray-foam coverage here might be a little sparse.

    Basement window rework

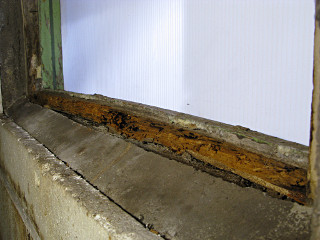
Heavy rot in basement-window sill The previous owner had turned one basement window at the back of the house into a pass-through panel for a dryer hose, and did a fairly poor sealing job on it. The years had not been kind to the panel substituting for the glass, and some heavy rot had taken hold in the sill of the window probably aided by insect activity. Far too late in the game I had slapped a piece of white coroplast over the whole frame to help keep weather out, but the damage had long since been done. This frame needed to get partially ripped out and rebuilt into some sort of insulated wall section, to also serve as the pass-through point for the HVAC stuff. I wasn't immediately sure how that would go together, but I was confident that this was the right place to do utility penetrations as it wouldn't put more holes in above sill level and interfere with the exterior foam job.


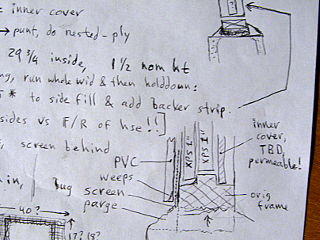
Basement window block-off design So I eventually came up with a design for how to generically block off some of the basement windows and turn them into nicely-insulated wall segments instead. A couple of them would need the sill parts rebuilt essentially from scratch, so this would be a bit variable as far as exact dimensions but the basic idea would consistently apply. The larger layer of XPS would caulk in all the way around the frame rail and form the primary air seal, and everything else would sort of piggyback off that. This way I could leave the original masonry intact and simply build off the way each window had originally been installed.

This all went with the understanding that it might not work out over the long haul and eventually need to be replaced with something else. But it would get some much-needed basic repairs done now and be an interesting experiment to monitor going forward.


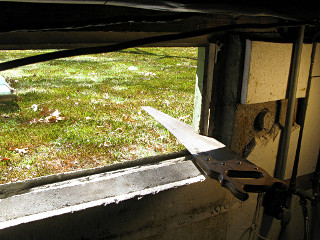
Sawing out bad part of window frame The first one to be thus tackled was the aforementioned rear window with the heavy sill rot. Basically the lower third of the whole thing was removed down to the cinderblock. The easiest way was to simply cut out the frame at the sides, my only real option for which was an old-school hand saw. Wooba, wooba, wooba. I don't actually own a Sawzall [yet] ...

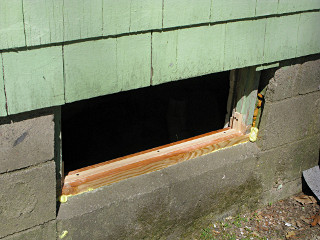
Rebuilt basement-window frame Rebuilding the frame was a little fiddly, but I had enough parts on hand and it went in quite solidly including the replacement rail that the insulation would seat against. The new sill seated down into a thick bed of expandy-foam, with a couple of plastic shims underneath to more or less match the drain angle of the original sill. All the joined wood pieces got glued-n-screwed with caulk to eliminate any little air leaks.

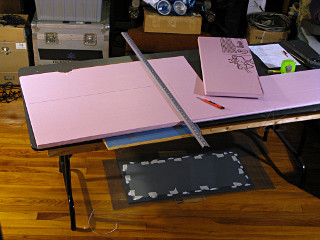
Cutting XPS: easy with a very sharp blade The general setup for cutting XPS foam panels is pretty simple. Pink and I became good buddies here, as I fashioned all the components for the basement window "sandwich" replacements. The foam is easy to cut along a straightedge with a utility knife but it has to be *very* sharp. The piece of grey PVC on the floor is one of the outer sandwich covers in the making, prepped with its bug screen with the center portion cut out and the inner edge tacked down with globs of caulk.

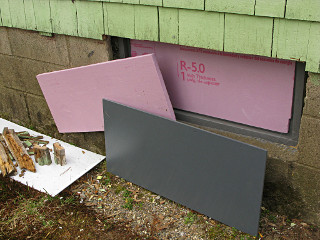
Assembling the window-blocker sandwich So here's how a basement window opening becomes a new section of wall: the 2 layers of XPS get caulked in against the rails from outside and then inside, my !expensive! and somewhat experimental slabs of battleship-gray PVC slapped on as the outer cover [but with bug screen added around the periphery, not yet attached to the piece shown here], and inside simply gets thin plywood to be structural but provide some amount of vapor permeability. Having PVC also on the inside would have likely turned this into a "moisture sandwich", not what we want right underneath the main sill. After everything was in, each outer frame also got foamed in at the sides to better seal its junction to the masonry, with the bug screen sort of embedded inside helping bridge the gap. I took that lesson from Joe Lstiburek's battle with the ants and decided to proactively head off any possibility of insect intrusion via something *I* had put together.

While I generally don't like painting, I decided to make all the frames grey since I had a big batch of latex "oops paint" left over from when we made some setpieces for a convention. The stuff even had Rosco flameproofing salts already mixed in. Eventually I even painted over the bright yellow spray-foam once it was all cured up and trimmed back a little.


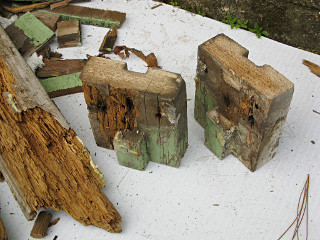
Old frame ends The bottom ends of the old side frames actually weren't totally rotten, but had to come out to fit the new sill piece anyways. Compare to the actual sill wood, which fragmented under a light touch.

Temporary brace while caulk cures The frame ends were nonetheless useful as part of a quick rig to hold first XPS layer firmly in place while the caulk bead cured.

In keeping with old tradition, I sharpied a little note on the inside of the assembly for the next person to take it apart. Which might be me, if the whole window-close-off experiment doesn't work out over the long term when constructed this way...


    Basement window # 2 (first keeper)

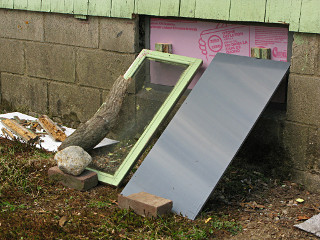
Two of the six basement windows, conveniently at opposite corners of the basement, seemed to be in good enough condition to be kept as windows but still needed a bit of rework. In addition to cleaning up and preserving the wood frames, I replaced and/or augmented the existing glazing surround with caulk. But they're originally just generic single-pane units, which got me thinking about how to at least try to make them both dual-pane for better thermal resistance and not totally transparent for better privacy. There were various things I could have bought sheets of at the Despot, but perhaps there were better options right at home. Leaning up against the back of the house was a piece of ancient plexi or something that had been frying in the sun's UV radiation for years but also helping keep drip water away from part of the foundation. The peel-off film coating had long since deteriorated into shreds, and I expected the whole thing to be completely brittle and ready to just shatter by now. But it seemed quite strong and still flexible when I went to check it out, and where the film had been stuck to it had turned into a frosted surface with a lightly mottled look. I drilled an experimental hole through one corner without it breaking away or even grabbing the bit as some plastics do, and decided that this stuff would be perfect for making extra panes. More of that unexpected "spare junk re-use" magic was happening for sure.
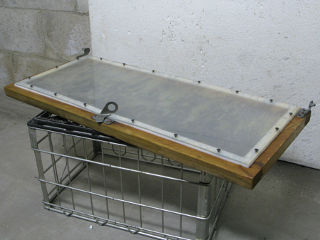
Extra plastic pane added to basement sash The material wouldn't even break by scoring like some plexi does, but it cut fairly easily with a saber saw. A little bit of cleanup later, I had two nice panels cut to size, smoothed up, and ready to go. Next came how to best mount them. I wanted an air seal of some sort but not a hard seal, so that pressure changes and any trapped moisture could still get out. Strips of the high-compression [read: soft] weatherstrip and a bunch of screws seemed like the right answer, with the screws *not* run in all the way but just enough to leave a little remaining squishiness in between. As it went together the assembly took on a sort of industrial submarine-bulkhead look. You know, as in "only after the twenty-eighth non-reuseable stretch bolt is carefully torqued down will it be realized that the gasket is missing".
With two windows to eventually rework, I came up with another experiment: I'd mount the extra pane on the *inside* of this one, and the *outside* of the other and then study both for their long-term thermal and condensation characteristics. Of course the sash-to-frame seating surfaces got full weatherstripping to be leakproof when closed, and the frames caulked and foamed and screened appropriately to their surroundings. Leak testing after this one was done [e.g. back-of-hand feeling for cold air around it on the next chilly night] demonstrated success, and the extra pane was significantly warmer than the single glass on the next window over so it was definitely helping with U-value.


    Furnace decommissioning

At this point I had discovered that Daikin AC had a central upright air-handler product for their split-system heat pumps designed to go in the same place as a typical furnace, and had found a clueful local dealer who supplies and installs them. Mitsubishi only had *rumors* of a similar product about to possibly come out in April, but not only did Daikin have it available already their units in general seemed to be as if not more so favored for reliable high-efficiency installations. Daikin's original markets were in Japan and Europe where residents have *much* more clue about lowering energy consumption, and their latest inverter-driven designs had great cold-ambient performance on par with Mitsu's vaunted "hyper-heat" system that some other acquaintances had mentioned to me. There are several other competitors in the same market -- Sanyo, LG, Fujitsu, etc -- and their cheaper units all look almost exactly the same and just scream "corporate-espionage copycatting". But reading the forums gave the impression that attention to quality at the underpriced manufacturers was considerably less than that of the original players.
The lowest system capacity on these Daikin ducted units seemed to weigh in at 18,000 btu/h, a ton and a half which was a bit more than I was thinking but I realized that a> that wasn't a problem with these systems and b> who knows, there might be some time when a little extra capacity might be useful. The ability of the inverter-drive compressors and ECM fans to turn themselves *way* down to match light loads at high efficiency without short-cycling gave a lot more leeway in the whole system-sizing problem. So now my magic number was the "18" embedded in the various component model numbers, and I could wander through Daikin's website myself and basically match up parts. Condenser, AHU, and thermostat/controller -- all linked up by a simple two-wire digital interface, exchanging a lot more useful information between all the pieces than a simple "hey, it's cold in here". And the HVAC dealer sounded enthusiastic about these systems, saying I couldn't do much better in terms of efficiency -- this guy also understands the need for radically smaller systems in tight houses and wasn't about to try and sell me a 3-ton monster.

Having finally found a specific system I was confident about, I was even more eager to get the wheezy old oil furnace *out* of my life. The right time to do that came along only a few days later, and the interim had been just the right amount of time to play around with ducts and flow and some final reassuring calculations before starting to tear it all apart.


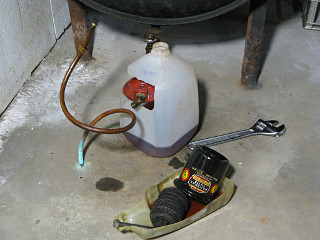
Draining the oil tank After burning the last accessible gallon and running the system to empty, there was still a bit of oil to get out of the filter and from around the gunk on the bottom of the tank. But this would be the last time I would need my specially cut milk-jug designed to sit around the filter fitting.

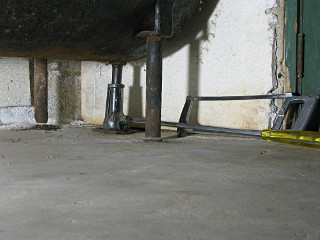
Oil tank jacked up To try and get the rest of it out, I wanted to try and tip the entire tank a little. It was then that I discovered that the support legs were cemented solidly *into* the floor. Fine, whatever. I hacksawed the two rear legs clear right at floor level, which wasn't as much work as it seems because the one toward the wall with all the efflorescence was pretty corroded already, and jacked up the back end of the tank a bit in an effort to let the remaining oil drain toward the outlet. [The Mighty Screwdriver makes another appearance!] This got a little more to dribble out but not all of it; I couldn't jack too high because the fill pipes were still firmly connected through the wall above and they and the remaining legs were starting to bend oddly. I left it that way for a couple of days with the jug underneath, and recovered maybe another quart.

The little screw jack was another legacy from the former owner, and was exactly the right thing to stick under here and start cranking on. I thought I'd never really use the thing, but had kept it around anyway.


Feed pipe cut off below floor level After the oil feed pipe got blown completely dry with the shop-vac in reverse, the slab got chipped away a little bit around each feed pipe end, the pipe cut off below floor level, and concrete-patched over to permanently bury it. No longer any sort of environmental hazard.

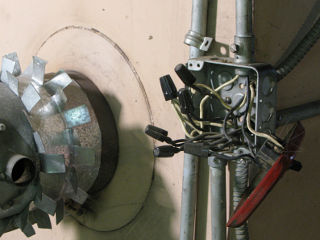
Way too many wire nuts This was the "connection blivet" for furnace control: ten pounds of wire nuts in a five-pound box, *very* packed into there along with a burner switch. I would have at least used a double-depth box if I had wired this...

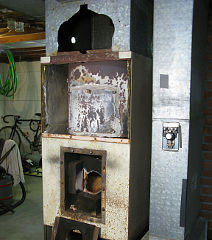
Furnace all opened up Here all the front panels of the furnace are opened up -- showing the sad and kludged state of the firebox and the massive old heat-exchanger can which was rusty but still completely intact. The odd cutout on top isn't Moorish ductwork architecture, it's just a hole where there used to be a humidifier installed [removed very early in my ownership because it was leaking].

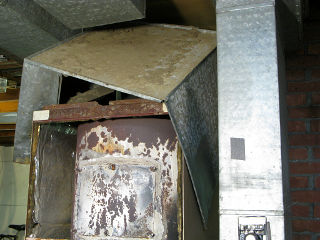
Ancient dirt on top of duct box After opening up the seam on one side of the supply box, the whole top part could be separated from the two supply ducts, spread and tipped out ... bringing the dust of the ages down with it, of course. Some of the screws holding all this together gave my cordless and my confined-space maneuvering skills a real workout, too. The main supply runs needed additional hangar straps under them before starting this, because otherwise as they simply rested on their own distribution-box connections they would have wanted to fall down once that was gone.

Mouse nests? Above the duct box, forming both heat-shield and part of the return plenum, was a fairly hideous assembly of drywall that had accumulated some weird junk and might have also been home to any number of mice in the meantime.

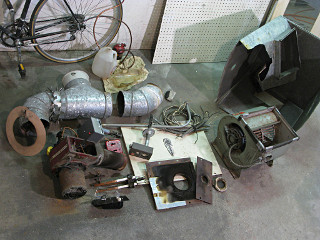
The build-your-own-furnace kit It's the build-your-own furnace kit! Some assembly required, bicycle not included.

I wouldn't be needing these parts anymore, and offered them up on the local-homeowners group with a detailed list. Eventually a friend who's sticking with oil for a while longer came over to cherry-pick the potentially useful bits.


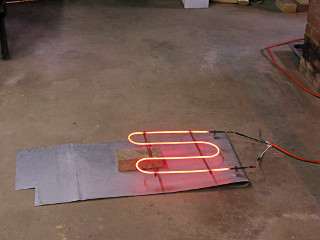
Fire hazard # 2 for heating With the furnace now quite dead, how to heat the house in the interim through the still-chilly nights? With the other available energy source. Besides the oven hack upstairs, here we present Fire Hazard # 2: a 3400-watt oven element found kicking around on top of the coal-bin, wired up and set on a temporary heat shield to help bring a little more warmth into the basement.

One of the electricians that came in for a site visit while I had this set up actually thought it was a nice idea for some of those winter jobs.


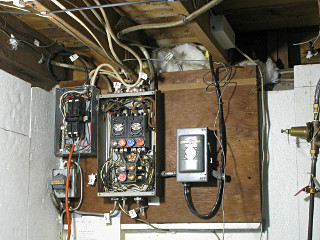
Old 60A electrical panel To power that high-power heater I temporarily swapped the orange cable into the 30A dryer breaker. This shot was taken primarily to email to an electrician as an intro to what he'd be replacing. The house wiring itself is actually in fine shape even if some of the outer jackets of it look a little ratty; the panel just needed to be upgraded from the old 60A fusebox and its weird extra warts to a tidier modern breaker panel with a metered sub-feed for the new HVAC circuits to be.

Finding someone to actually do all that, let alone fully understand why I wanted separate metering on that in the first place, would prove more difficult than I thought.


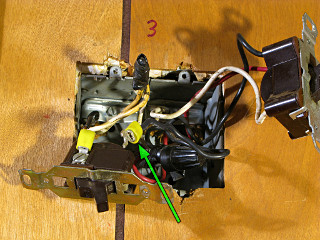
Bad lugs on switch wiring I had some minor electrical work to do elsewhere, such as removing various hacks the previous owner had done for outdoor lamp-posts. While going after that I found that he'd done these lugged connections in a wall switch box. Here's what happens when you don't have the right kind of crimp tool, especially on solid wire -- both lugs were slightly loose, which in some circumstances can lead to very delicately flakey connections that aren't strictly hazardous on their own but can cause lights to turn off and on seemingly by themselves.
This is one of the things that keeps the gullible entertained when they attribute flickering lights to the presence of "spirits". Just-barely connected connections like this can heat up a little, move, disconnect themselves, cool down, connect again, repeat ... walking across a floor can jiggle everything just enough for a light to "acknowledge" one's own presence in a room, giving an even more convincing series of events and total conviction that the room, house, electrical system, whatever is haunted!

It's interesting how when one offers to open and *fix* an ailing electrical system or lamp or whatever's causing the problem, the response from these woo-woo people is "oh no, absolutely not, don't touch it!" Even if some of the situations *could* be dangerous and really need to be repaired. Sorry, folks, I've got news for you: when all these spirits and archangels and whatever you call them were invented, electric lights and wiring didn't exist and would not for thousands of years to come. Try studying a little *science* for a change.

I just chopped the lugs off and just tightened the wires around the switch screws like normal. The output from this switch fed up to a bulb under the front portico, which would all have to be rerouted to a different sort of fixture once the portico was removed.


Next section   (03)
Index

_H*   120520