|
On a bit of an impulse one damp morning, I decided to investigate the
switches in the driver's door armrest, with particular interest in how
resistant to incident water they might be.
They sit right under the window, which may often be open, and even a small
opening at the top is basically positioned right over the switches.
I usually drive with the side windows open, even if only a little bit,
as my ears to the outside -- even in most rainy weather unless it's
*really* pouring down.
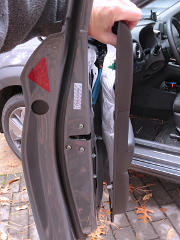
On the Kona, there's not really much lip of A-pillar metal at the left side of the windshield, and the wiper tends to fling water right off the edge where it then hooks around in the airflow and drops in on the armrest. The Prius has similar behavior although not quite as bad, and its switches never seemed to have any issues from minor water incursion. Since many vehicles have a similar setup, what have manufacturers done to guard against the electrics underneath getting soaked from a window left open, either while driving or stationary? The only way to really know is to take a look. |

|
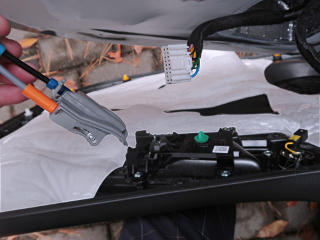
Fortunately, both cables end in a single quick-release fitting that pops right out once a small lock barb is pushed back. |
| One odd thing about the Kona that doesn't seem true in other cars, is that the weatherstripping at the bottom of the window on the outside does *not* bear against the glass as it slides up and down. There's actually a gap there, on all the moveable side windows, which prevents the gasket from being able to "squeegee" the water off the outside by simply lowering the window. While the outer weatherstrip flange is not designed to be a watertight seal to begin with, at least it's usually designed with light contact against the glass to deflect most of the water away. The assumption is made that *some* water will always leak down inside the door and exit the weep holes at the bottom, and items like the window regulator are generally designed to not be greatly affected by moisture. But having a free-flowing gap there just doesn't seem right. I double-checked that the weatherstrip was clipped on correctly on all the windows, and it just seems an inherent fault with the Kona body. |

|
When I posted this original door-teardown to InsideEVs,
someone asked
if I could figure out how to non-destructively remove the B-pillar trim
as well.
It isn't difficult; the key to any trim removal around the door openings
is that you have to un-seat the rubber door seal along the edge over
enough distance to expose the edges of the interior trim first.
The weatherstripping channel interfaces with hooks on the trim pieces and
helps hold them in tight.
Once opened up, it's fairly obvious how to fish a pry tool in and go after
the friction-pins.
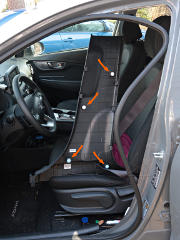
This shot illustrates where they are in the panel, to serve as a guide.
A strong flashlight [and appropriate optics if needed] in through the gap
between the pinch weld and the edge of the panel helps locate the pins
and where to insert the tool and pry apart.
The lower ends are also tucked under the door-sill pieces, but those are easy
to pop out, and the seatbelt passes through a hole in the panel so it has
to ride along with movement.
At the time I didn't go after the upper panel because I needed to put this back and drive somewhere, but made the assumption that almost all the interior plastic is mounted in a similar fashion and it wouldn't be hard to figure out. |
_H* 191219