Brake inspection on the Kona part 2: front wheels

  I was more motivated to inspect the rear brakes due to their light scraping I kept hearing when starting a drive, and then with a lot of family stuff demanding my attention through 2022 I never got around to the fronts until a year later.  So at this point I'd had the car almost two years, and it was high time.  The spring "slosh-out" to try and rid the undercarriage of the winter salt had already happened, the plastic belly-covers were back on, the gear-reduction fluid had already been changed for the second time, and this was about all that was outstanding to take care of for the year.

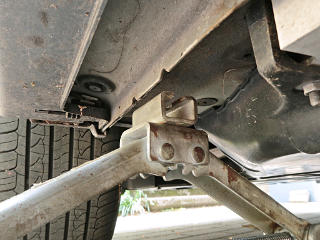
Jack spot behind the pinch weld Since my old scissor jack was designed for different cars, its cradle isn't quite deep enough to straddle the pinch weld properly.  But there's plenty of solid structure on either side of it, with the area just inboard of the weld flange being the most level, so that's what I use for a lift point.  This works fine at the front and rear of the car.

On the way up, once the wheel is mostly unweighted but still in contact with the ground, the lugnuts get loosened a little.  Then, up she goes.


Jackstand added for more safety We go up high enough to add a jackstand for holding safety, and then gently lower so that the weight is distributed across the two.  The aluminum battery bracket is structural enough to be a secondary point, but we obviously avoid the battery case itself.

This car of course weighs about 1000 pounds more than the Prius did...


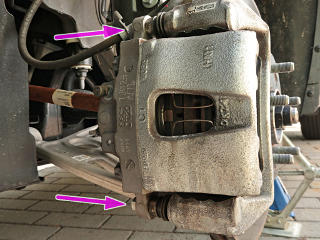
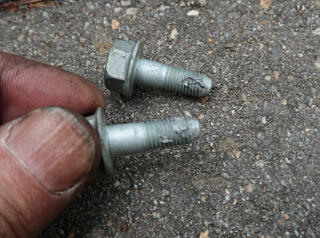
The two bolts to remove These are the two caliper bolts we want: 14 mm.  A box wrench works quite well for this.

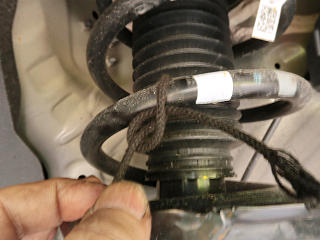
Caliper tied up, not hung on its hose The brake hose is very short, and not long enough to allow hanging the caliper directly on the strut spring like in the rear.  So the caliper gets tied up out of the way.  Never just dangle a caliper on its brake line, as every similar guideline says -- although I've seen "professional" mechanics do just that, thinking that the customer will never know.  These calipers are pretty heavy, so it's even more important.

Brake parts Here's what we now see.  A bit of brake dust on things, which is one of the reasons to get in here and clean things up every so often.  The rotors up here are in pretty good shape, as opposed to the wimpy ones in the back that are already a little scored.  Those rear brakes just suck, in a host of ways, not the least of which is that the electric e-brake setup is just stupid and annoying.

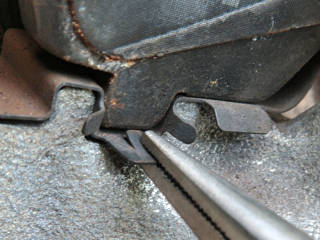
Tiny retainer tab on the pad clips Again, the hardest part is getting the pads out from behind the little barbs in the end clips.  These are likely here as a convenience to keep the pads in place, with the separation springs trying to always push them apart.

Squeeze the tab with pliers Squeezing the tab downward while pulling on the pad seems to work best, without permanently bending the tab out of place.  It's springy metal, so it can handle this.

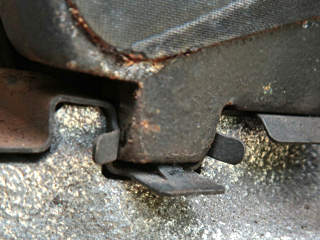
Tab ducked under the ear Once you've got the barb ducked under, you're golden!  Getting this done on the inner-side pads involves a little contortion into the wheel well to see it.

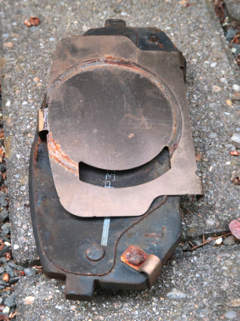
Piston shim with magic slot in it This is interesting: the hollow caliper piston bears on this shim against the inner pad, and there's this this slot cut into it which, from the obvious wear pattern, is along the line of the piston edge itself.  Shims are part of the many design aspects of disc brakes to prevent squeal and chatter, but this one takes it to another level.  Given the orientation of the slot, the piston will exert a little less pressure on the "leading", or upper end of the pad during normal forward wheel rotation.  There is obscure wisdom found here and there, often in the bicycle world, that the trailing edges of most types of brakes should make contact with the rotating parts first and/or most firmly, which tends to prevent oscillation starting.

I couldn't find any good articles specifically about this, but I did come across one relevant line in a preview of a massive e-book entitled "Braking of Road Vehicles":

    "Disc brake squeal can often be eliminated by moving the contact between
    the piston and the pad backplate towards the trailing end, e.g. by a shim."
The book is evidently an extensive treatise on the science and engineering of brake systems, likely required reading for anyone designing them, and priced in an accordingly sky-high way typical of textbooks.  There could be no other reason this slot is here, in contrast to every other pad shim I've seen which is solid all the way across.

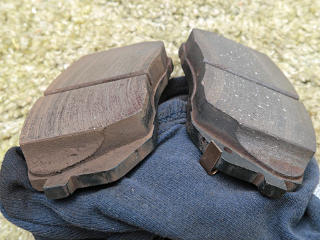
Pads themselves in good condition Plenty of "meat" left on these pads, of course, at around 25,000 miles.  The benefits of regenerative braking!  The one on the right has been cleaned off; the left one is as it came out.

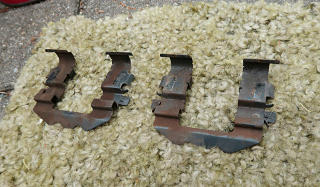
Pad clips removed for cleanout The pad clips should also come off for cleanup.  Top and bottom are identical.

Lube key moving pieces: pad ears Next, the key places where things move against each other should get greased.  This never happens from the factory, so brakes that haven't received any of this treatment are generally sliding bare metal on metal for most of their lives. 

Grease on clip mounting points Grease on clips themselves
We can also lube up the attachment points for the clips and all the key surfaces of the clips themselves, because the ears at the ends of the pads need to slide back and forth within these clips as freely as possible without being too loose.  The clips are another part of the anti-rattle system.  A light coating of grease on that magic shim is good to do as well, plus making sure the edge of the piston is clean.

Releasing the slide-pin boot Then it's time to pull the slide pins, as they do feel a little stiff by now.  They're difficult to simply pull out, because the boot is basically air-sealed around the pin and goes into vacuum when extended -- so we need to gently pull back the edge and break the seal around the head of the pin to let air in.

Both slide pins, they are different Both pins out.  They look good, but could use a little more grease.  Keep these clean!  We don't want anything binding them up.  The upper, aka leading pin, has an extra little rubber damper on it, so we make sure to reinstall the pins in the right places.  Yet another part of anti-squeal engineering.

It can be a little tricky pushing the pin heads back into the rubber boots; a little grease applied to the inside lip of the boot end helps, and makes for freer rotation when checking pin movement in general.  Other than the air-pressure issue, the pins should move relatively freely, as that's key to keeping correct caliper alignment as the pads wear down.


Clips bear on inner edge of the pad Reinstalling the pads involves pushing them in against the longer arm of the clips -- see how the inner edge of the pad is already bearing on the clip, with the ear not yet aligned to the slot?  This keeps the pads steady in very predictable positions and very unlikely to rattle around when they're not being applied.

Retraction springs It's also prudent to grease the ends of the retraction springs when reinstalling.  It's interesting that the Prius brakes didn't have these at all, its pads would just sit almost touching the rotors when not applied.  On the Kona the pads sit very close to the rotors once the piston has advanced a little anyway, but the springs help keep them out of rotor contact that much more.

Anti-seize on caliper bolts The caliper bolts came out dead-dry, so it's time for a little anti-seize.  These will be removed semi-regularly on the inspection/cleaning schedule, so we don't want the threads binding up over time.

Bolt should thread in and out freely It's prudent to run the bolts into the slide pins once before real reassembly to make sure they thread in and out freely; this helps being able to tighten without having to hold the hex of the slide pin itself.

Short video of caliper pin movement
      (click for short video)
The main caliper body *should* slide fairly freely back and forth over a short range.  This is with the piston slightly pushed back; the amount of play will be considerably less once the brakes are used a couple of times.

Dont forget the tie-up Let's not forget to recover our tie-up string...

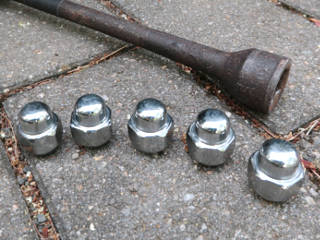
Shine up your nuts! Shine up your nuts!

[That cross-wrench is older than I am; from my late dad's workshop.  Still perfectly serviceable, though, as are many of his other tools.]


Old spark-plug socket spins lugnuts nicely I'm far less likely to have to deal with spark plugs these days, but my old 13/16 plug wrench happens to fit the lug nuts perfectly and makes a nice fast spinner setup for them.  This is super-helpful because the nut wells in the rim are so deep.

_H*   230526