The block heater goes in...

"Ken1784" over at Priuschat posted these pictures of the engine block
heater [EBH] kit. [Here's a backup
copy in case you can't see it.]
For a LONG rundown on others' experiences with these block heaters,
see the overall
Priuschat thread,
and in particular the
post
from Horacio [aka "mrbigh"] who also installed his from above and
posted his
pictures.
Most people have been buying the heaters through
Jesse at Metro Toyota,
who has been generously organizing bulk-buys
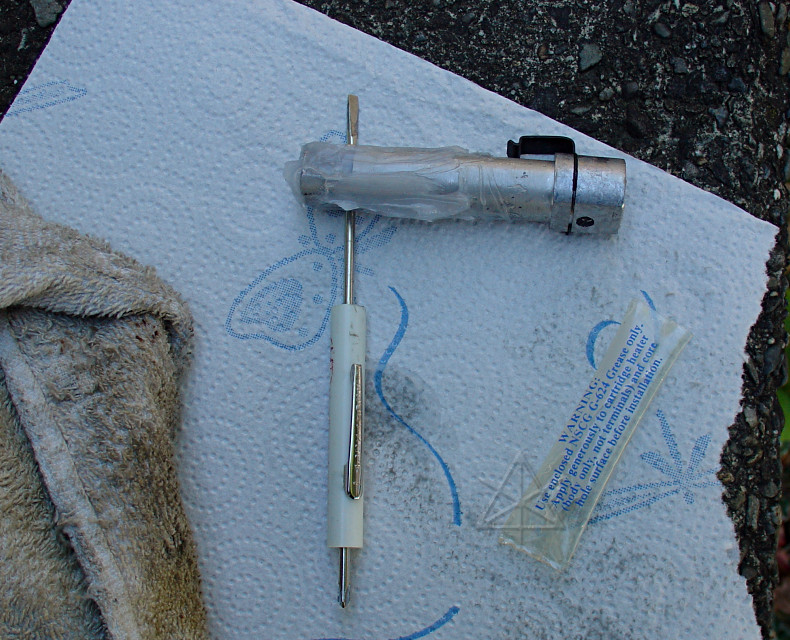
through the forum every so often. The kit comes with the heater,
power wire, thermal grease, instructions, and a few zip-ties to
dress the wire routing.
This is the heater itself, lying on top of the engine.  No, it's not very
big, but it packs a 400 watt wallop and there's no safety cutoff, which
is why it must not be plugged in without being in firm contact with the
large thermal mass of the engine around it to take the heat away.  Without
that, it might just turn bright red and burn out.  The AC plug includes a
ground pin, which grounds the car to the house electrical system -- something
to keep in mind if the heater is plugged in and you're doing other experiments
that require the car body to be electrically isolated!

If the contact pins are not oriented with respect to the spring clip as shown,
rotate the spring-clip around in its slot until it looks like this with the
flat clip closest to the ground pin.  That will let the right-angle power
connection aim toward the firewall once it's plugged in, which seems like the
safest way to bring it out.  But if you've got a different idea of how to
route your wiring, feel free to turn it some other way.
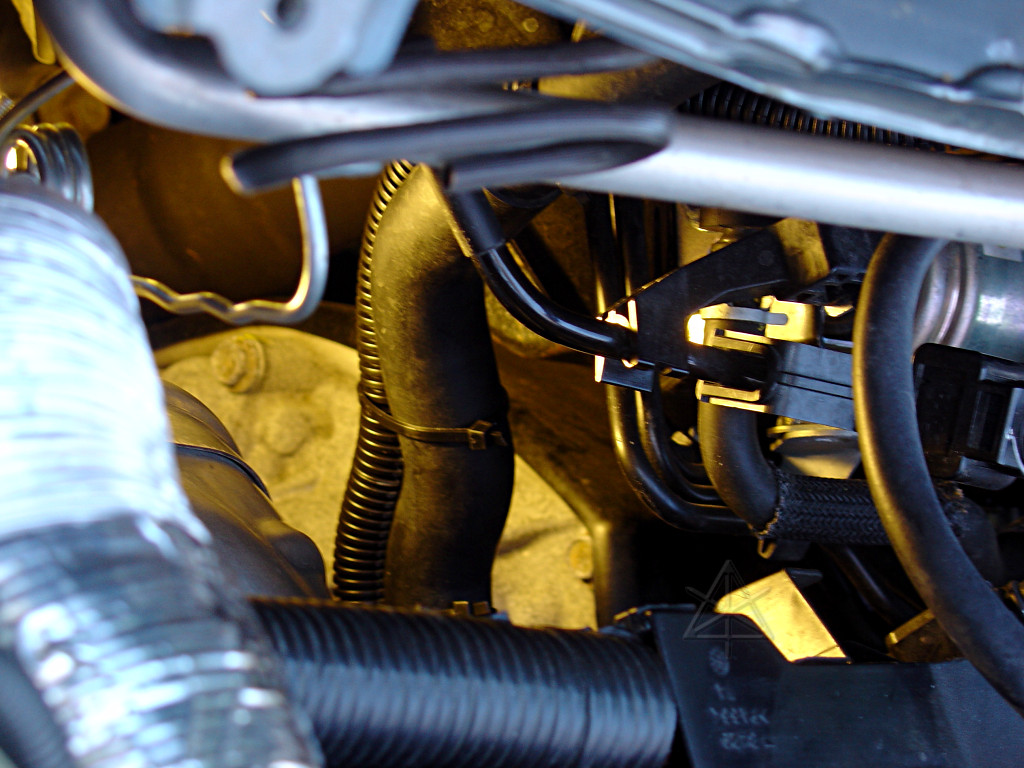
Now comes what everyone reports as the tough part.  The region of interest
is down behind the engine and transaxle, lit in the characteristic ugly yellow
glow from a compact-fluorescent lamp I clipped down near the firewall.  The
way the camera picks up that light is a feature in this case, making it
easier to distinguish which area is which, because the focus and depth of
things is much less clear without the advantage of binocular vision.  [Some
fine day they'll start making digicams with various flavors of "CF" white
balance built in, because as efficient as the bulbs are their spectrum sucks
and you don't always have time or a white surface to manually set from.]  The
black plastic fitting that the fuel line passes through is *always* in the
way including frequently screwing with the auto-focus, but two eyes can see
around it on either side.  Most of the subsequent pictures here are shown
from the same orientation, with the edge of the windshield just visible as
a white blur along the top of each and the bottom of the picture nearest
the front of the car.  [Again, ignore that silver hose on the left for now.]
If you could look straight at the left side of the car with x-ray vision,
the block-heater hole is about there.  It really is that far down, just
above where the transaxle housing bolts on.
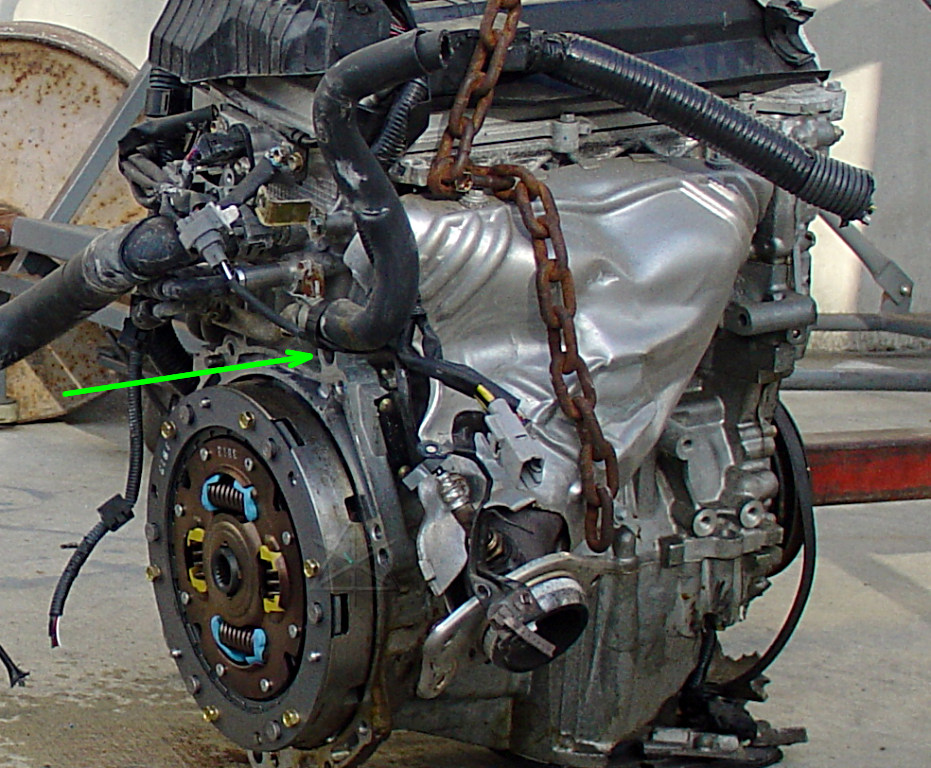
This may help: the back of the engine from a crashed '01 Prius.  The blocks
haven't changed between Classic and '04 Prius, so it's still the same here.
Look at the larger picture for the full context.  The boss that the block
heater slides into is designed in, part of the casting and machined to match,
and located so it warms the coolant near the cylinders where it can probably
circulate a little and help carry the heat around even with the engine off.
This feature exists, in fact, in *many* Toyota engine blocks -- the heater
installation instructions describe locations for eight or so vehicles, and
there are probably different heaters available for more blocks beyond that.
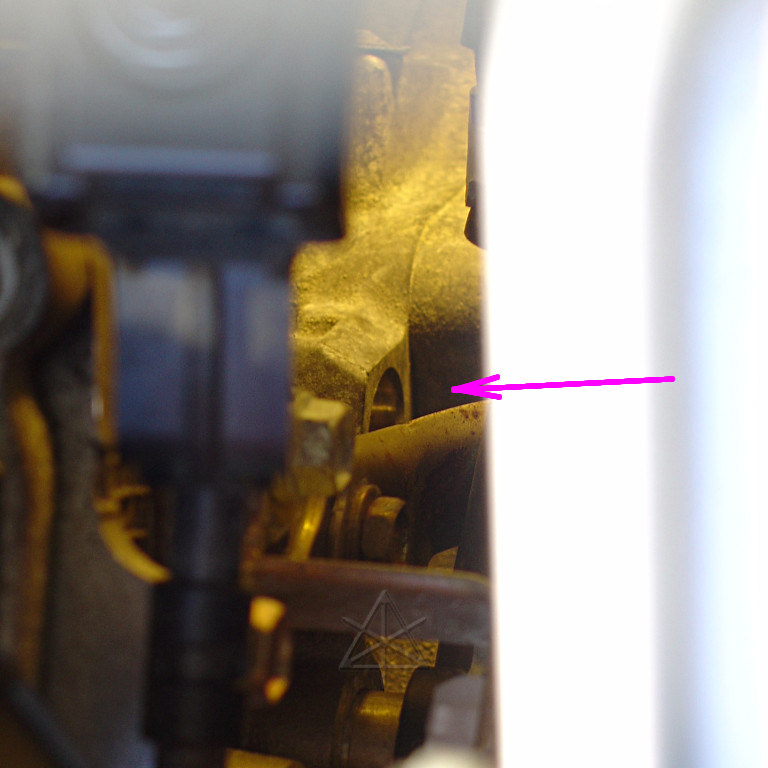
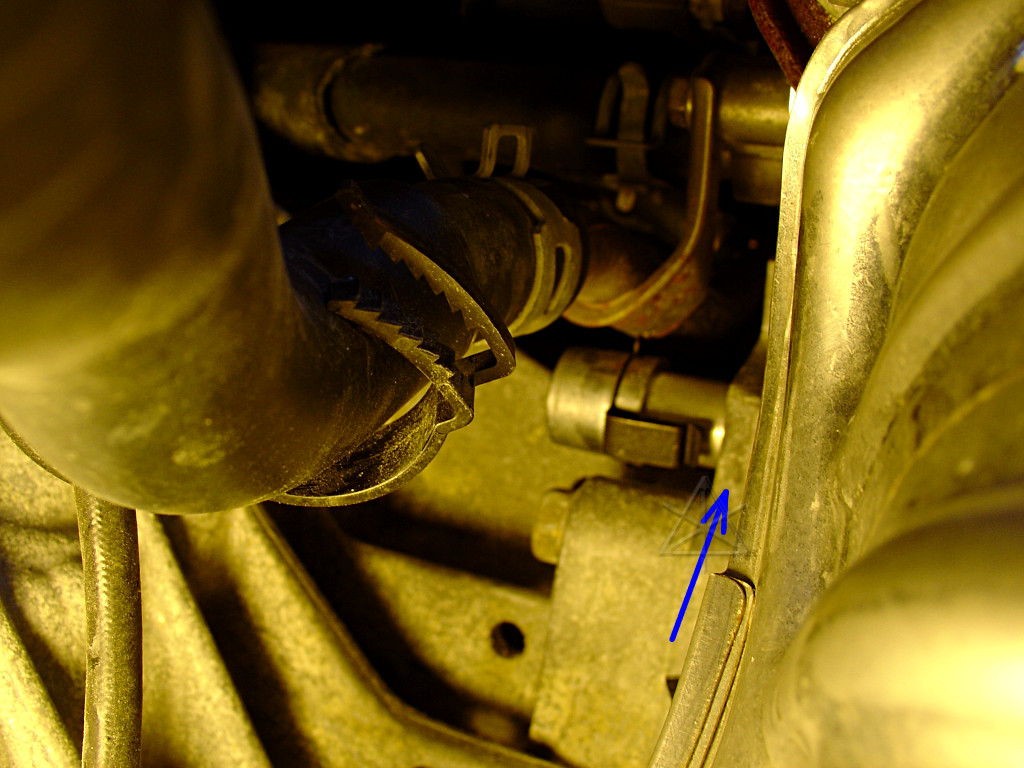
So as I cruise my gaze and my camera around overhead just in front of the
windshield edge looking down, there it is!  The elusive hole, just visible
between fuel pipe and inverter cover.  The angled face of metal right next to
it leads up to a nearby dimple, and that's what the spring-clip barb on the
heater drops into to hold it in.
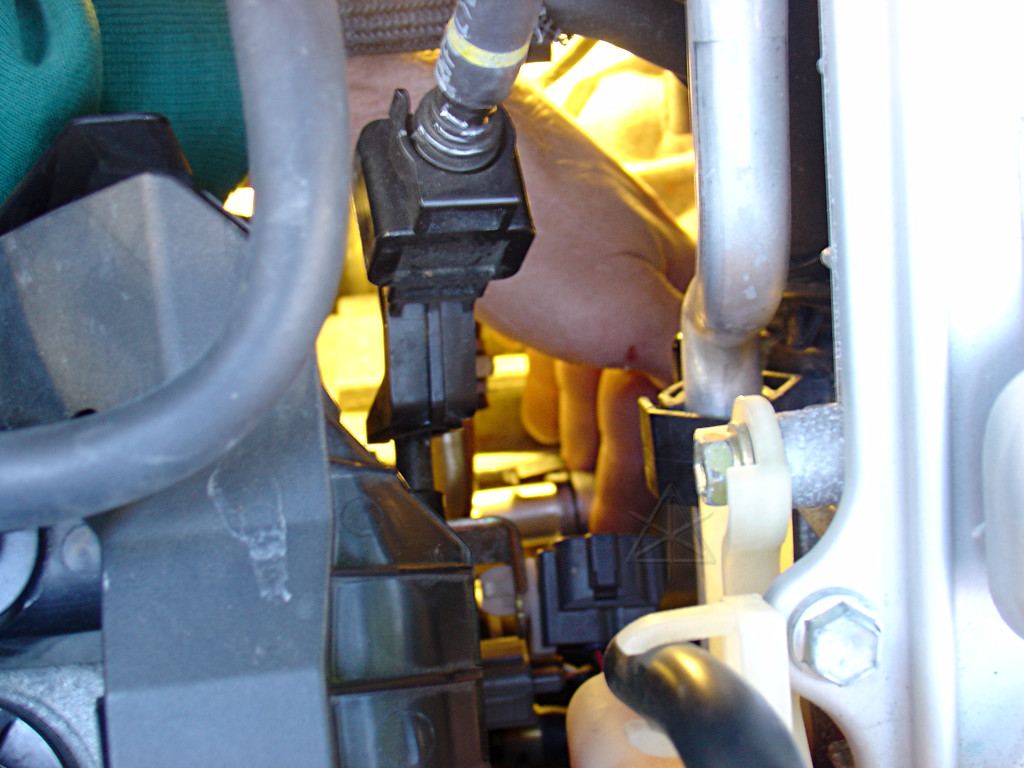
With the cowl out, the area in question is easily accessible with a left
arm wrapped over and behind the engine.  [I'm wearing a green long-sleeved
sweatshirt here.] This involves laying one's whole body across the front
radiator support, the air box, and inverter to get at a lot of this stuff,
but at least I [and the camera] could *see* what I working on and I could
reach everything.  Here I'm testing alignment and how the heater will go into
the hole.  We can explain to the neighbors later what the hell I was doing...

The grey connector obscuring the end of my first finger goes to the air/fuel
ratio sensor wire, that's clipped to the heater hose on its way to the back
of the first catalytic.  [Also visible on the crashed engine above.]
Disconnecting this and folding the wire back helps increase visibility.  The
little spot on my thumb *is* a scrape, but this is hardly the first time the
Prius has drawn blood...
There is *just* enough space between the block and the transaxle's final-drive
housing to line the heater up and start it on its way in.  Almost like it was
designed that way, huh?
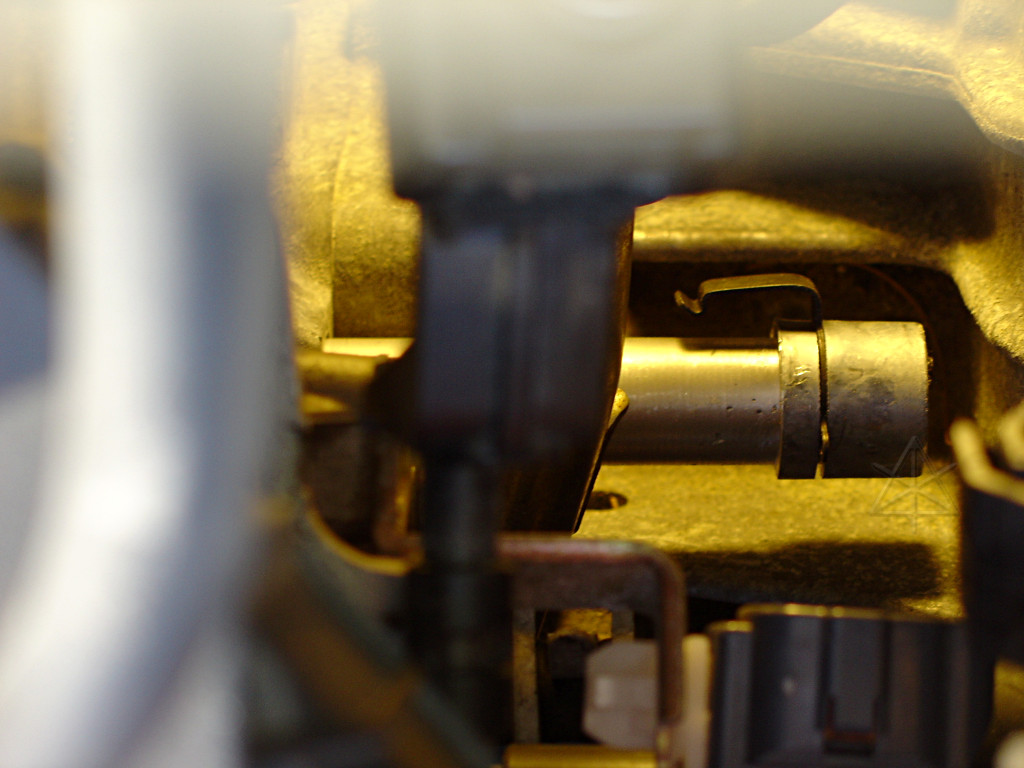
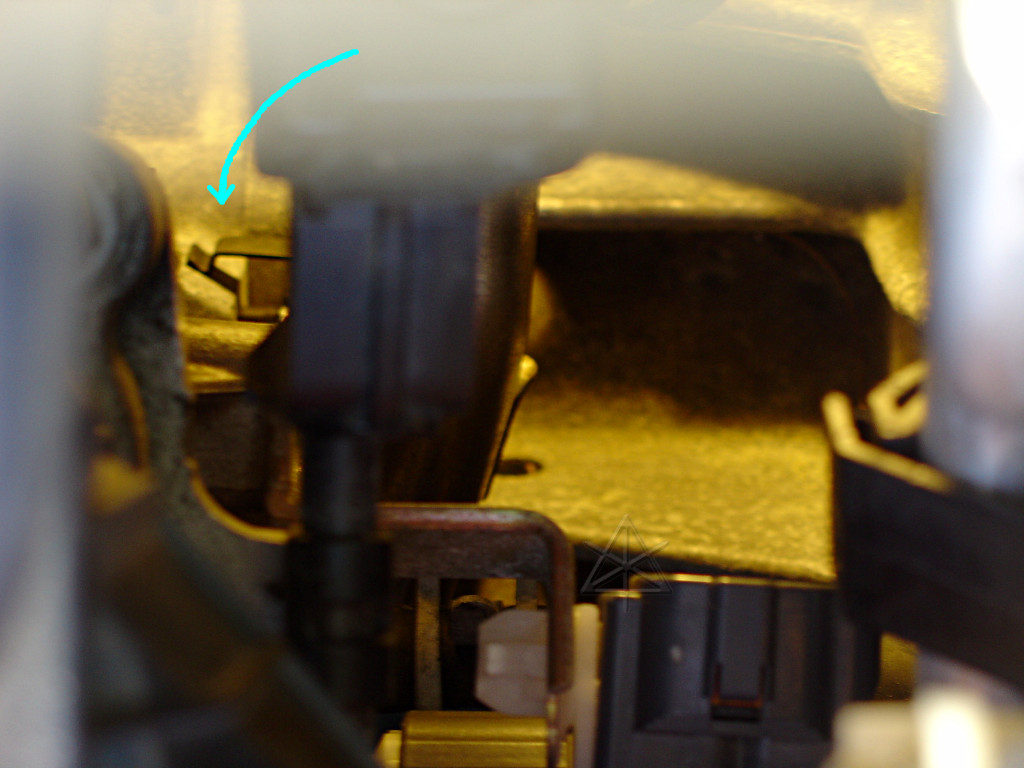
This is a blind "insert camera, guess, and fire" shot taken from behind the
engine, showing the area under the heater hose and how the clip on the
block heater lines up with the diagonal area of metal it will hook around
[blue arrow].  The bolt head right below it is one of the transaxle-to-
engine bolts.  The thing that actually wound up in best focus is the cable
clamp holding the A/F wire to the heater hose, which I've opened completely
up at this point.
Okay, at this point I know how the thing is going to go in.  Time to grease
it up and get it ready to insert for real.  Since the fit is very snug, it
doesn't take a whole lot of grease to fill the surrounding void, and I
anticipate that pushing the heater in would force a lot of grease back toward
the connector so I put most of the grease out near the end.  This is about
two thirds of what comes in the little tube.
The grease immediately forms a complete seal, essentially turning the block
heater into a little piston trying to compress the trapped air.  It helps to
go slowly and gently rotate it back and forth in an effort to break that seal
and let the air out without letting all the grease get pushed back.  Make sure
the clip is positioned properly, toward the rear of the car, as the heater
approaches full insertion -- otherwise it can jam against nearby parts and not
rotate the right way!  At the end, the clip rides up the side of the metal
boss [arrow], and ... click!  drops into the dimple.  Done.
Next thing is to bring the AC electric line in and plug the connector securely
into the block heater.  You *did* test-fit this externally beforehand, right?
On mine, I actually had to dig a little bit of mold-flashed rubber out of one
of the AC contacts to make sure it would have a clean connection.  The plug
should fit quite snugly, especially since friction is the only thing holding
it in.  Like the instructions say, seat it all the way in with no gap.

If you didn't preset the plug orientation in advance, it may be possible to
twist the heater around against the spring clip now, but it's much easier to
have planned ahead.  Just like with high-MPG driving technique.  We oughta
all be used to this.
The most obvious way to bring the electric line up out of the area is along
the heater hose, which is another part that connects from the engine to the
firewall but also absorbs vibration.  Here the plastic protective loom is
simply zip-tied to the hose as it passes up toward the cowl area.  Make sure
there's no strain on the wire or the heater's AC socket.
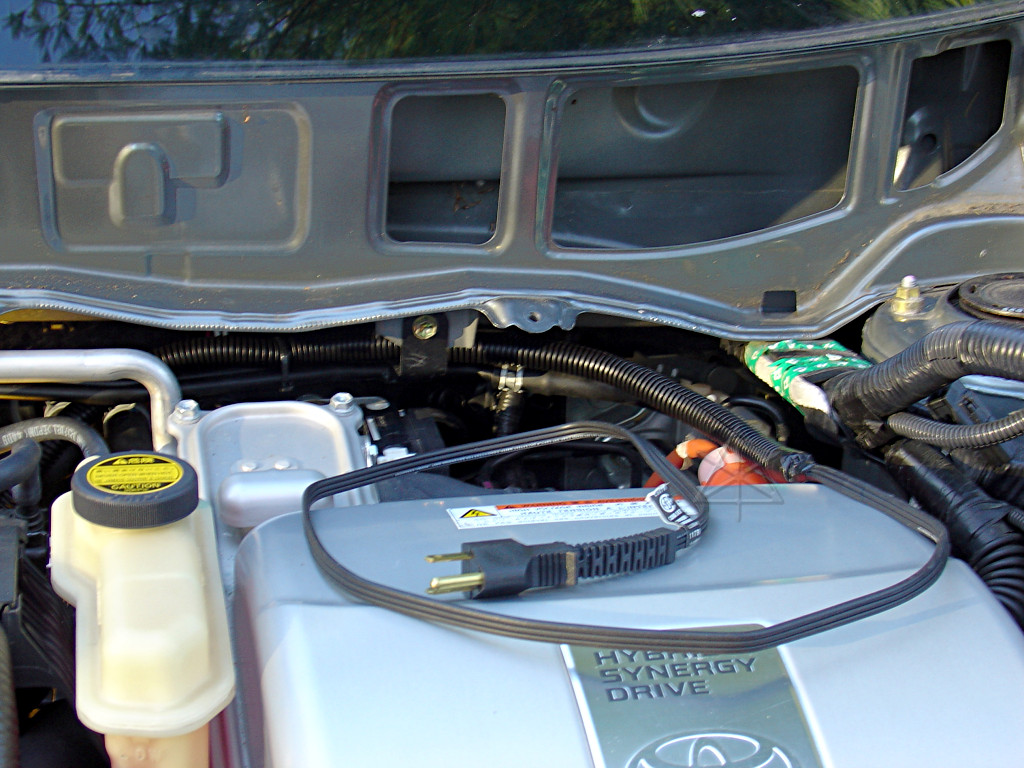
Take your choice of which way to bring the power wire out -- to the right or
left, depending on where you want the plug and/or where you might mount
your timer box, such as the way Horacio set his up.  There's plenty of stuff
to anchor the wiring to -- just make sure that once the wire hops off the
engine block, that it is tied to things that *don't* shake with the engine.
See the next page for more about relative motion.  In this case, the wire is
brought around behind the inverter, and eventually runs along with the main
harness and coils up near the driver's-side relay box.  An extension cord
can lay in next to the headlight and make a connection that stays dry when
the hood is lowered back over it.  Having the hood down helps keep the heat
in better, too.

Whee, my first plug-in hybrid conversion!  Heh...  Now, it makes sense at
this point to TEST the heater.  The boss around where the heater is in can
get rather hot, but the rest of the block starts absorbing it pretty quickly.
The heater draws about 3 amps at first, which seems to gradually drop to 2.5A
as the heater itself warms up and its resistance changes.  The block will get
up to around 40 - 45 deg C but nobody has observed much more than that; the
rate of heat transfer to ambient air seems to balance the power input at that
point.  It's designed as a gentle preheat, not something to get the block up
to full running temperature.  Two hours generally suffices for a good preheat.
Over 40 deg C is perfect, because that lets the system enter stage 2 operation
very soon after startup.  [See the "five stages" document for the full rundown
on hybrid operation modes.]

Two hours at 350 watts costs about eight cents, which at contemporary fuel
prices buys about a half-cup of gas.  Even the efficient Prius can chug down
more than that while crawling out of the neighborhood on a cold engine.  The
coolant-storage bottle does help, but not a whole lot if the car's not been
run for a couple of days.  The heater is a nice way to get a jump on not only
better efficiency, but much *cleaner* operation soon after startup.  And by
itself, it's a 100% efficient device!  To look at it another way, putting 700
watt-hours of energy into the system theoretically gains about three miles of
propulsive power, or let's say two once you take ambient-air losses into
account.  That's about nine of those little green "regen cars" in the MFD!
For drivers who tend to take short trips, that can still add up.

Normally what would happen now is reversing all the disassembly, and the block
heater job is done.  [Remember to plug that air/fuel sensor connection back
in, too.]  But in this case I've got quite a bit more work to do on the
warm-air intake, as long as I've got access to everything back here.  See
page three for this next phase, as well as some helpful hints on getting
everything back together right and the windshield wipers correctly aligned.